Showing posts with label Klub Berani Baking. Show all posts

5.29.2012

KBB #29 : Eccles Cake

eccles cake

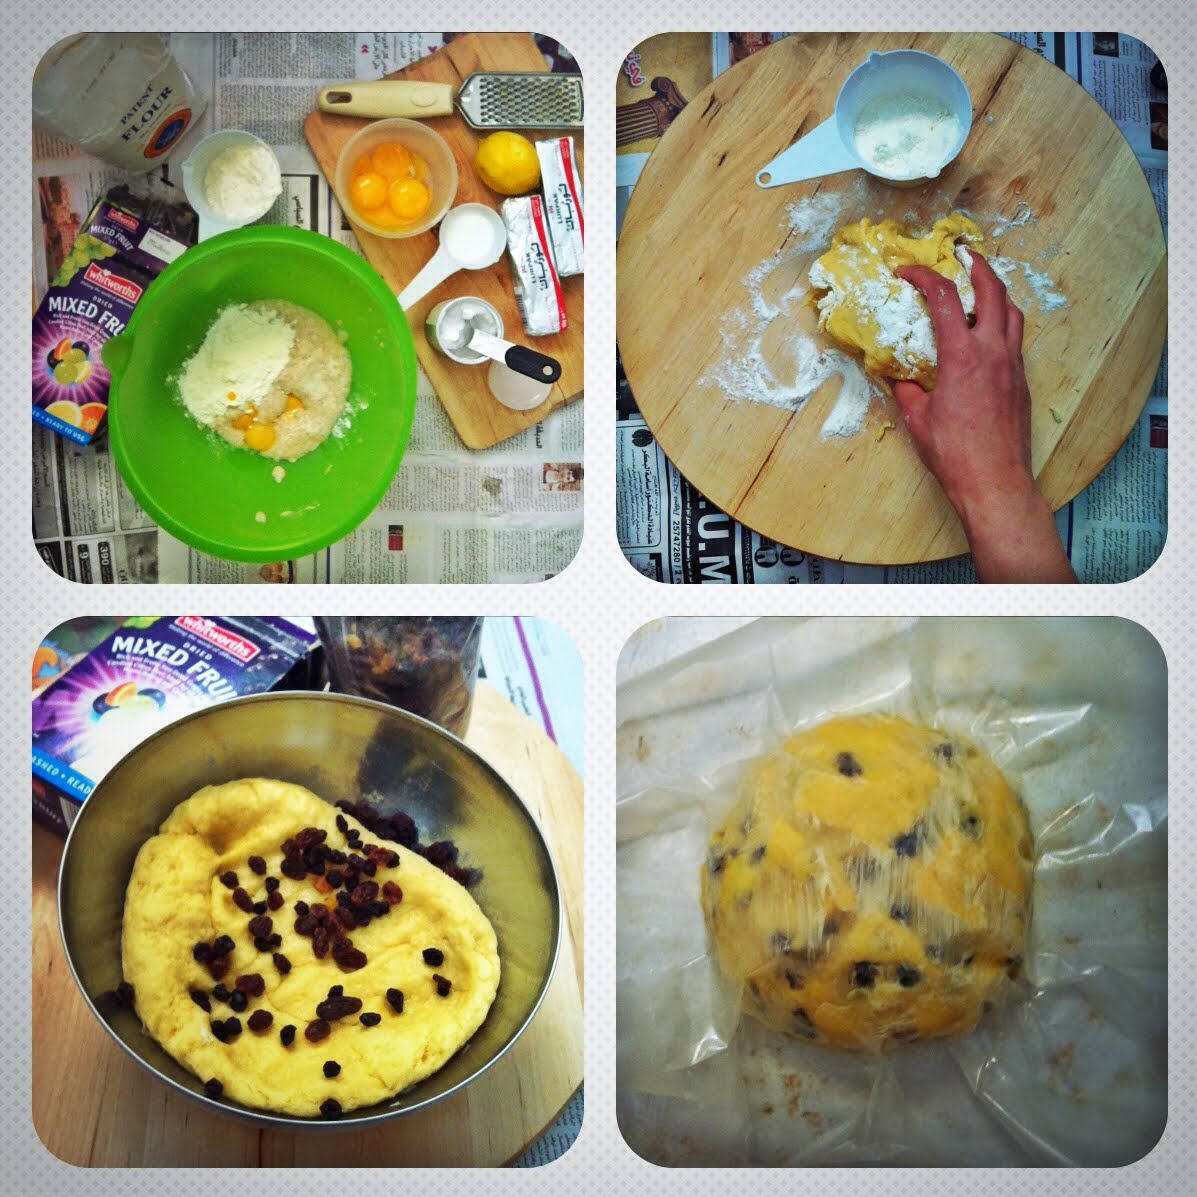
Super delish flaky puff pastry filled with juicy dried fruit. I warn you, after making this pastry, you'll have popeye muscle :D. But believe me, it's worth it. The taste won't be the same if you use ready to use puff pastry, because it less flaky. Eccles Cakes
Makes about 50 smallish cakes Filling

Ingredients :
6 tablespoons unsalted butter
1 cinnamon stick
1 teaspoon ground nutmeg
1/2 teaspoon ground cloves
Peel from 2 lemons Peel from 2 oranges
2 cups dried currants
1/2 cup golden raisins
2 tablespoons brandy (optional)
1/4 cup fresh-squeezed lemon juice

eccles5eccles6

Directions :
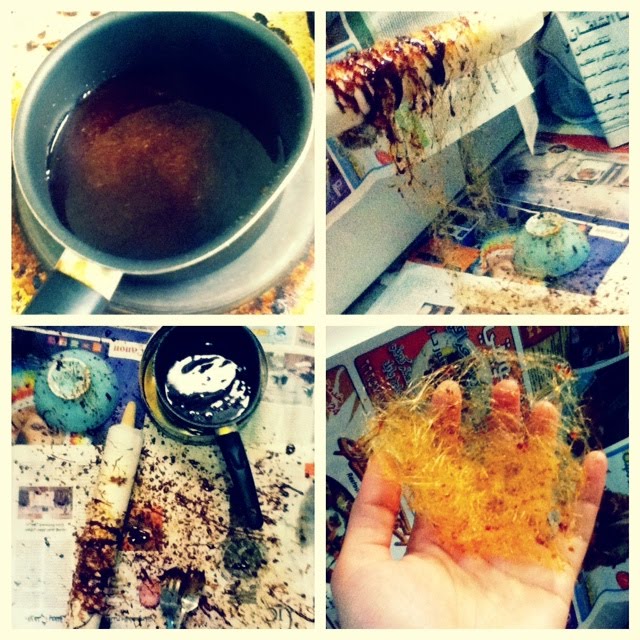
1. Melt the butter in a small saucepan over medium heat. Add the spices and peel and fry until they are fragrant in the butter. Add the fruit, brandy, and juice. Simmer for ten or fifteen minutes, stirring occasionally. Let cool, then put in the fridge overnight to let the flavors really meld.


Puff Pastry
Ingredients :
1 pound (4 sticks) unsalted butter
4 cups AP flour
1 teaspoon salt
Between 1 and 1/2 cups ice water

Directions :
1. Take three of the sticks of butter and slice them in half lengthwise and then again widthwise.

2. Arrange them into a rectangle on a large piece of wax paper. Put another piece of wax paper on top and roll them the butter out into a 9x12-inch rectangle between the sheets of waxed paper. Chill for at least four hours.

3. Put the four cups of flour into a food processor.

4. Cut up the remaining stick of butter and add it, bit by bit, to the flour and pulse into dusty crumbs.

5. Dump the butter-flour crumbs into a big bowl and add ice water gradually, stirring, just until the dough comes together. Knead for a couple minutes until smooth. Wrap and refrigerate four hours or overnight.

6. Roll the dough out into a 1/4-inch-thick rectangle and place the butter rectangle on top. Fold the corners of the dough over the butter and roll out to its previous size. Fold the sides of the dough up to the middle, like folding a piece of paper into thirds, then fold it again in half — like closing a book. You're working the butter into the dough in finer and finer layers; the butter if it stays cold will puff the pastry up in delicious and spectacular ways when you're finished. Wrap this parcel well and put back in the fridge for at least an hour or two.

7. Take the dough out and roll the parcel out into the rectangle again, then repeat the folding process. This is working the butter into the pastry in finer and finer layers. Continue this process - rolling out, then folding. These are called turns. Do at least four turns - six or more is even better. It's very simple: the longer you let the dough rest and chill between turns, and the more turns you do, the lighter and flakier your pastry will be. I did five turns over the course of about 8 hours, and mine was fine - but if I was doing some other kind of pastry I would definitely let it sit overnight at least once.

 eccles Collage


Assembly :
1. 1 egg, beaten.

2. Coarse sugar

3. Heat the oven to 375°F.

4. Line a baking sheet with parchment paper.

5. Take a third of the the puff pastry dough from the fridge. It should be very cold and firm, but not hard. Roll it out to a thickness of about 1/8-inch. Cut small circles - I used a biscuit cutter that gave me four-inch circles. You could do larger, but I wanted a lot of individual pastries.

6. Put a small dollop of filling (about 1 teaspoon) in the center of each dough circle. Fold in half, like a potsticker dumpling, and seal the edges with your fingers. Now bring the two pointy edges up and fold them in the center, on the curved seam. Flatten out the little pouch with your fingers, and roll it into a small circle - just thin enough that the filling shows through the dough a little. Try not to let it leak out, though. Make two or three shallow slashes in the top of the finished round cake. Brush with beaten egg, and sprinkle with sugar. (Note: I think that my pastry dough was pretty warm by this point, from all the handling and rolling. I didn't try this at the time, but in the future I think I would put the finished, unbaked pans of cakes in the fridge or freezer to let them chill again - maybe for an hour. This would make a higher, lighter pastry.)

7. Bake for about 20 minutes, or until golden brown and puffy. Try not to eat one immediately - the hot raisin filling will scorch your mouth - believe me, I know. These are amazingly good even a few days later.

eccles4eccles cake

3.30.2012

KBB #28 Torta Pasqualina

torta pasqualina

Torta Pasqualina is a typical Italian Easter recipe that comes from Liguria. It is a traditional tart made with a thin pastry stuffed with vegetables, ricotta cheese, Parmesan and eggs and it is traditionally prepared in the Easter day as an appetizer.

I didn't have enough time when I prepared this. Been busy the whole month. I was juggling between cupcakes orders, driving license paper works, my friend's wedding invitation and being a tour guide for my sister & brother whose visiting us this month.

It took times when you want to make this savoury cake. I better warn you, it's not easy to flatten each piece of dough into a very thin disk. Be careful not to tear it apart. But worth to try, I like the combo taste of cheese, eggs and vegetables.

Torta Pasqualina
Source: Old Time Cooking Recipes

torta pasqualinatorta pasqualina

Ingredients:

DOUGH:
600 g (1 lb 5 oz) white flour
6 Tbs olive oil
a pinch of salt

FILLING:
1 kg (2 lb) Swiss chard (silver beet) or spinach
400 g (0.9 lb) cottage cheese/ricotta cheese
100 g (3.5 oz) parmesan
10 eggs
2 teaspoons marjoram, chopped
2 teaspoons parsley, chopped
garlic, minced (optional)
olive oil
salt, pepper
Preparation:

1. DOUGH:
-Combine flour, oil, a pinch of salt and enough cold water to make a medium soft dough.
-Knead well for 10 minutes or until the dough becomes elastic. -Divide the dough into 14 balls.
-Cover with cloth and let stand for about 1 hour.

2. FILLING:
-Clean, wash and dry the Swiss chard.
-Place in a saucepan with little boiling water and cook at high heat until wilted.
-Cool, then squeeze out excess liquid and chop finely.
-Add 50 g (1.7 oz) parmesan cheese, marjoram, parsley, garlic and 2 eggs. Season with salt and pepper.

3. Oil a round shallow oven dish, 9 inches (22 cm) in diameter.

4. Flatten each piece of dough, one at a time, making each a very thin disk, larger than the baking pan you are going to use.

5. Lay the pastry on the oven dish, allowing it to flow over the edges. Oil it lightly.

6. Place another disk over it and repeat until you have used 7 disks.

7. Spread the Swiss chard stuffing over the dough, and then spread the cottage cheese over the greens level with a knife.

8. Make 8 small cavities. Pour a raw egg into each cavity and sprinkle each with salt, pepper and remaining parmesan cheese.

Happy weekend kuwait! I'm baking torta pasqualina for breakfast #ditutbaking

9. Cover the whole lot with the same number of pastry sheets, each brushed with oil.

10. Pinch the borders and trim the excess dough, prick the top of the pie in a few places and then brush with oil.

11. Bake for 1 hour in 190 C (375 F) oven. Allow to rest before removing from the cake tin

torta pasqualina

1.03.2012

KBB #27 Fortune Cookies

fortune cookies

Making fortune cookies by myself? Oh My...I did it! It wasn't that hard as I imagined :). Just need to practice how to fold the cookies,not perfect yet.

Fortune Cookie
Source: about.com

fortune cookies

Fortune cookies can be tricky to make - it's important to make sure that the cookie batter is spread out evenly on the baking sheet. Instead of using the back of a wooden spoon to spread the batter, it's better to gently tilt the baking sheet back and forth as needed. Wearing cotton gloves makes it easier to handle and shape the hot cookies. This fortune cookie recipe makes about 24 cookies.

Ingredients:

2 large egg whites
1/2 teaspoon pure vanilla extract
1/2 teaspoon pure almond extract
3 tablespoons vegetable oil
8 tablespoons all-purpose flour
1 1/2 teaspoons cornstarch
1/4 teaspoon salt
8 tablespoons granulated sugar (dita-I used only 6 tbsp)
3 teaspoons water

Preparation:

fortune cookiesfortune cookies

1. Write fortunes on pieces of paper that are 3 1/2 inches long and 1/2 inch wide. Preheat oven to 300 degrees Fahrenheit. Grease 2 9-X-13 inch baking sheets.

2. In a medium bowl, lightly beat the egg white, vanilla extract, almond extract and vegetable oil until frothy, but not stiff.

3. Sift the flour, cornstarch, salt and sugar into a separate bowl. Stir the water into the flour mixture.

fortune cookies

4. Add the flour into the egg white mixture and stir until you have a smooth batter. The batter should not be runny, but should drop easily off a wooden spoon.
Note: if you want to dye the fortune cookies, add the food coloring at this point, stirring it into the batter. For example, I used 1/2 teaspoon green food coloring to make green fortune cookies.

5. Place level tablespoons of batter onto the cookie sheet, spacing them at least 3 inches apart. Gently tilt the baking sheet back and forth and from side to side so that each tablespoon of batter forms into a circle 4 inches in diameter.

6. Bake until the outer 1/2-inch of each cookie turns golden brown and they are easy to remove from the baking sheet with a spatula (14 - 15 minutes).

fortune cookies

7. Working quickly, remove the cookie with a spatula and flip it over in your hand. Place a fortune in the middle of a cookie. To form the fortune cookie shape, fold the cookie in half, then gently pull the edges downward over the rim of a glass, wooden spoon or the edge of a muffin tin. Place the finished cookie in the cup of the muffin tin so that it keeps its shape. Continue with the rest of the cookies

fortune cookiesfortune cookies

12.17.2011

Mini Panettone

I heart this cake bread. Smells like heaven. Read the ingredients and you'll know what I mean.

mini panettone

This is my second time around making panettone. (First attempt here). But this time I make it small, so my kids could easily eat it. Recommended recipe if you try to find a simple panettone recipe. Definitely gonna be my favorite recipe.

Panettone (traditional Italian christmas bread)
Source: The Worldwide Gourmet

Ingredients :
- 1 1/2 cakes of fresh baker's yeast (dita-you can use 1 package of instant yeast=11gr)
- 65 ml (1/4 cup) sugar
- 6 tbsp. warm water
- 6 egg yolks
- Finely grated zest of 1 lemon
- A pinch of salt
- 500-750 ml (2-3 cups) flour
- 100 ml (6 tbsp.) diced candied peel
- 100 g (6 tbsp.) + 2 tbsp.butter
- 4 tbsp. sultanas
- 4 tbsp. currants
- 1 tsp. vanilla

Method :
1. Sprinkle 1 tbsp. granulated sugar and the yeast over the warm milk and let sit 3 minutes; mix and let rest in a warm draft-free place (e.g., a warm oven that has been turned off) until the mixture has doubled in volume, approximately 5 minutes;
2. pour the mixture into a bowl, add in the egg yolks, vanilla, lemon zest, salt and remaining sugar;
3. gradually mix in 500 ml (2 c.) of the flour by hand until a smooth consistency is attained - the dough should easily come together into a ball;
4. gradually add the butter cut into small dice and beat until the dough becomes smoother and more elastic;
5. add 125 to 250 ml (1/2 to 1 c.) more flour until the dough is firm and silky but not sticky;
6. place the ball onto a lightly floured surface. Knead the dough for approximately 10 minutes. When the dough is smooth and shiny, place into a buttered bowl; dust lightly with flour, cover with a kitchen towel and place in a warm draft-free place for about 45 minutes until doubled in volume;
7. punch down the dough firmly with your fist and flatten it out in the bowl; add the candied lemon peel, raisins and currants and knead until well distributed but without working the dough more than necessary;
8. line a large bread pan with brown paper that has been well buttered on both sides; place the dough in the pan and trace a cross on top;
9. cover with buttered paper and let rise again in a warm place for 15 minutes;
10. remove the paper from the top; brush the top with softened butter;

mini panettonemini panettone

11.preheat the oven to 200°C (400° F);
12. place the bread pan on the middle rack of the oven and bake for 10 minutes;
reduce the oven temperature to 160° C (350° F) and continue baking for another 30 to 40 minutes, brushing again with melted butter; the bread is done when the surface is golden and crispy;
13. remove from the oven; remove the paper and let cool for 15 minutes before unmolding.

mini panettone

11.09.2011

KBB #26 : Panettone


Waktu terima surat cinta, penasaran banget bacanya. Apa sih panettone? Terus terang belum pernah denger. Kalo gak ikutan KBB, saya gak tau kali, makanan jenis apa pula ini. Ternyata sejenis roti-rotian, tepatnya roti dari Italia. Biasanya roti jenis ini keluar pada saat menjelang natal. Mumpung udara belum terlalu dingin, mending garap rotinya sekarang-sekarang, daripada nanti susah ngembang.

Kata orang bikinnya ribet dan lama. Tapi saya enjoy kok ngerjainnya dan gak berasa ribet. Terbayar dengan rasanya yang enak banget :).

Saya puas banget dengan hasilnya. Enaakkkkkkkkkk!!!! :D. Rasanya itu campuran antara roti dan cake dengan hint wangi lemon, vanilla, susu dan roti. Pokoknya wangi banget deh. nikmat banget buat temen ngopi. Sepertinya ini bakal jadi resep favorit saya.

Panettone (traditional Italian christmas bread)
Source: The Worldwide Gourmet


Ingredients
- 1 1/2 cakes of fresh baker's yeast
- 65 ml (1/4 cup) sugar
- 6 tbsp. warm water
- 6 egg yolks
- Finely grated zest of 1 lemon
- A pinch of salt
- 500-750 ml (2-3 cups) flour
- 100 ml (6 tbsp.) diced candied peel
- 100 g (6 tbsp.) + 2 tbsp.butter
- 4 tbsp. sultanas
- 4 tbsp. currants
- 1 tsp. vanilla

Method :
1. Sprinkle 1 tbsp. granulated sugar and the yeast over the warm milk and let sit 3 minutes; mix and let rest in a warm draft-free place (e.g., a warm oven that has been turned off) until the mixture has doubled in volume, approximately 5 minutes;
2. pour the mixture into a bowl, add in the egg yolks, vanilla, lemon zest, salt and remaining sugar;
3. gradually mix in 500 ml (2 c.) of the flour by hand until a smooth consistency is attained - the dough should easily come together into a ball;
4. gradually add the butter cut into small dice and beat until the dough becomes smoother and more elastic;
5. add 125 to 250 ml (1/2 to 1 c.) more flour until the dough is firm and silky but not sticky;
6. place the ball onto a lightly floured surface. Knead the dough for approximately 10 minutes. When the dough is smooth and shiny, place into a buttered bowl; dust lightly with flour, cover with a kitchen towel and place in a warm draft-free place for about 45 minutes until doubled in volume;
7. punch down the dough firmly with your fist and flatten it out in the bowl; add the candied lemon peel, raisins and currants and knead until well distributed but without working the dough more than necessary;
8. line a large bread pan with brown paper that has been well buttered on both sides; place the dough in the pan and trace a cross on top;
9. cover with buttered paper and let rise again in a warm place for 15 minutes;
10. remove the paper from the top; brush the top with softened butter;


11.preheat the oven to 200°C (400° F);
12. place the bread pan on the middle rack of the oven and bake for 10 minutes;
reduce the oven temperature to 160° C (350° F) and continue baking for another 30 to 40 minutes, brushing again with melted butter; the bread is done when the surface is golden and crispy;
13. remove from the oven; remove the paper and let cool for 15 minutes before unmolding.


9.30.2011

KBB #25 : Pear Scones

Happy 4th birthday KBB. Gak berasa udah hampir 4 tahun join dengan klub baking ini. Banyak banget belajar dan dapet ilmu berguna dari tema-teman yang hebat-hebat. Bukan cuman belajar baking, kita juga sempet belajar foto bareng-bareng. Semoga pertemanan ini terus terjalin ya. Love you all.

Dan untuk edisi ulang tahun ini, saya memilih untuk membuat scones dengan based buah-buahan. Karena di rumah lagi banyak pear, ini karena salah beli pear, anak-anak gak terlalu suka dengan pear jenis ini, agak sepat rasanya...hihihi jadi daripada mubazir mending dibikin scones sekalian.


Pear Scones (the original recipe is Apple Scones, I changed the apples with pears)
source : joy of baking


Ingredients :
2 cups (280 grams) all purpose flour
1/3 cup (65 grams) granulated white sugar
1 1/2 teaspoons baking powder
1/4 teaspoon salt
1/2 cup (113 grams) (1 stick) unsalted butter, cold and cut into pieces
1 large egg
1/2 cup (120 ml) milk
1 teaspoon pure vanilla extract

Filling:
1 pound (454 grams) Granny Smith Apples, peeled, cored, and cut into 1 inch (2.5 cm) chunks
2 tablespoons (30 grams) granulated white sugar
1/4 teaspoon ground cinnamon

Directions :
Apple Scone Cake: Preheat oven to 350 degrees F (177 degrees C) and place rack in center of oven. Butter (or spray with a non stick vegetable spray) a 9 inch (23 cm) glass pie plate.

In a large bowl, whisk together the flour, sugar, baking powder, and salt. Cut the butter into small pieces and blend into the flour mixture with a pastry blender or two knives. The mixture should look like coarse crumbs. In a separate small bowl whisk together the egg, milk, and vanilla extract and add to the flour mixture, stirring just until the dough comes together. Do not over mix.


Transfer to a lightly floured surface and knead dough gently four or five times and then divide the dough in half. Roll or pat one half of the dough into a 9 inch (23 cm) circle and transfer to the pie plate and pat onto the bottom and up the sides of the pie plate.

In a separate bowl toss together the cut apples, sugar, cinnamon, and nuts. Spread the apples evenly over the bottom of the dough in the pie plate.

Roll the remaining dough into a 9 inch (23 cm) circle, on a lightly floured surface, and gently place the dough over the apples. With your fingers seal the edges of the top and bottom crusts. Brush the top of the dough with a little milk and sprinkle with white sugar. Cut a slit in the center of the dough to allow the steam to escape.


Bake in the preheated oven for about 35 - 45 minutes or until the pastry is nicely browned and a toothpick inserted into the center of the cake comes out clean.

Cool on a wire rack. Serve warm with a dollop of whipped cream or ice cream.

Serves 6 to 8.


5.08.2011

KBB #23 : Cheesy Fun : Lemon Cheesecake


Maafkaaannnnnnnnnnn saya telat publish, karena foto sempet nyempil entah di mana, bikin pusing nyari-nyarinya. Waktu baru pertama kali baca resepnya...alamak jantung mo copot, secara bahan-bahannya ya bow, mehitawati semua. Mascarpone dan ricotta-nya itu loh. Tapi ya dibela-belain juga, karena feeling saya, ngeliat dari komposisi bahan-bahannya, cheesecake ini bakal enak banget.

(KBB) Lemon Cheesecake

Selama proses pembuatan gak ada masalah sama sekali. Waktu liat cheesecake mulai kuning keemasan di dalam oven, rasanya seneng banget dan udah kebayang ntar bakal didandanin kayak apa buat foto-foto. Di pertengahan proses pemanggangan, bagian atas loyag saya tutup dengan aluminium foil supaya matangnya merata dan bagian atas tidak cepat gosong.

Tapi hikssss terjadi kecelakaan...lah kok ya bisa lupa matiin oven pas ninggalin cheesecake ini. Baru inget pas udah mo pulang groceries shopping, kok perasaan belum matiin oven....hiyaaaaa....lemes banget rasanya. Kebayang itu mascarpone dan ricotta mahal kebuang percuma. Selama perjalanan pulang mo nangis rasanya.

Begitu sampe rumah langsung lari ke dapur. Dan bener aja kan, belum matiin oven *nangis kejer*. Buru-buru ngeluarin cheesecake dari oven dan buka lapisan aluminium foilnya....ternyata oh ternyata...phuuiiihhhhhh..... gak item-item amat dan gak gosong-gosong amat. Pertama ketolong sama tutup alu foil, kedua karena saya set di api kecil. Padahal ditinggal selama 1 jam bow!!! Alhamdulillah gak kebuang. Dan ternyata bener banget kan, cheesecake ini enak banget. Beda rasanya dari cheesecake yang pake cheese cream. Harga emang gak bohong :D

Owiyah terjadi kesalahan juga dalam pengerjaan lapisan kacang. Karena gak teliti baca resep, kacang tidak saya spread di sekeliling loyang tapi hanya di dasar loyang aja.

Lemon Cheesecake
Sumber: Successful Baking

kbb lemon cheesecake

Bahan-bahan :
Untuk 8-10 porsi
¼ cup port ----- (*sejenis wine - bisa diganti)
¼ cup orange juice
75g sultanas
150g mascarpone
400g ricotta
125g gula kastor
2 btr telur, pisahkan kuning dan putihnya
3 buah lemon, parut kulitnya
60g tepung terigu
80g manisan apricot, iris tipis

Crust:
30g mentega tawar
185g kacang2an, haluskan
8 sdt gula kastor
4 sdt dark brown sugar
½ sdt bubuk kayu manis
¼ sdt bubuk mixed spice

Panaskan oven 170C. Siapkan loyang ukuran 23cm, olesi dasar dan sisi2 loyang dengan mentega leleh. Alasi dasar loyang dengan baking paper, lalu olesi mentega leleh.

Panasi port, orange juice, dan sultanas di dalam panci selama 5 menit. Angkat dari api, tutup dan biarkan selama 15 menit.

Crust: panaskan mentega hingga leleh, masukkan kacang2an, semua gula dan rempah-rempah; aduk rata. Letakkan di dasar dan sisi loyang, tekan-tekan supaya padat dan melekat.

(KBB) Lemon cheesecake

Kocok mascarpone dan ricotta hingga lembut, lalu masukkan gula, kuning telur dan parutan kulit jeruk, lalu masukkan tepung, aduk hingga rata dan lembut. Masukkan campuran sultanas-port-orange juice dan apricots.

kbb lemon cheesecake

Kocok putih telur di dalam mangkuk yang bersih dan bebas lemak hingga soft peaks. Masukkan putih telur kocok ke dalam campuran keju. Tuang ke dalam loyang, ratakan permukaannya.

kbb lemon cheesecake

Letakkan loyang ke atas loyang oven/loyang biscuit (oven tray/baking tray), panggang selama 1 jam, atau hingga permukaan cheesecake set tengah2nya dan berwarna emas kecoklatan di sekelilingnya. Matikan oven. Biarkan cheesecake di dalam oven dengan pintu dibuka sedikit selama 50-60 menit.

Keluarkan cheesecake dari oven. Gunakan pisau tumpul secara perlahan ke sekeliling cheesecake, lalu biarkan hingga betul2 dingin. Keluarkan cheesecake dari loyang dan dinginkan dalam kulkas selama 2 jam sebelum disajikan.

Tips: olesi mentega leleh ke sekeliling loyang agak tebal sehingga crust kacang akan terbalut secara merata.


(KBB) Lemon Cheesecake

3.20.2011

KBB #22 : Pennylane Brownies & Spun Sugar


Woa woa woa apa ini? Apa ini? Begitu buka surat cinta Klub Berani Baking langsung stress. Apa pula ini spun sugar? Tantangan kali ini memang memadukan resep made in Indonesia dengan dekorasi spun sugar. Resep Indonesianya sih gancil, nah ini spun sugarnya? Alhasil setelah 2 minggu berlalu baru bisa ngerjain. Karena ngerjain spun sugar butuh fokus, konsentrasi dan gak keburu-buru. Sementara di awal-awal minggu bulan Maret ini lagi ada aja masalah yang agak ribet. Makanya ijin sama host ngerjainnya nanti kalo udah tenang. Dan yang pasti harus dikerjain pas weekend, saat papin libur dan bisa jagain anak-anak. Kalo anak-anak gak ada yang jaga, wahhh bisa bubrah semua deh.

(KBB) Spun Sugar

Begitu semua udah tenang dan situasi dan kondisi udah mendukung, mulailah saya ngerjain tugas. Resep pertama yang saya coba adalah resep KBB yang medium use.

Gagal!!!!! terlalu moist dan akhirnya gak menghasilkan benang-benang halus. Udah dapur berantakan. Gula di mana-mana, tangan pake kecipratan gula cair panas pulak *ouch*.


Setelah gagal itu, saya browsing-browsing cari penyebabnya. Ternyata bikin spun segar ini gak boleh udara panas dan lembab. Sangat disarankan untuk kerja di tempat dingin. Terus ada juga source yang bilang, gula itu sifatnya sudah lembab, karena mangandung air, jadi sebenernya gak perlu pake banyak air waktu mau bikin karamel.

Penasaran, saya ngobrol juga sama chef Adith, temen twitter yang bermukim di Singapura. Ia menyarankan untuk mencoba membuat spun sugar dengan dry caramel. Gak pake air sama sekali. Kalopun pake air, palingan cuman 2 sendok makan aja.


Yukk mareee coba lagi. Tutup-tutupin dapur lagi dengan kertas koran, siap tempur lagi, siap messy lagi dengan kepretan-kepretan gula.


Owiyah, karena saya gak rela mengorbankan whisker saya untuk dipotong, maka saya pake garpu aja. Wuiiiii....seneng banget liat benang-benang halus waktu garpu dikepretin *ini bahasa Indonesia yang proper apa yak?* Ahuiii...jingkrak-jingkrak deh. Aman! Akhirnya selesai sudah tugas PR kali ini. Cake-nya pake Pennylane Brownies (reepnya di sini) terus didekor pake spun sugar.


Hasil spun sugarnya memang lebih coklat dan lebih kokoh dibandingkan dengan spun sugar resep KBB. Dengan menggunakan dry caramel, spun sugar saya bisa bertahan sampai 8 jam (mungkin tergantung cuaca juga ya, kebetulan saya berada di ruang ber AC dengan kelembaban udara yang rendah).

(KBB) Spun Sugar

Nah, terus ini temen-temen KBB pada ngobrolin Croquembouche. Aduuuhhh tergoda pengen bikin. Ya sut, bikin deh kue sus-nya pake resep mbak Fatmah. Diisi filling green tea pastry cream...yummm enak banget!!

(KBB) Croquembouche

Kali ini saya bikin spun sugarnya gak pake garpu dan whisker yang dipotong, tapi pake bantuan sumpit, ternyata bisa juga. Videonya di sini dan di sini.

Resep Spun Sugar dari KBB
Spun Sugar (Angel’s Hair)
Sumber: Dessert Techniques by Le Cordon Bleu Cooking Schools

Alat: Pakailah whisk yang sudah tidak dipakai tetapi masih bagus (tidak karatan), lalu pakai wire cutter, potonglah jari-jari whisk di ujung (yang melengkung), sehingga whisk anda akan ‘gundul’. Gunakan whisk ini untuk membuat spun sugar.

Sugar Syrup

Silakan pilih:
Medium use 1 ¼ cups sugar to 1 cup water.
Heavy use 1 ¼ cups sugar to ⅞ cup water.

Step :

1. Heat the sugar syrup to 311 F then plunge into a pan of cold water to halt the cooking process.
2. Cover your work surface with parchment paper. Holding a rolling pin in one hand over the paper, dip the whisk into the sugar syrup and flick it back and forth over the rolling pin so that railing threads are formed.
3. Gently gather up the strands and fold them back over the rolling pin. Loosen and lift them or slide them off the pin gently.
4. Break the sugar in half and gently shape each half as desired in your hands.

Resep kue Sus
sumber : NCC

Adonan Dasar Kulit Sus

Bahan:
200 ml air
125 gr Margarine
1 sdm gula pasir
150 gr tepung terigu
4 btr telur

Cara membuatnya:

1. Masak air, mentega dan gula hingga mendidih.
2. Masukkan tepung terigu, aduk cepat hingga kalis, angkat, dinginkan.
3. Masukkan telur satu persatu sambil dikocok hingga rata.
4. Masukkan adonan kedalam plastic segitiga, semprotkan diatas loyang yang sudah dioles mentega dan ditabur tepung.

(KBB) Croquembouche

Resep Pastry Cream-nya dari Joy of Baking, tapi saya bikin rasa green tea. Terus setelah cream matang, saya campur dengan whipped cream.

Ihhhh seneng banget deh udah bisa bikin spun sugar *norak*. Bukan KBB namanya kalo tantangannya gak bikin orang jadi pinter.

1.08.2011

KBB #21 : Creme Brulee


Creme Brulee? Siapa yang gak suka. Manis dan creamy, cucok banget buat makanan pencuci mulut. Apalagi kalo ditambah buah-buahan jenis berry-berry-an atau rhubarb. Manis,creamy, asem dan lembut membelai lidah.


(KBB #21) : Creme Brulee

Karena gak punya blow torch dan akhirnya memang mengurungkan niat untuk beli blow torch, jadinya efek gosongnya pake grill oven aja. Dan karena dulu pengalaman di grill sebentar aja gosong, akhirnya kali ini saya nungguin sampe didapet kegosongan yang pas *apa sih?:D*

Creme Brulee
gosong tapi tetep enak ;)

Buat saya, creme brulee yang enak itu emang musti pake double cream. Kalo diganti susu atau whipping cream hasilnya jauh dari creamy.

Creme Brulee
Source: Jamie Oliver: The Naked Chef 2

Serves 6

300g fresh rhubarb (dita-saya ganti strawberries)
3 Tbs caster sugar
2 vanilla pods (krn keabisan stock vanilla pod, saya pake vanilla essence)
300ml double cream
200ml full fat milk
8 egg yolks
80g sugar

Preheat the oven to 140C/275F/Gas 1. Roughly slice up the rhubarb and place it in a pan with the caster sugar and 5 tablespoons of water. Simmer until tender, divide between 6 small serving dishes which your brulee will be cooked in, then set aside.

Score the vanilla pods lengthwise and run the knife up the pod to remove the vanilla seeds. Scrape these into the pan with the pods, cream and milk and slowly bring to the boil.
Meanwhile beat together the yolks and the sugar in a bowl until light and fluffy. When the cream and milk are just boiling, remove the vanilla pods and add little by little to the egg mixture, whisking continuously. I like to remove any bubbles or froth from the mixture before dividing it into the serving dishes, on top of the rhubarb.
Stand these in an appropriately sized roasting tray filled with water half way up the containers, and bake in the pre-heated oven for around 25 minutes until the custard mixture has set but is still slightly wobbly in the centre.

Allow to cool to room temperature then place in the fridge until ready to serve. Sprinkle with sugar and caramelize under a very hot grill or using a kitchen blowtorch. Lovely.

(KBB #21) : Creme Brulee

PS : maaf foto step by stepnya yang saya ambil pake iPhone rusak file-nya jadi gak layak diupload.