Showing posts with label Cake. Show all posts

3.07.2014

Lemon-Blueberry Cake with White Chocolate Cream Cheese Frosting


Lemon Blueberry Pecan Cake with White Chocolate Cream Cheese Frosting


Ingredients
  • 3-1/3 cups cake flour
  • 1/2 tsp salt
  • 1/2 tsp baking powder
  • 1/2 tsp baking soda
  • 3/4 cup (1-1/2 sticks) unsalted butter, room temperature
  • 2 cups sugar
  • 1/3 cup fresh lemon juice
  • 1 tsp grated lemon zest
  • 4 large eggs
  • 1 cup + 2 Tbsp buttermilk
  • 2-1/2 cups fresh blueberries
Instructions
  1. Preheat oven to 350ºF. Butter and flour two 9-inch cake pans. Line bottoms with rounds of parchment paper.
  2. Whisk together flour, salt, baking powder and baking soda in a bowl.
  3. Using electric mixer, beat butter in large bowl until fluffy. Gradually add sugar, beating until blended, scraping down sides of bowl. Beat in lemon juice, zest, then 1 egg at a time. Continue to beat until well blended.
  4. Add dry ingredients in 3 additions alternating with buttermilk. Fold in berries. Transfer to pans.
  5. Bake cakes until tester inserted in the centre comes out clean, about 45 minutes. Cool cakes in pans on racks.
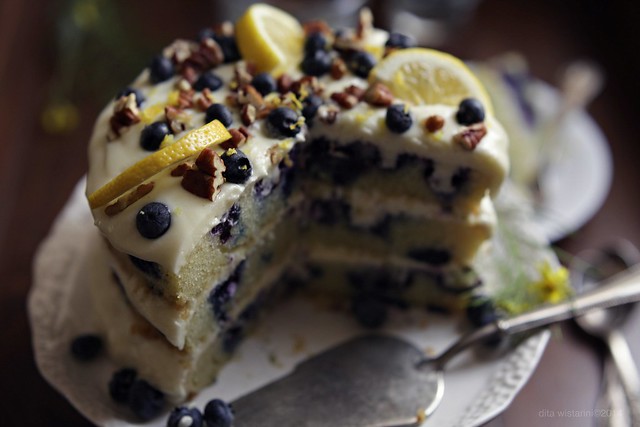
  6. TO ASSEMBLE: Make White Chocolate Cream Cheese Frosting. Turn first layer of cake on platter. Peel off parchment. Spread with 1 cup frosting. Place second layer on top. Remove parchment. Frost remainder of sides and top. Keep in refrigerator until ready to serve. 

Lemon Blueberry Pecan Cake with White Chocolate Cream Cheese FrostingLemon Blueberry Pecan Cake with White Chocolate Cream Cheese Frosting

Notes
WHITE CHOCOLATE CREAM CHEESE FROSTING: In a small bowl, microwave 6 oz (180 g) chopped white chocolate for 2 -3 minutes on Medium until almost melted. Stir until smooth. Cool to room temperature.Beat 8 oz. (250 g) cream cheese and 1/4 cup softened unsalted butter until blended. Add melted chocolate. Gradually add 3 cups confectioner’s (icing) sugar, beating until smooth and creamy.
Lemon Blueberry Pecan Cake with White Chocolate Cream Cheese Frosting


11.23.2011

Super Moist Banana Cake

Happy weekend Kuwait! Enjoy your day.

If you're looking for a super moist banana cake recipe, this is the one. I'll tell you another secret why this cake could turn to be super moist.

Banana Cake
source : Spark Recipe

Ingredients :
1/2 cup (1 stick) Butter, softened
1 1/4 cups Granulated Sugar (Dita-I used brown sugar, I guess it taste better. But you might cut down the amount of the sugar to 1 cup, because it's just to sweet)
2 Eggs
4 tbsp. Sour Cream (Dita-I used 4 tbsp milk mixed with 2 tbsp vinegar)
1 1/2 cups Flour, all-purpose (white)
1 tsp. Baking Soda
1 tsp. Vanilla Extract
1.5 cups (2-3) ripe Bananas, mashed (NOTE: Original recipe called for 1 cup and baked a little less, but I usually use more banana and bake it a wee bit longer. The tracker includes the extra bit of banana!)

Directions :
1. Grease 9" x 5" loaf pan.
2. Beat together butter and sugar.
3. Add eggs. Mix well.
4. Add sour cream, flour, baking soda, vanilla, and bananas. Mix well.
5. Pour into prepared loaf pan.
6. Bake at 350 degrees F for 45 - 55 minutes, or until toothpick in center comes out clean.
7. Cool on rack, and wrap in plastic wrap overnight to bring out the moisture in the bread. (Dita-here's my secret : put the WARM cake wrapped in a plastic wrap in refrigerator overnight, it will make the cake turn super moist)
8. Makes 1 loaf, cut into 14 slices about 5/8" thick each.

Number of Servings: 14

3.27.2011

Bolu Kukus (anti gagal)


Bikin Bolu Kukus? Mari menarik nafas panjang. Agak kapok sebenernya, karena ratusan kali bikin *lebay*, selalu berakhir di tong sampah, bolkusnya gak mau ngakak. Segala resep dicoba. Dari yang pake soda, pake susu doang, dll. Gak satupun berhasil.

Kali ini tergoda, waktu liat bolkus gula merahnya mbak Besta, di FB, yang ternyata pake resepnya Widya. Biasanya nih kalo ada resep yang lagi dihebohin ibu-ibu, pasti ada apa-apanya. Entah gampang, entah enak banget atau simple banget.

Pas baca resepnya, ternyata simple banget, bikinnya pun bisa gak pake mikser. Gak boros telur pulak. Nah, karena ini percobaan pertama dan takut gagal lagi, saya coba gak pake gula merah dulu. Gula merah barang mewah bok di sini, daripada nangis gerung-gerung, stok gula merah kebuang percuma, mending eksperimen pake rasa lain aja. Cairan gula merah saya substitusi dengan susu cair plus gula pasir.

Bolu Kukus Gula Merah
sumber : Widya Wijanarti

Bahan-bahan :
1 sdt baking Powder
1 butir telur
250 gr gula merah (dita - saya gak pake gula merah, gantinya 125 ml susu cair plus 6 sdt gula pasir)
125 ml air (dita - gak pake, karena udah diganti susu cair)
250 gr tepung terigu
1 sdt pasta vanila (dita - saya ganti dengan pasta panda dan pasta durian)
50 gr margarine, cairkan (dita - saya pakai butter)

Cara membuat :
1. Cairkan gula merah dengan 125ml air, saring (saya skip step ini)
2. Cairkan mentega, dinginkan
3. Kocok telur dengan baking powder, sampai tercampur rata, gak perlu sampe mengembang banget.
4. Masukkan terigu bergantian denga susu.
5. Kemudian masukkan pasta.
6. Terakhir masukkan mentega, aduk rata.
7. Masukkan dalam wadah bolu kukus.
8. Kukus selama 20 menit dalam dandang/kukusan yang sudah beruap banyak (ini penting ya, musti panas banget). Angkat.

Batch pertama bikin rasa pandan. Begitu 20 menit berlalu dan saatnya membuka tutup dandang...jeng jeng jeng!!!!!!

Takjub!!!!! Bolu Kukus gue ngakak!!!!!!!! Rasanya pengen teriak-teriak! *langsung sujud sukur* Gimana gak seneng, ratusan kali bikin, ratusan bok, ratusan *kayak wafer aja* *edisi lebay nih* gak pernah berhasil. Lah ini yang resepnya gak neko-neko, langsung mekar! Wohooo *masih joget-joget nih*...makasih banyak loh jeng Widya.


Ngeliat batch 1 sakseis, langsung kalap pengen bikin rasa lain. Aha! Kan punya pasta duren. Lucu nih kayaknya bikin bolu kukus duren. Pengennya sih bikin bolu kukus green tea juga, tapi apa daya, persedian tepung tipis, kayaknya cuma cukup buat bikin sekali lagi. Penasaran? Coba deh. Kayaknya sih resepnya anti gagal nih. Inget-inget aja kukusan yang panas banget itu kuncinya. Tandanya uapnya banyak. Terus sekali ngukus jangan banyak-banyak ya, biar panasnya rata dan maksimal. Dan supaya air gak netes ke adonan, sebelum ditutup, saya lapisi dulu dengan lap dapur.

Owiyah, 1 resep ini jadinya cuman 8-9 cup.


4.09.2010

Orange Chiffon Cake

Masih dalam rangka keranjingan bikin chiffon cake, gue udah gak tau lagi ini percobaan yang keberapa XD. Gue suka resep ini dan tekstur cake yang dihasilkannya. Dan yang pasti resep ini hemat telur.

Sengkyu Mindy buat rekomendasi resepnya.

orange chiffon cake

Orange Chiffon Cake
source : happyhomebaking

Ingredients:
100 gr flour
1 1/2 tsp baking powder
1/2 tsp salt
3 egg yolks
40 gr caster sugar
50 ml vegetable oil
50 ml water
25 ml fresh orange juice
Zest of orange

3 egg whites
40 gr caster sugar

orange

Directions:
Preheat oven to 170C

Combine the flour, the baking powder and the salt. Set aside

In a mixing bowl, whisk manually the egg yolks the add the sugar in 3 times. Whisk until the mixture becomes sticky and turns pale. Drizzle in the oil, whisking at the same time until the mixture is well combined. Repeat the same with the water, followed by the orange juice. Sieve the flour mixture over the yolk mixture and whisk until fully incorporated into the batter. Add in the lemon zest (if used) and combine well

In a clean, dry mixing bowl, beat egg whites with an electric mixer until mixture becomes frothy and foamy. Gradually beat in the sugar and beat on high speed until stiff peaks form. Then add the beaten egg whites into the yolk batter in 3 separate times then folding gently with a spatula until just blended after each adding

orange chiffon cake

Pour batter into a 18cm (7 inch) tube pan (do not grease the pan). Tap the pan lightly on a table top to get rid of any trapped air bubbles in the batter. (Note: my pan is bigger, that's why the cake doesn't look so high). Bake for 45 to 50 mins or until the cake surface turns golden brown and a skewer inserted into the centre comes out clean. Remove from the oven and invert the pan immediately. Let cool completely before unmould. To remove the cake from the pan, run a thin-bladed knife around the inside of the pan and the center core. Release the cake and run the knife along the base of the pan to remove the cake

orange chiffon cake

3.12.2010

Cream Cheese Banana Nut Bread

Yang mau mengkaryakan cream cheese silahkan coba resep ini. Gara-gara May Irianti posting resep ini gue jadi pengen bikin. Setuju sama jeng Mae, gue juga cucok sama resep ini. Kalo mau tau teksturnya : moist, gak padet, gak seret, cenderung agak crumbly dengan wangi pisang dan samar-samar wangi cream cheese. Tadinya mau buat proyek week-end tapi looh...loohhh...loohh....pisangnya udah keburu item. Ya sutra terpaksa muter mikser :P

cream cheese banana nut bread

Cream Cheese Banana Nut Bread
Original recipe taken from myrecipes.com. Converted and modified by May Irianti.

50 gr butter
100 gr creamcheese
175 gr gula pasir
1 butir telur
180 gr tepung terigu
1/4 sdt baking powder
1/4 sdt baking soda
1/4 sdt garam
2 buah pisang matang, haluskan (gue sarankan pake pisang yg udah mateng banget biar aromanya keluar)
50 gr kacang2an, panggang sebentar (optional-gue pake kacang mete)
1/2 sdt extract vanilla
dita-kalo mau dicampur chocolate chips juga ok

Olesi loyang loaf dengan margarin, alasi dengan kertas dan olesi kembali dengan margarin. Panaskan oven hingga mencapai suhu 180 degC. Sisihkan.

Kocok butter dan cream cheese hingga lembut, tambahkan gula sedikit demi sedikit. Kocok terus hingga creamy dan fluffy. Masukkan telur, kocok pelan hanya hingga tercampur rata.

Campur tepung dan bahan kering lainnya, lalu masukkan kedalam kocokan butter+cream cheese. Kocok sebentar dengan speed rendah hingga tercampur rata. Masukkan pisang, kacang kacangan dan vanilla extract, aduk hingga rata. Adonan bertektur sangat kental mirip adonan pisang goreng.

Tuang dalam loyang, panggang selama kurang lebih 45 menit atau hingga permukaan kecoklatan. Cek dengan menggunakan tusukan sate, bila tusukannya kering setelah dimasukkan, tandanya cake sudah matang.

Keluarkan dari loyang dan dinginkan. Hias sesuai selera.

IMG_6285

3.03.2010

KBB#16 : Chiffon Cake


Ini tantangan paling edan dari semua tantangan KBB, bukan cuman tingkat kesulitannya aja yang rada advance tapi juga bikin ketagihan dan kesurupan. Coba aja tanya member KBB. Pasti rata-rata ngerjain tantangan ini berkali-kali. Resep yang dicoba juga macem-macem dan ganti-ganti. Biasanya sih saling ngeracunin, si ini lagi bikin chiffon apa? yang lain lagi share resep lain. Seru dan berkesan banget tantangan kali ini. Semuanya mendadak chiffonista!

Kendala yang gue hadapi saat bikin tantangan ini adalah masalah loyang. Bikin chiffon cake idealnya memang pake loyang chiffon cake (mirip loyang angelfood cake tapi ada kakinya). Lahh nyari loyang angelfood cake aja susah. Gak asik lah Kuwait untuk para bakers, nyari apa-apa (keperluan baking) banyak gak adanya. Akhirnya pas pertama kali hunting loyang, gue nemu loyang tulban kertas, gue pikir gak papalah daripada gak ada sama sekali.

Percobaan pertama yang gue jadiin laporan untuk KBB, pake loyang ini. Resepnya ambil dari mbak Riana, gue modifikasi chiffon kejunya jadi chiffon moka.

Chiffon cake7

Chiffon Keju
Source: Seri Masak Femina Primarasa - Cake Istimewa Semua Yummy

Bahan:
150 g terigu protein rendah, ayak (dita-140 g tepung all purpose+20 g coklat bubuk)
100 g keju cheddar, parut (dita-gak pake)
1/2 sdt soda kue
1 sdt baking powder
1/2 sdt garam
100 g gula kastor
100 ml minyak goreng
100 ml susu cair
5 kuning telur (dari telur @ 70 g)
7 putih telur (dari telur @ 70 g)
1/2 sdt cream of tartar (optional)
(dita) 1 sdt pasta moka

Olesan & Taburan:
200 gr mentega/margarine
200 gr keju cheddar, parut

Cara Membuat:

1. Panaskan oven pada 180 derajat Celcius. Siapkan loyang chiffon diameter 24 cm. Jika ada, gunakan loyang chiffon berkaki. Jangan olesi bagian dalamnya dengan minyak/margarin.
2. Campur terigu dengan keju parut (dita-coklat bubuk), soda kue, baking powder, garam, dan 2 sdm gula kastor, aduk rata. Buat lubang di tengah campura tepung, tuangi minyak goreng, susu dan kuning telur dan pasta moka (dita). Aduk dengan pengocok kawat hingga licin, sisihkan.

chiffon step1

3. Kocok putih telur dengan mikser berkecepatan sedang hingga berbusa, masukkan cream of tartar dan sisa gula dalam beberapa tahapan. Kocok hingga putih telur membentuk ujung yang tumpul waktu mikser diangkat.
4. Masukkan putih telur dalam beberapa tahapan ke dalam adonan tepung, aduk perlahan hingga rata. Perciki bagian dalam loyang dengan air masak
5. Tuang adonan ke dalam loyang. Masukkan dalam oven, panggang hingga matang (lk 75 menit). Tandanya tidak ada sisa adonan yang menempel ketika ditusuk dengan lidi. Keluarkan kue dari oven, segera balikkan loyang hingga kue benar-benar dingin (lk 1 1/2 jam). Keluarkan kue dari loyang dengan bantuan spatula/pisau panjang.

chiffon step 2

6. Balikkan kue di rak kawat, balik sekali lagi ke piring saji sehingga bagian atas kue tetap di atas. Olesi seluruh permukaan kue dengan mentega/margarin, lalu taburi keju parut.

chiffon step 3

Hasil akhirnya cantik mengembang. Teksturnya bener-bener ringan kayak kapas, jadi kalo digigit kapes-kapes gitu. Sebenernya not my kind of cake, gue lebih suka yang sedikit lebih padat. Buat penggemar manis, rasanya cake ini kurang manis, jadi silahkan ditambah gula secukupnya.

Percobaan kedua dapet sharing resep Gluten Free Chiffon Cake dari Regina. Lucu, ingredients-nya gak pake tepung terigu tapi pake tepung beras dan tepung beras ketan. Langsung penasaran pengen coba, pengen tau teksturnya kayak apa. Gak ada loyang, gak ada loyang deh. Akhirnya pake loyang loaf aja ;).

Pandan Gluten Free Chiffon Cake 2

gluten-free chocolate chiffon cake
source : Yujai

Three 4" round tube cake

Egg yolk // 3
Rice flour // 40g
Glutinous rice flour // 10g
Water // 20g
Oil // 15g
Cocoa powder // 2 tbps
Vanilla extract // 1 tsp
Egg white // 4
Sugar // 40g
Lemon juice // 1 tsp
Salt // 1/4 tsp

1. Combine and sift both rice flour. Separate the eggs and place the whites in one bowl and the yolks in another.

2. Whisk yolks in a large bowl until light in color, add in oil, then milk and vanilla extract. Add in flour in a few additions, beat until smooth.

3. In a separate bowl, with the whisk, beat the egg whites until foamy. Add in lemon juice and salt and continue to beat until soft peaks form. Gradually beat in the sugar(one tbps at a time) and beat until stiff peaks form.

4. With a large rubber spatula or wire whisk, gently fold the egg whites into the yolk batter just until blended (Do not over fold or else the batter will deflate).

5. Pour the batter into the ungreased tube pan and bake at 325F for 25 minutes , or until a inserted wooden skewer comes out clean. (When lightly pressed the cake will spring back).

6. Immediately remove the cake from the oven invert the pan and place on a bottle or flat surface so it is suspended over the counter. Let the cake cool completely before removing from pan.

notes :
1. Try substitute part of the rice flour with almond flour or other nut flour. It adds flavour to the cake too!

Ternyata cake jenis gluten memang tidak akan mengembang sempurna seperti halnya chiffon reguler, karena tidak ada kandungan gluten dalam tepung. Tekstur cake ini juga lebih membal tidak kapes-kapes spt layaknya chiffon cake, mungkin ada pengaruh dari penggunaan tepung beras ketan.

Percobaan berikutnya, kena guna-guna dari Rachmah....hahahahaha....Pake resep hasil modifikasi mbakyu Rachmah, Cheesy Chiffon Cake.

chiffon cheese cake

Cheesy Chiffon Cake
recipe by Rachmah Setyawati

5 kuning telur
100 gr Gula Castor
110 gr Tepung Terigu
20 gr Oatmeal Instant
15 gr Tepung Maizena
6 gr Baking Powder
80 ml Minyak Sayur/Goreng
120 ml Susu UHT cair putih
50-75 gr Cheese Cream Yummy - Neufchatel (tergantung selera, suka keju bgt / nggak)
(campur susu UHT dengan cheese cream, aduk hingga tercampur rata, sisihkan)
40 gr Cheddar Cheese, parut halus

5 putih telur
sedikit garam
3 gr COT (optional)
50 gr Gula Castor

Cara membuat :
1. Tepung terigu, tepung maizena, baking powder, campur ayak. Taruh dalam baskom, campur pula oatmeal instant.
2. Masukkan minyak sayur/goreng, aduk rata.
3. Masukkan kuning telur, aduk rata
4. Masukkan campuran susu cair + krim keju, aduk rata.
5. Taruh putih telur di dlm wadah kering, beri COT (optional), beri garam, kocok hingga mulai mengembang, masukkan gula sedikit sedikit smbil dikocok hingga soft peak.
6. Ambil sedikit adonan putih telur, campurkan ke dlm adonan tepung, aduk rata. Tambahkan sisanya berkala hingga rata. Terakhir masukkan keju cheddar aduk rata.
7. Masukkan loyang chiffon, oven hingga matang (aku pakai suhu 165 derajat pertama sekitar 15 menit, lalu turunkan hingga 155 drjt hingga kurleb total 30-35 menit - tp ini semua tergantung msing2 oven ya).

Semua bahan persis sama seperti yg disarankan resep, kecuali penggunaan oatmeal instan, gue ganti jadi mashed potato instant. Loyang yg digunakan adalah loyang loaf. Hasil cake-nya lembut, agak padat tidak kapes-kapes (tekstur spt ini yg gue suka). Permukaan cake retak. Panas yg digunakan 160˙C. Cake-nya tidak membubung tinggi. Kayaknya kepadatan cake karena pengaruh penggunaan mashed potato instant deh.

Berikutnya, gue nyoba Orange Chiffon Cake-nya Yasaboga, dapet resep dari sesama KBB-er di Kuwait, mbak Widya Suci. Udah punya loyang angelfood cake nih, infonya juga dari mbak Widya Suci dapetnya di mana *thanks mbak*. Buat gue resep ini terlalu manis. Hasil akhirnya agak crumbly, gak kapes-kapes.

orange chiffon cake

Setelah itu *belum kapok juga!*, latihan bareng baking dengan temen-temen di sini dan resep yang dipilih chiffon cake juga *doeng!* Kali ini kita milih Strawberry Chiffon Cake-nya Yasaboga. Wuiihhh cake-nya cantik banget, mengembang sempurna. Tapi sayang....hikss....pada saat dibalik, gak sampe 10 menit, tuh cake terjun bebas, meluncur sendiri dari loyangnya. Kayaknya karena loyang teflonnya udah keseringan dipake nih sama mbak Wid (udah 11 kali pake bok! udah gak perewi lagi). Menurut sharing Rachmah, ada beberapa karakter loyang yang begitu. Loyang udah terlalu sering dipake jadi lebih licin, dibandingkan loyang "perawan" yang masih kesat.


photo courtesy of Irra Fachriyanti

Gak kapuok juga? Masih ada yang ke-enam nih. Kali ini keracunan resepnya Nisa, Chiffon Cake Rempah. Ambruoolll juga! Huhuhu mau nangis.

spicy cake

Yang ke-7 *edan*, bikin lagi *pantang menyerah* pake resep sharing-an Mindoel, Orange Chiffon Cake.

orange chiffon cake

Orange Chiffon Cake
source : Happy Home Baking

Ingredients:
100 gr flour
1 1/2 tsp baking powder
1/2 tsp salt
3 egg yolks
40 gr caster sugar
50 ml vegetable oil
50 ml water
25 ml fresh orange juice
Zest of lemon (dita-I used zest of orange)

3 egg whites
40 gr caster sugar


Directions:
Preheat oven to 170˙C

Combine the flour, the baking powder and the salt. Set aside

In a mixing bowl, whisk manually the egg yolks the add the sugar in 3 times. Whisk until the mixture becomes sticky and turns pale. Drizzle in the oil, whisking at the same time until the mixture is well combined. Repeat the same with the water, followed by the orange juice. Sieve the flour mixture over the yolk mixture and whisk until fully incorporated into the batter. Add in the lemon zest (if used) and combine well

In a clean, dry mixing bowl, beat egg whites with an electric mixer until mixture becomes frothy and foamy. Gradually beat in the sugar and beat on high speed until stiff peaks form. Then add the beaten egg whites into the yolk batter in 3 separate times then folding gently with a spatula until just blended after each adding

Pour batter into a 18cm (7 inch) tube pan (do not grease the pan). Tap the pan lightly on a table top to get rid of any trapped air bubbles in the batter. (Note: my pan is bigger, that's why the cake doesn't look so high). Bake for 45 to 50 mins or until the cake surface turns golden brown and a skewer inserted into the centre comes out clean. Remove from the oven and invert the pan immediately. Let cool completely before unmould. To remove the cake from the pan, run a thin-bladed knife around the inside of the pan and the center core. Release the cake and run the knife along the base of the pan to remove the cake

Gue berasumsi bahwa cake yang ambrol itu karena adonan pastanya terlalu cair. Makanya pas nyoba resep ini, penambahan cairan gak semuanya sesuai resep, supaya hasil akhir pastanya gak terlalu cair. Dan suksyes gak terjun bebas saat dibalik *gatau juga ya ada pengaruhnya apa nggak dari konsistensi adonan pasta*

Setelah itu, loyang chiffon pesenan dari Indonesia datang!!! Senangnya! Tapi udah ahh...istirahat dulu ya. Bulan ini udah boros telur!! :D Gara-gara mendadak chiffonista!


1.17.2010

KBB#15 : Mud Cake Cookies Sandwiches


KBB#15 : chocolate mud cake cookies sandwiches

Tantangan KBB yang ke-15 ini sebenernya gampang *sotoy*, cuman prosesnya aja yang agak panjang. Ada 3 proses yang harus kita lalui, dari bikin cookies, cake coklat dan nyiapin ganache-nya.

Dari diskusi dengan temen-temen Bakers, banyak yang mengurangi jumlah gula pada resep. Tadinya gue juga udah mau ngurangin, tapi terus nyadar, ternyata coklat yang gue beli 70%. Untung aja gak jadi gue kurangin, ini aja jadinya agak pahit coklat, jadi kurang manis. Mana untuk bikin ganache-nya salah ngambil coklat, gue ambil yang 85%...kwakwawww!!

Karena gak punya cookie cutter bulat, gue akalin dengan pake tutup nutella terus pinggirnya diiris pake ujung pisau *ihhh kerajinan*

Cake-nya sendiri kayak brownies. Dan gampang rapuh pada saat dipotong. Mungkin harus dikurangin waktu pemanggangannya biar gak terlalu kering. Tapi untuk ukuran resep, rasanya terlalu tipis kalo harus dibagi 2 loyang dengan ukuran segitu. Gue bikin 1/2 resep semuanya, baik untuk cookies dan cake-nya.

Buat penggemar coklat, resep ini recommended. Rasanya nyoklat banget. Sayang di rumah gue rada kurang laku, mungkin karena rasanya agak pahit jadi anak-anak males makannya *untung gak bikin banyak-banyak*

Mud Cake Cookie Sandwiches
Source: The Australian Women's Weekly: cupcakes, cheesecake, cookies. ACP Magazine Ltd. 2008
Makes 24

KBB#15 : chocolate mud cake cookies sandwiches

Ingredients :
250g butter, softened
330g firmly packed brown sugar
2 eggs
450g plain flour
75g self-raising flour
50g cocoa powder
2 Tbs cocoa powder, extra

Chocolate Mud Cake
150g butter, chopped
100g dark eating chocolate, chopped coarsely
220g caster sugar
125ml water
2 Tbs coffee liqueur
150g plain flour
2 Tbs cocoa powder
2 egg yolks

Combine butter, chocolate, sugar, the water and liqueur in small saucepan. Stir over low heat until smooth. Place mixture in medium bowl; cool 10 minutes. Whisk in sifted flour and cocoa, then egg yolks. Bake about 25 minutes. Cool cakes in pans. Using 6.5cm round cutter, cut 12 rounds from each cake.


Chocolate Ganache
80ml cream
200g dark eating chocolate, chopped coarsely

Bring cream to a boil in small saucepan; remove from heat. Add chocolate; stir until smooth. Refrigerate until spreadable.

1. Preheat oven to 170C/150C fan-forced. Grease two 20cm x 30cm lamington pans; line with a strip of baking paper, extending paper 2cm above edges of pans.
2. Make chocolate mud cake.
3. Make chocolate ganache.
4. Beat butter, sugar and eggs in small bowl with electric mixer until combined. Transfer mixture to large bowl; stir in sifted flours and cocoa, in two batches. Knead dough on floured surface until smooth; divide in half, roll each portion between sheets of baking paper until 5mm thick. Cover; refrigerate 30 minutes.


5. Preheat oven to 180C/160C fan-forced. Grease oven trays; line with baking paper.
6. Using 6.5cm round cutter, cut 48 rounds from dough. Place about 3cm apart on oven trays. Bake about 12 minutes. Cool on wire racks.


7. Spread ganache onto underside of cookies; sandwich a mud cake round between two cookies.

KBB#15 : chocolate mud cake cookies sandwiches

8. Using heart template, dust cookies with extra cocoa.

KBB#15 : chocolate mud cake cookies sandwiches

1.11.2010

Carrot Cake with Cream Cheese Frosting

Ini resep andalan gue dari dulu kalo bikin carrot cake. Udah kadung jatuh cinta jadi rada males coba-coba resep lain :). Wangi dan rasanya enak, gak ada bau langu wortel.

Carrot cake with cream cheese frosting

Carrot Cake
Sumber: NCC, Bogasari Baking Center Cake Baking Course

Bahan Cake :
250 gr Telur (kira-kira 4 telur ukuran sedang)
300 gr gula kastor
2 gr garam
5 gr emulsifier (optional)
260 gr tepung Segitiga Biru
1 gr baking soda
1 gr baking powder
1 gr cinnamon bubuk
450 gr wortel (parut halus) (kira-kira 4 wortel ukuran kecil)
150 gr minyak

Bahan Cream Cheese Frosting (diambil dari resep dalam kemasan Philadelphia Cream Cheese) :
250 gr Philadelphia Cream Cheese
80 gr margarine
1 cup icing sugar
1 sdm perasan air jeruk lemon

Cara membuat cake :
1. Kocok telur, gula, garam hingga kental dengan speed tinggi. Masukkan emulsifier, kocok terus hingga kental dan meninggalkan jejak.
2. Ayak bahan kering, kemudian masukan kedalam adonan dengan speed rendah hingga tercampur rata.
3. Masukkan wortel parut, aduk rata.
4. Masukan minyak perlahan kedalam adonan hingga tercampur rata.
5. Tuangkan kedalam loyang bundar 20-22 m yang telah dialasi kertas.
6. Panggang dengan suhu 180ºC selama 30 - 45 menit (lakukan tes tusuk).

Cara membuat cream cheese frosting :
1. Kocok Philadelphia Cream Cheese dan margarine dengan mikser selama 4-5 menit atau hingga halus dan ringan (fluffy).
2. Tambahkan icing sugar dan air lemon, kemudian kocok lagi selama 30 detik atau sampai tercampur rata.
3. Oleskan pada Carrot Cake.

carrot cake

12.28.2009

Chocolate Cream Cheese Loaf Cake

Paduan keju dan coklat selalu yummy. Sebelum keburu lupa, buat yg kemaren nanya, ini resepnya ya :)

Chocolate Cream Cheese Loaf Cake

Chocolate Cream Cheese Cake
source : Thibeaultstable

Ingredients

Mixture ‘A’
250g cream cheese, softened
60g castor sugar
1 egg
1 teaspoon vanilla

1. Beat cream cheese with sugar until light and fluffy
2. Beat in egg until well incorporated and set it aside

Mixture ‘B’
180g butter, softened
150g sugar
3 eggs
3 tbsp cocoa
120g self-raising flour
1 tsp baking powder
2 teaspoons vanilla

chocolate cream cheese loaf

1. Sieve flour, baking powder and cocoa together and put aside
2. Beat butter and sugar until light and fluffy
3. Add egg, one at a time and beat until well incorporated into mixture
4. Fold flour mixture into egg mixture.
5. To assemble, pour half of mixture ‘B’, then all of mixture ‘A’, then followed by the remaining mixture ‘B’.
6. Bake in preheat oven at (350°F)180C for 45-50 min or until skewer comes out clean.

12.24.2009

Raspberry Jelly Swiss Roll Cake

Jaman masih kecil dulu siapa sih yang gak tertarik sama Swiss Roll Cake aka Bolu Gulung. Udah capek-capek digulung sama yang bikin eh sama yang makan dibuka gulungannya :D. Kejadian juga sama anak-anak gue. Emaknya udah deg-degan nggulung cakenya, begitu udah dipotong-potong, kuenya dibuka gulungannya sama mereka :P.

Resep ini bukan resep bolgul ala Indonesia yang telornya seabrek-abrek. Cukup 3 telor dan hasilnya empuk dan lembut.

Silahkan dicoba! Bikin bolu gulung gak sesusah yang dibayangin kok

Raspberry Jelly Roll Cake

Swiss Roll Cake

Recipe Ingredients
3 eggs
1 cup granulated sugar
1/3 cup water
1 tspn vanilla
3/4 cup all-purpose
1 tspn baking powder
1/4 tspn salt
Powdered Confectioner's sugar - for dusting
2/3 cup spreadable raspberry jelly/jam (or any other filling of your choice)

Method
Heat oven to 375 deg F. Line a baking pan, preferably (15 × 10 × 1) inches, with cooking parchment paper or aluminum foil. Spray with non-stick cooking spray.

Beat eggs in small bowl with electric mixer on high speed for about 5 minutes or until very thick and lemon colored. Gradually beat in the granulated sugar. Beat in water and vanilla on low speed. Finally add the flour, baking powder and salt, beating just until batter is smooth. Pour into the prepared pan, spreading out well to form a thin even layer.

Bake for 12 to 15 minutes (NOT MORE) until toothpick inserted in center comes out clean. Spread a clean kitchen towel on the platform and sprinkle some powdered sugar on it. Now loosen the edges of the cake, then turn the whole pan upside down upon the towel. Carefully remove the paper from the top. Trim off the hard edges of the cake, and while its hot, carefully roll cake lengthwise from one end to the other. Keep the roll as tight as possible, but apply very little pressure so as not to crack the cake a lot. A few cracks are normal, so don't worry. it is going to be covered with frosting later! Now refrigerate the rolled cake for 40 mins to an hour. (This was the only change I made from the About recipe video)

Remove the cake from fridge and unroll it gently and remove the towel. Beat the raspberry jelly/jam slightly to soften; it's better to use a spreadable jelly. Now spread it evenly over the cake. Do NOT use a lot of jelly as it would ooze out of the cake once you finish rolling it up again.

Raspberry Jelly Roll Cake

Now again roll up the cake, which should be fairly easier this time. If you are not ready to serve, place it in the fridge again, so it becomes a bit harder and easier to slice. When ready to serve, place it on a serving dish, with the seams facing down. Sprinkle generously with confectioners sugar, making sure you cover all the flaked ends or cracks and edges that you incurred while rolling it up. You can even cover the whole cake with chocolate icing or any other frosting. Gently slice at a 30deg angle to form beautiful raspberry swiss rolls.

6.19.2009

Black Forest Cake and Cupcakes

Now it's time to treat myself. I've been wanting to make my own Black Forest Cake since a long time ago. This classic cake always attracted my attention. Actually I'm a bit picky with BF recipe. I want my cake turn to be moist. When I saw the recipe at Eliza's, I fell in love at the first sight. I knew this is what I really wanted. And that was my first self made proper birthday cake for myself. Happy birthday to me! :)

Black Forest

If you ask me which Black Forest recipe that I recommend...definitely this is the ONE!

I also made a cupcake version for this cake. For the filling, I use cherry puree which cooked with sugar.

Filling cupcakes with cherry puree

BLACK FOREST CAKE
Makes 9-inch three-layered cake
source : via Eliza

Cherries and syrup:
2 cups jarred sour cherries in light syrup, drained with 1 cup syrup reserved
1/2 cup (3 1/2 ounces) sugar
1/2 cup kirsch or other cherry flavored liqueur

Whipped cream frosting:
1/4 cup (1 3/4 ounces) sugar
1 tbsp cornstarch
3 cups heavy cream, chilled
1 1/2 tsp vanilla extract

1 recipe Devil’s Food Layer Cake, baked and cooled, but unfrosted, recipe below
Chocolate shaving (see note), for serving

FOR THE CHERRIES AND SYRUP: Reserve 8 of the prettiest cherries for garnish in a small bowl. Slice the remaining cherries in half and place in a medium bowl. Simmer the reserved cherry syrup and sugar together in a medium saucepan over medium heat until mixture is thickened and measure about 1/2 cup, 8 to 10 minutes. Off the heat, stir in the kirsch.

Toss 1 tbsp of the syrup with the cherries reserved for garnish. Toss 3 tbsp more syrup with the halved cherries. Poke the top of the cake layers thoroughly with a wooden skewer and brush with the remaining syrup.

FOR THE WHIPPED CREAM: Whisk the sugar and the cornstarch together in a small saucepan and slowly whisk in 1/2 cup of the cream. Bring the mixture to a simmer over medium heat, whisking constantly, until the mixture thickened,2-3 minutes. Let the mixture cool to room temperature, about 30 minutes.

In a large bowl, whip the remaining 2 1/2 cups cream and the vanilla together with an electric mixer on low speed until frothy, about 30 seconds. Increase the mixer speed to medium and continue to whip the mixture until it begins to thickened, about 30 seconds. Slowly add the cooled cornstarch mixture and continue to whip until the mixture forms soft peak, 1-3 minutes.

Line the edges of a cake platter with strip of parchment paper to keep the platter clean while you assemble the cake. Place one of the cake layers on the platter. Spread 1/2 cup of the whipped cream over the top, right to the edge of the cake, then cover with half of the sliced cherries. Repeat with another cake layer, 1/2 cup more whipped cream, and the remaining sliced cherries. Place the remaining cake layer on top and press lightly to adhere. Frost the cake with the remaining whipped cream.

Refrigerate the cake until it absorbs the soaking syrup, at least 2 hours or up to 24 hours. Before serving, let the cake sit at room temperature, 30-60 minutes, then gently press the chocolate shavings into the sides of the cake. Evenly space 8 small pile of chocolate shavings around the top of the cake and top each with a cherry. Remove the parchment strip from the platter before serving.

NOTE: Be sure to buy jarred or canned cherries packed in syrup, not water. You will need about 7 ounces of chocolate for the shavings to decorate the sides and top of the cake. Letting the cake to sit at least 2 hours before serving allows the soaking syrup to sink in and the flavors to meld; however in a pinch, you could serve it right away.

DEVIL’S FOOD LAYER CAKE

1/2 cup Dutch-processed cocoa powder, plus extra for dusting
1 1/2 cups all-purpose flour
1 tsp baking soda
1/2 tsp baking powder
1/4 tsp salt
1 1/4 cups boiling water
4 ounces unsweetened chocolate, chopped
1 tsp instant espresso or instant coffee
10 tbsp (11/4 sticks) unsalted butter, softened
1 1/2 cups packed light brown sugar
3 large eggs, room temperature
1/2 cup sour cream, room temperature
1 tsp vanilla extract

Adjust the oven racks to the upper-middle and lower-middle position and heat the oven to 350 degrees Fahrenheit. Grease 3 9-inch round cake pan, then dust with cocoa powder and line the bottoms with parchment paper. Whisk the flour, baking soda, baking powder, and salt together in a large bowl. In a medium bowl, whisk the boiling water, chocolate, 1/2 cup of the cocoa powder, and instant espresso together until smooth.

In a large bowl, beat the butter and sugar together with an electric mixer on medium speed until light and fluffy, 3-6 minutes. Beat in the eggs, one at a time, until combined, about 30 seconds. Beat in the sour cream and vanilla until incorporated.

Reduced the speed to low and beat in 1/3 of the flour mixture, followed by 1/2 of the chocolate mixture. Repeat with half of the remaining flour mixture and the remaining chocolate mixture. Beat in the remaining flour mixture until just incorporated.

Give the batter the final stir with a rubber spatula to make sure it is thoroughly combined. Scrape the batter into the prepared pans, smooth the tops, and gently tap the pans on the counter to settle the batter. Bake the cakes until a toothpick inserted in the center comes out with a few crumbs attached, 15-20 minutes, rotating and switching the pans halfway thorough baking
Let the cakes cool in the pans for 10 minutes. Runs a small knife around the edge of the cakes, then flip them out onto the wire racks. Peel off parchment paper, flip the cakes side up, let cool completely before frosting, about 2 hours.

Source: adapted from America’s Test Kitchen Family Baking Book

Black Forest

On the next day we had a fabulous family dinner at Le Notre.....the food is so yummy!!!

Birthday Girl

Dinner at LeNotre Kuwait

5.30.2009

Eggless Ontbijtkoek

As I promised you, this is the other recipe of Ontbijtkoek which doesn't use any eggs. No mixer is needed! You'll love the recipe :).

Eggless Ontbijtkoek

I made this cake as a cupcake so my kids could easily eat it. The texture of the cake was dense (pretty similar with muffin) but moist. It's because the usage of honey.

Eggless Ontbijtkoek
source : Eat Dutch

Preparation time: 15 minutes
Cooking time: 1 hour

Ingredients:
9 oz / 250 g self-raising flour
Pinch of salt
2 teaspoons ground cinnamon
½ teaspoon ground cloves
½ teaspoon ground nutmeg
½ teaspoon ground ginger
4 oz / 100 g brown sugar
4 oz / 100 g honey
6 fl oz / 175 ml milk

Eggless Ontbijtkoek Ontbijtkoek

Directions :
Preheat the oven to 320 degrees F / 160 degrees C.

Mix the flour, salt and spices together in a bowl. Add the sugar, milk and honey and beat until smooth. Add a little more milk if the mixture is too thick.

Lightly grease an 8 in x 4 in / 20 cm x 10 cm bread tin and pour the cake mix into it.

Put on the floor of the oven and bake for an hour. The cake is done when a knife inserted into it comes out clean. If it comes out moist, cook for a further 10 minutes.

Remove from the oven and turn out onto a cooling rack.

Serve warm from the oven on its own, or spread with butter. The cake’s delicate sweetness also makes it a great accompaniment to cheese.

Eggless ontbijtkoek collage

If there’s any left over, wrap it in aluminium foil to keep moist.