Thank you Kartu Halo for featuring me! Really appreciate it.
12.17.2014
12.15.2014
Passion 4 Food : A Food Photography Workshop with @ditut
Nah, kali ini giliran Bandung yang saya datangi. Melihat peminat Food Photography di Bandung cukup banyak, mbak Ria Nirwana bernisiatif untuk mengadakan Workshop Food Potography bersama saya. Workshop yang diberi nama Passion 4 Food ini mengambil tempat di KOLONI Artventure selama 2 hari.
Untuk materi handout kurang lebih sama dengan materi Afternoon Delight di Jakarta. Isinya tentu saja dasar-dasar food photography serta tips dan trik menghasilkan foto-foto makanan yang menawan, baik menggunakan kamera DSLR, kamera saku ataupun kamera phone.
2 hari yang sangat seru, 2 hari yang penuh semangat dari peserta Bandung. Terimakasih atas partisipasinya. Senang sekali bisa berbagi ilmu dengan teman-teman baru. Semoga apa yang saya bagi bisa berguna ke depannya yah. Tentunya juga terimakasih untuk mbak Ria Nirwana (@rnirwana) yang sudah memberikan saya kesempatan untuk berbagi dan juga KOLONI Artventure atas kesediannya berbagi tempat.
Sekilas foto-foto workshop dari Instagram. Sebenernya ada tagar khususnya #passionforfood, tapi ternyata kalo sekarang dicek, sudah banyak yg menggunakan tagar tersebut.
Oiya, Siska Knoch dari The Urban Mama berkesempatan menuliskan pengalamannya di sini.
Labels:
bandung,
food photography,
workshop
12.12.2014
Food Photography Workshop di Bandung
Halo halo Bandung! Saya akan berbagi tips dan trik tentang Food Photography rumahan di KOLONI Bandung selama 2 hari besok.
A photo posted by Dita Wistarini (@ditut) on
Labels:
bandung,
food photography,
workshop
12.04.2014
Food Story di Blog Living Loving
Cerita-cerita seru dari workshop food photography saya bersama Living Loving sudah bisa dibaca di blog mereka yah. Silahkan meluncur ke sini.
Terimakasih Nike dan Miranti dari Living Loving. Terimakasih semua untuk yang sudah berpartisipasi juga semua pihak yang menjadi sponsor dan membantu berlangsungnya acara ini.
Special thanks juga buat Denia dan Kitty Manu yang sudah menuliskan tentang pengalamannya ikutan Living Loving Afternoon Delight : Food Story with @ditut di sini dan di sini.
11.28.2014
Let's Have Fun Tomorrow!
Saya happy banget, gak sabar menyambut besok. Kalian udah siap? Senang sekali lihat handout-nya sudah jadi. Kudos to Nike dan Miranti dari Living Loving yang selalu gerak cepat ngerjain semua printilan workshop.
11.26.2014
LLFoodStory Preparation
Yay, handout untuk dibagikan kepada peserta Workshop LLFoodStory sudah hampir siap. Can't wait to meet you all in the next 2 day!
A photo posted by Dita Wistarini (@ditut) on
11.21.2014
5.08.2014
Chia Seed Pudding with Fresh Fruits
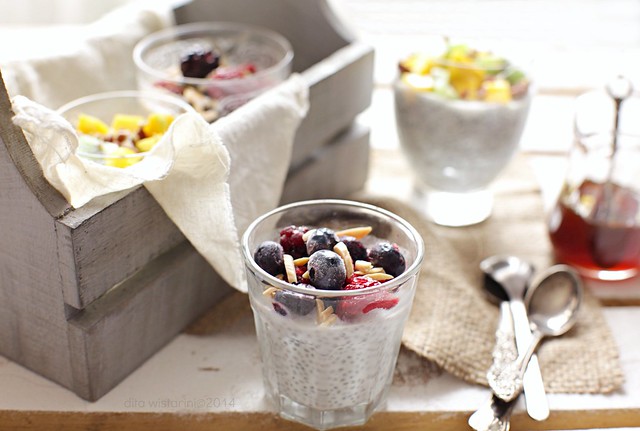
Chia pudding is awesome. I was actually introduced to chia seeds a year ago when I started making green smoothies. People said it's superfood and wonder seeds, because it delivers the maximum amount of nutrients with minimal calories. The seeds are packed with vitamins, minerals and antioxidants that protect your body against free radicals, prevent cancer and fight aging *wow*. Find more about this magic seeds on google, there are tons of sources :).
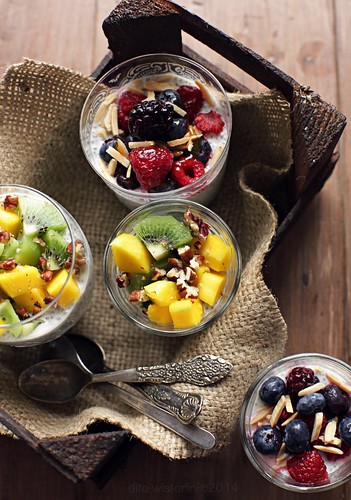
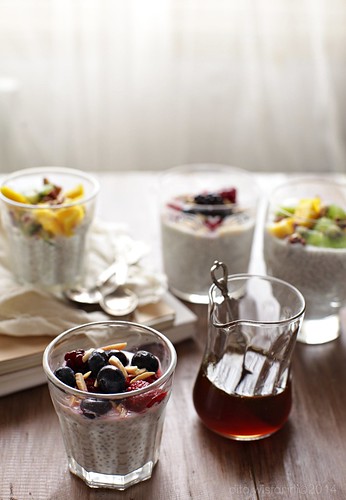
Chia Seed Pudding
1/2 cup raw chia seeds
2 cups unsweetend almond milk
1 cup non-fat yoghurt
1 tbsp raw honey
Directions :
1. Place the chia seeds in a medium bowl.
2. Add the yoghurt, milk, honey, whisk to combine.
3. Cover the bowl tightly with plastic wrap and refrigerate for at least 4 hours (mine is overnight).
4. Before serving, stir the pudding to make sure that there aren't any clumps.
5. Spoon pudding into glasses or bowls.
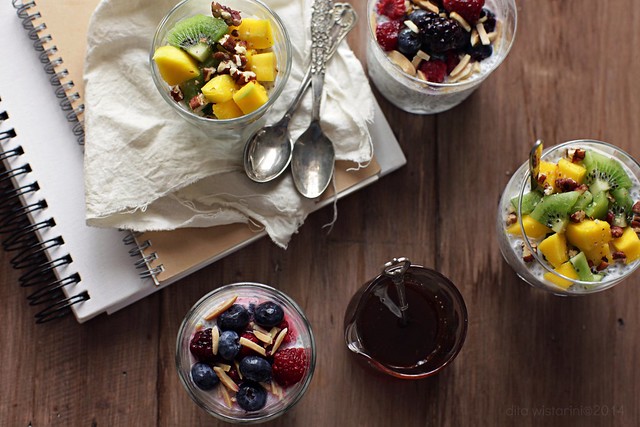
6. And go wild with the toppings. My favorite is mango and kiwi combo.
Labels:
chia seeds,
fruits,
healthy,
Pudding
4.28.2014
7 tahun Merantau di Kuwait di Mamarantau
Kisah perantauan kami selama 7 tahun di Kuwait, terangkum cukup lengkap dalam 2 artikel berikut ini di Mamarantau :
The Neverland Journey (Part 1) : Merantau Tujuh Tahun di Kuwait.
The Neverland Journey (Part 2) : Salmiya dan Tempat Favorite di Kuwait.
Terimakasih Chica dari Mamarantau yang udah ngasih kesempatan buat saya bercerita panjang lebar tentang kehidupan merantau di Kuwait.
3.08.2014
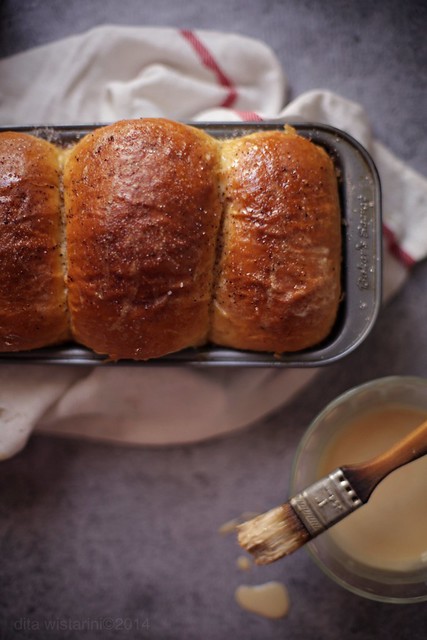
Hokkaido Milk Bread (Tangzhong Method)
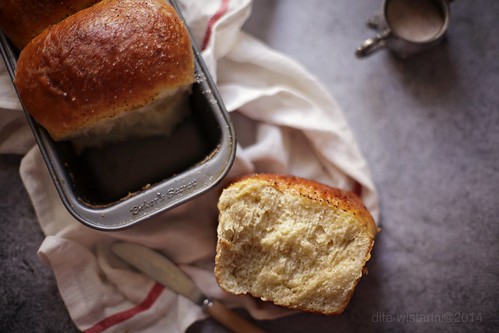
It's my first time using Tangzhong method! And I love it. The texture of this Hokkaido Milk Loaf was, very soft and fluffy, and it remained so even on the 3rd day. Definitely a keeper!
Please note, this recipe is using breadmaker but don't worry I did it manually with my mixer. It took 30-35 minutes for me to knead the dough until it became smooth & elastic.
Ingredients for Tangzhong (sufficient to make 2 loaves)
50g bread flour (1/3 cup)
250ml water (1 cup)(Note: proportion of bread flour to water should always be 1 part bread flour to 5 parts water. However do not be confused with the volume/density of bread flour versus that of water, since 1 part bread flour is 1/3 cup whereas 5 parts water is 1 cup.)
50g bread flour (1/3 cup)
250ml water (1 cup)(Note: proportion of bread flour to water should always be 1 part bread flour to 5 parts water. However do not be confused with the volume/density of bread flour versus that of water, since 1 part bread flour is 1/3 cup whereas 5 parts water is 1 cup.)
Method
1. Mix water with bread flour and stir well until it is no longer lumpy. Cook over medium low heat in a non-stick pot, stirringly constantly with a wooden spoon/rubber spatula/egg whisk, to prevent burning and sticking to the pot.
2. The tangzhong (汤种) mixture is ready once it achieves the temp of 65 degrees celsius or once you notice that "lines" start to appear in the mixture every time you stir it. At this stage, the tangzhong should have the consistency and texture of glue.
3. Remove the pot from heat immediately and transfer the tangzhong into a clean bowl, and cover with clingwrap sticking onto the surface of the tangzhong to prevent it from drying up. The "tangzhong" can be used as soon as it cools down to room temperature. You can keep it chilled in the fridge for 2-3 days but discard it as soon as the mixture starts to turn grey.
Ingredients for 2 loaves (about 1080g in total)
540g bread flour
86g caster sugar
8g salt or 1.5 tsp (1 tsp is about 5.5g)
9g milk powder or 1 tbsp (1 tbsp is about 10g)
11g instant yeast or 3.75 tsp (1 tsp is about 3 g)
86g whisked egg or 1.5 egg (1 average egg is about 60g)
59g whipping cream
54g milk
184g tangzhong dough
49g unsalted butter, melted
Method :
1. First add all the wet ingredients except the butter (egg, whipping cream, milk, tangzhong) into the bread machine, followed by the dry ingredients (bread flour, sugar, salt, milk powder, yeast) and select the "dough" mode. Do not add the melted butter yet. Only when all the ingredients come together to form a rough dough, then add the melted butter and knead until the dough becomes smooth and elastic.
2. Cover the dough with a greased clingwrap and place it in a warm enclosed space to let it undergo the 1st proofing, about 40 min.
3. Transfer the dough to a clean floured surface. Divide the dough into 2 if you are making 2 loaves. Punch down and deflate each dough and divide into 3 equal portions. Roll it round, cover with clingwrap and let it rest for 15 min at room temp.
4. On a clean floured surface, roll out each portion of the dough with a rolling pin into an oval shape. Fold 1/3 from the left edge to the middle and another 1/3 from the right edge to the middle, and seal both edges in the middle. Turn it the other way round so that the sealed edges are facing down. Roll it flat so that it stretches to about 30cm in length. Then flip it back again so that the sealed edges are facing upwards, and roll the dough into a cyclinder, like a swiss roll. Do it for all 3 portions, and place the pieces into a greased loaf tin, cover with greased clingwrap and let it proof in a warm enclosed space for the 2nd proofing,for about 1 hour or until doubled in size.
5. Preheat the oven to 180 degrees celsius. Brush the surface of the bread with egg wash and bake for30 to 35 min, or until it turns golden brown. Remove from the oven and transfer to a cooling rack for cooling.
source : Everybody Eats Well in Flanders
source : Everybody Eats Well in Flanders
3.07.2014
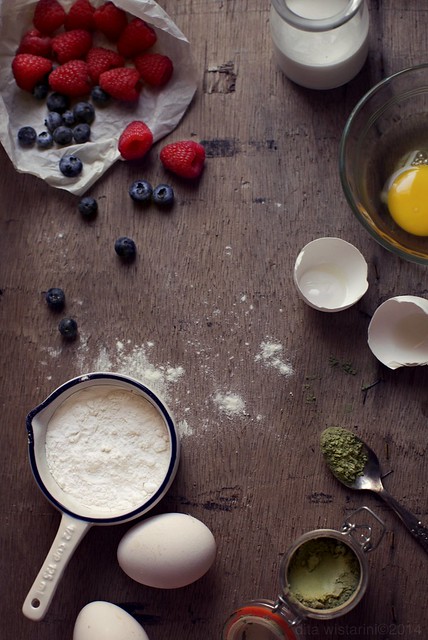
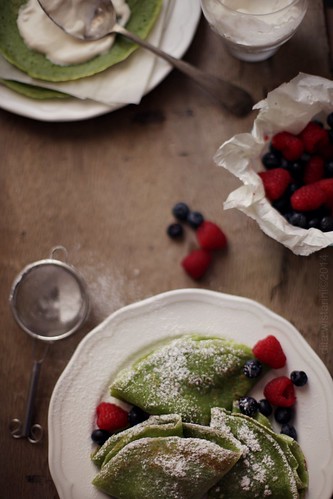
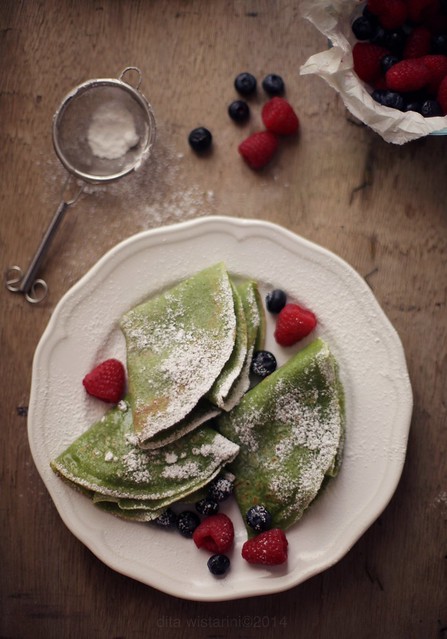
Matcha Green Tea Crêpes
INGREDIENTS
- 2 medium eggs
- 2 Tablespoons butter, melted
- 1 1/2 Tablespoons sugar
- 1 1/4 cup all purpose flour
- 1 1/2 tsp matcha (green tea) powder
- 1 cup + 1 Tbsp milk any kind
- 1/2 tsp pure vanilla extract
INSTRUCTIONS
- Place all ingredients into a blender and blend until smooth. In the meantime, heat a small non-stick skillet over low heat.
- Once preheated, spray with non-stick spray and pour enough batter in to coat the bottom, twirling the batter around to evenly coat the pan. It won’t take much (about 1/4 cup).
- Cook for 1-2 minutes or until the top begins to appear dry and the edges brown. Then flip carefully by loosening the edges with a butter knife and flipping it over in one swift movement.
- Cook for another minute or so on the other side and then transfer to a serving plate. Place sheets of wax paper between crepes to keep fresh. There should be 10-12 crepes depending on the size of your pan.
- Serve warm with white chocolate coconut filling, blueberries and strawberry sauce (recipes below).
- To store, place in an airtight container or ziploc bag with sheets of plastic wrap or wax paper between each crepe. Will reheat well the next day.
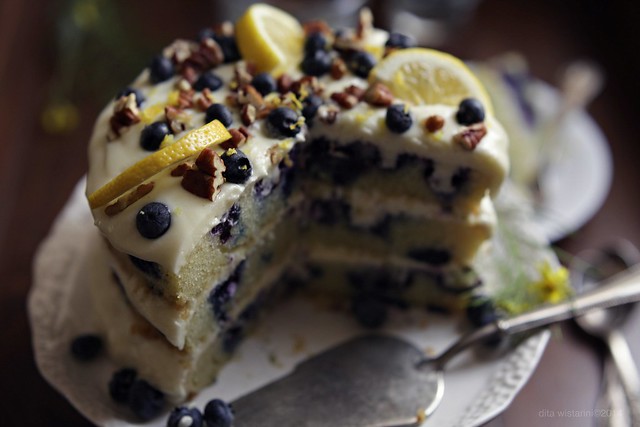
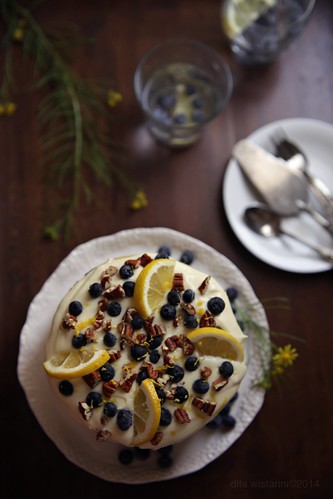
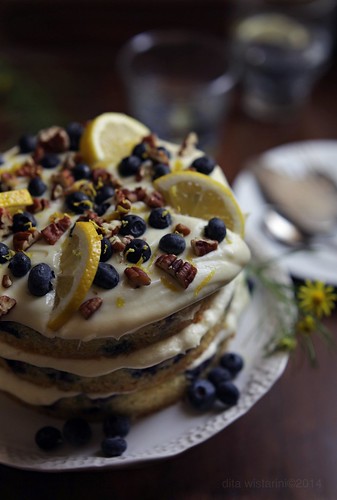
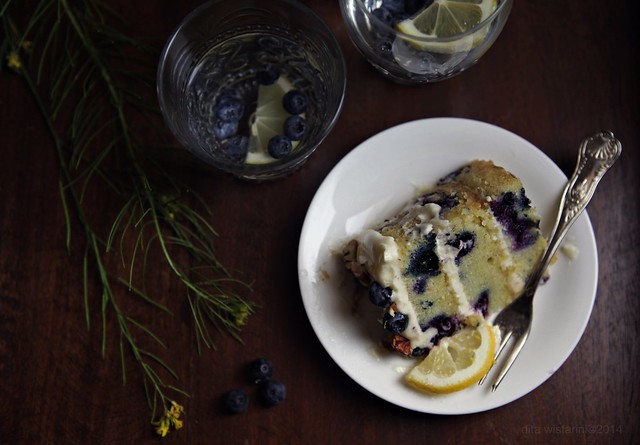
Lemon-Blueberry Cake with White Chocolate Cream Cheese Frosting
Ingredients
- 3-1/3 cups cake flour
- 1/2 tsp salt
- 1/2 tsp baking powder
- 1/2 tsp baking soda
- 3/4 cup (1-1/2 sticks) unsalted butter, room temperature
- 2 cups sugar
- 1/3 cup fresh lemon juice
- 1 tsp grated lemon zest
- 4 large eggs
- 1 cup + 2 Tbsp buttermilk
- 2-1/2 cups fresh blueberries
Instructions
- Preheat oven to 350ºF. Butter and flour two 9-inch cake pans. Line bottoms with rounds of parchment paper.
- Whisk together flour, salt, baking powder and baking soda in a bowl.
- Using electric mixer, beat butter in large bowl until fluffy. Gradually add sugar, beating until blended, scraping down sides of bowl. Beat in lemon juice, zest, then 1 egg at a time. Continue to beat until well blended.
- Add dry ingredients in 3 additions alternating with buttermilk. Fold in berries. Transfer to pans.
- Bake cakes until tester inserted in the centre comes out clean, about 45 minutes. Cool cakes in pans on racks.
- TO ASSEMBLE: Make White Chocolate Cream Cheese Frosting. Turn first layer of cake on platter. Peel off parchment. Spread with 1 cup frosting. Place second layer on top. Remove parchment. Frost remainder of sides and top. Keep in refrigerator until ready to serve.
WHITE CHOCOLATE CREAM CHEESE FROSTING: In a small bowl, microwave 6 oz (180 g) chopped white chocolate for 2 -3 minutes on Medium until almost melted. Stir until smooth. Cool to room temperature.Beat 8 oz. (250 g) cream cheese and 1/4 cup softened unsalted butter until blended. Add melted chocolate. Gradually add 3 cups confectioner’s (icing) sugar, beating until smooth and creamy.
Source :Eat In Eat Out
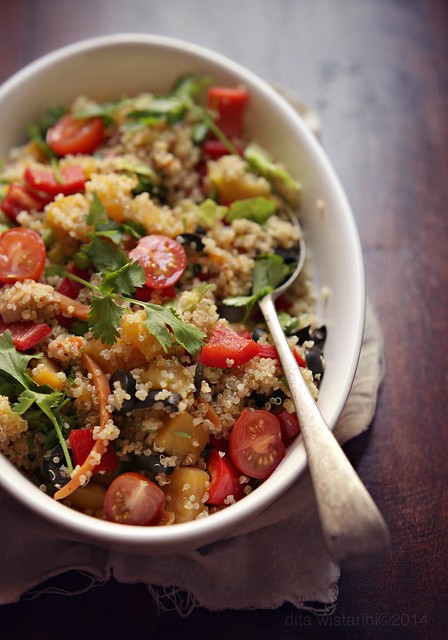
Sweet Potato Quinoa Salad
Ingredients:
1 cup uncooked quinoa
2 medium sweet potatoes (about 1 pound)
1 red bell pepper, cored, and diced
3 tablespoons minced green onion
1 cup sliced black olives
1 avocado, diced
1/4 cup extra virgin olive oil
2 tablespoons freshly squeezed lime juice
1/4 teaspoon chipotle chili powder (or to taste)
1/4 cup minced fresh cilantro
1/2 cup diced cherry tomatoes for garnish
salt
freshly ground pepper
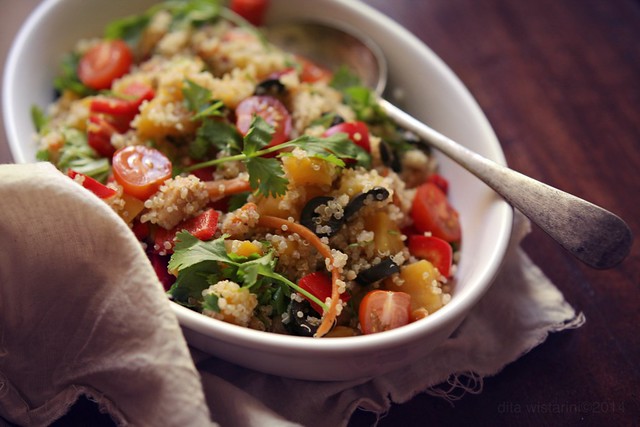
Directions:
1 red bell pepper, cored, and diced
3 tablespoons minced green onion
1 cup sliced black olives
1 avocado, diced
1/4 cup extra virgin olive oil
2 tablespoons freshly squeezed lime juice
1/4 teaspoon chipotle chili powder (or to taste)
1/4 cup minced fresh cilantro
1/2 cup diced cherry tomatoes for garnish
salt
freshly ground pepper

Directions:
Combine quinoa with a large pinch of salt and 2 cups of water in a medium saucepan. Bring to a boil, then reduce heat to a gentle simmer. Cook, stirring occasionally until until the grain is tender. If there is some water remaining, carefully strain the quinoa. Let cool slightly.
Meanwhile, peel the sweet potatoes and dice into 1/2 inch or smaller pieces. Cover with water in a medium saucepan, add a pinch of salt, and bring to boil. Cook until tender, approximately 15 minutes. Drain well and cool slightly.
Toss together the potatoes, quinoa, bell pepper, onion, olive, avocado, and cilantro. Whisk the oil, lime juice, and chili powder together then toss the salad with the mixture. Taste and adjust salt and pepper seasonings. Garnish with cilantro and grape tomatoes. Serve warm with tortilla chips.
Note: If you have a baby, six months or older, at home, this makes delicious baby food too! Reserve a small portion of cooked quinoa and cooked sweet potatoes. Puree with one or two tablespoons of milk and serve.
Serves 6
Source : Good Life Eats
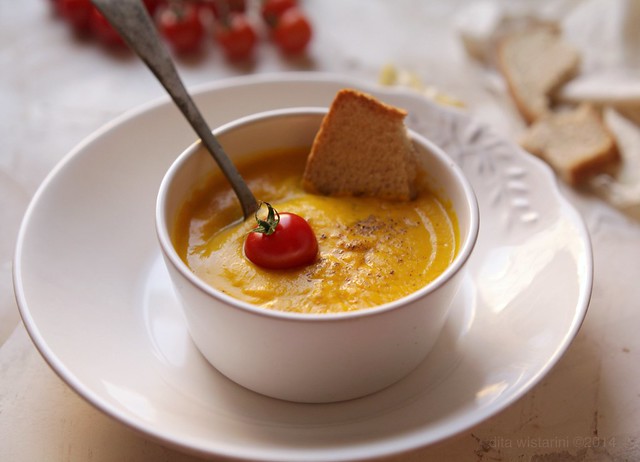
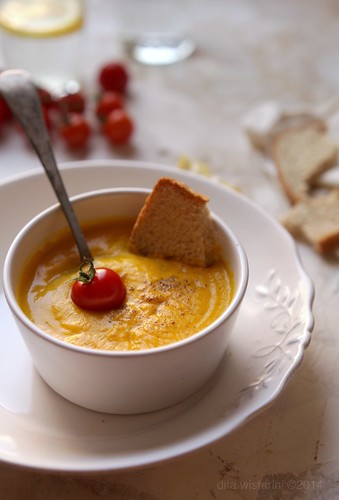
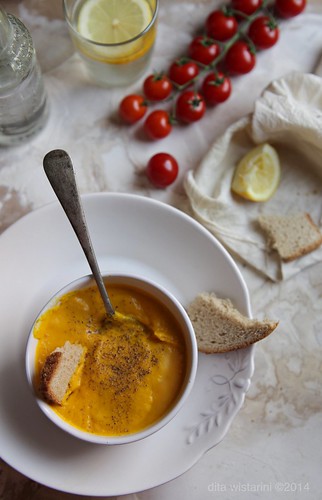
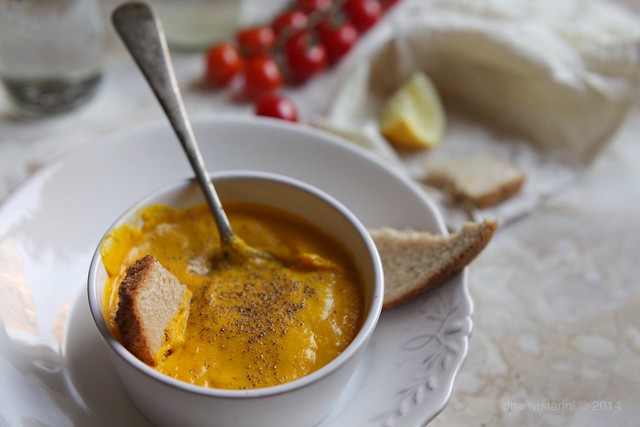
Spicy Ginger Carrot Soup
Ingredients:
- 2 tablespoons coconut oil
- 1 small onion, chopped
- 2 tablespoons ginger, minced
- 2 garlic cloves, smashed and chopped
- 1 teaspoon ground cumin
- 6 carrots, washed and chopped into ½”
- 1 (12-14 oz) can coconut milk, unsweetened
- 1 cup vegetable broth
- 4 tablespoons fresh lemon juice
- Sea salt and black pepper
- Heat coconut oil in a large saucepan over medium-high heat. Add the chopped onions and sauté until translucent.
- Add the ginger and garlic to the onions, and cook for another minute. Add the cumin and stir well, cook until fragrant - under a minute.
- Add the chopped carrots and sauté for a few minutes, then add the coconut milk and vegetable broth. Lower heat to a simmer and cook for 20 minutes, or until the carrots are just tender.
- Puree soup using an immersion blender, or standard blender. (Use caution when using a standard blender. The soup will be hot!) If soup is too thick, add a little extra stock or coconut milk.
- Add the desired amount of lemon juice plus a little sea salt and black pepper. Serve hot.
*Note: Can be made ahead and kept refrigerated for 3-4 days.
source : simplegreensmoothies
Labels:
soup
Subscribe to:
Comments (Atom)


