9.29.2010

KBB #19 : Hip Hip Horayy!! Happy 3rd Birthday!


Hip hip Horay! Happy birthday buat KBB. Gak kerasa udah 3 tahun usianya dan udah hampir 3 tahun pula gue ikutan gabung. Banyak banget ilmu perbakingan yang gue dapet dari klub ini, belum lagi jalinan pertemanan yang sangat akrab, walopun banyak di antara kita yang belum pernah saling bertemu. Semoga ke depannya KBB makin eksis dan temen-temen tetep semangat ngerjain tantangan dan berbagi ilmu-ilmunya *group hugs*.

Awalnya bingung mau bikin apa? Akhirnya diputuskan bikin yang pas gue absen aja. Walaupun sebenernya udah pernah juga bikin lattice pie tapi seringnya yang manis. Sekalian bikin buat bekal mbak Arwen, jadilah gue bikin Creamy Chicken Pie (Puff Pastry-nya beli jadi aja deh ya, gak sanggup bikin sendiri ditongkrongin Neo...hahaha). Sebenernya bikin chicken pie ini sampe 2 kali. Yang pertama salah beli pastry...main samber aja dari fridge di SPM...lah kok taunya Fillo Pastry *dudul*. Kalo mau coba bikin classic puff pastry sendiri (gampang loh), bisa liat resepnya di sini.
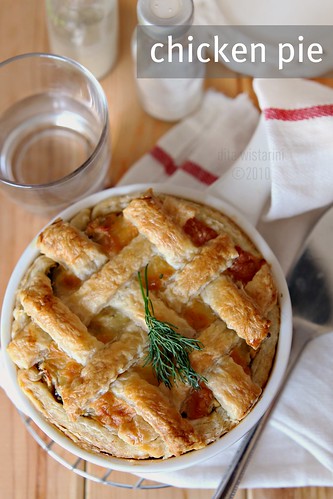
Chicken Pie

Ini resep isian ayamnya :

Creamy Chicken
Bahan :
3 potong dada ayam
oregano
3 bawang putih, geprek
2sdm butter untuk menumis
bawang bombai
daging asap
2sdm tepung terigu
100ml air kaldu rebusan ayam
50ml whipped cream cair
keju parut secukupnya

Cara membuat :
1. Rebus ayam dengan bawang putih dan oregano sampai matang. Angkat, dinginkan, suwir-suwir.
2. Tumis bawang putih dan bawang bombay hingga wangi, masukkan daging ayam suwir dan daging asap. Bumbui dengan pala bubuk, merica dan garam secukupnya.
3. Masukkan tepung terigu, aduk-aduk hingga rata, siram dengan air kaldu. Tuang whipped cream cair. Aduk rata.
4. Taburi keju parut, aduk lagi hingga merata. Sisihkan dan siap digunakan.

chicken pie

Setelah bikin Chicken Pie, lah kok malah ketagihan pengen bikin yang lain-lain yang pernah jadi tantangan KBB. Gak sengaja liat status Riana Pennylane lagi ngomongin Lemon Cake...jiyahhh gue latah pengen bikin Lime/Lemon Meringue Pie. Dikomporin pulak sama beliau. Ya sut...yuk mari brangkat!! Akhirnya bikin pie crust-nya pake resep dari tantangan Banoffee Pie. Isi lime curd-nya hasil googling. Meringue-nya pake resep tantangan Chocolate Swirl Meringue (tapi gue modified).
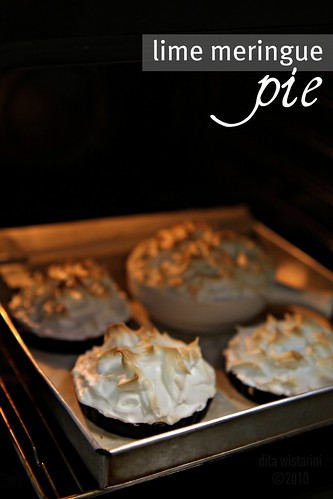
Lime Meringue Pie

Lime Curd
source : All Recipes
(resep aslinya pake lemon, gue ganti lime)

Lime Meringue Pie

Ingredients :
1 cup white sugar
2 tablespoons all-purpose flour
3 tablespoons cornstarch
1/4 teaspoon salt
1 1/2 cups water
2 lemons, juiced and zested (dita - I used 3 limes)
2 tablespoons butter
4 egg yolks, beaten

Directions :
To Make Lemon Filling: In a medium saucepan, whisk together 1 cup sugar, flour, cornstarch, and salt. Stir in water, lemon juice and lemon zest. Cook over medium-high heat, stirring frequently, until mixture comes to a boil. Stir in butter. Place egg yolks in a small bowl and gradually whisk in 1/2 cup of hot sugar mixture. Whisk egg yolk mixture back into remaining sugar mixture. Bring to a boil and continue to cook while stirring constantly until thick. Remove from heat. Pour filling into baked pastry shell.

Terus yang ketiga, rencana awalnya cuman pengen bikin kue sus...lah kok terus pengen bikin Paris Brest...eaaa.....jadilah nguplek di dapur bikin PB. Resep Paris Brest silahkan tengok di sini.

Paris Brest

Sekali lagi....Happy Birthday KBB. Kompak terus ya!


9.05.2010

Indonesian Cheese Cookies - Kaastengels

What's the most popular cookies in Indonesia during Eid Al Fitr? Yes,it's Kaastengels, Ananas Tart (Kue Nastar) and Cheese Sago Cookies (Sagu Keju). We can find these three types of cookies in every house that celebrates the day. I think Eid Al Fitr won't be the same without these delicious cookies :) *ohhh now I miss my homecountry*

kaastengels (cheese cookies)

Kaastengels
source : Sedap Sekejap

Ingredients :
(this is for 2 recipes)
250 gr butter
4 egg yolks
300 gr all purpose flour
50 gr cornflour
1/2 tsp baking powder
200 gr edam/parmessan cheese

100 gr grated cheddar cheese for topping
2 egg yolks to wash the cookies

Directions:
Pre-heat the oven 170˙C
1. Beat butter and egg yolks until soft, add edam cheese, mix it well.
2. Sift all purpose flour, cornflour and baking powder over the batter. Mix until the dough not sticking to the bowl and hand.
3. Roll the dough, shape. Wash it with egg yolks then sprinkle the top with grated cheese.
4. Put it in the oven for 20 minutes.

kaastengels (cheese cookies)

9.04.2010

Indonesian Grilled Chicken ala Moi

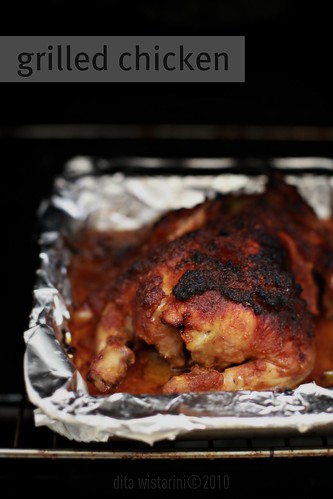
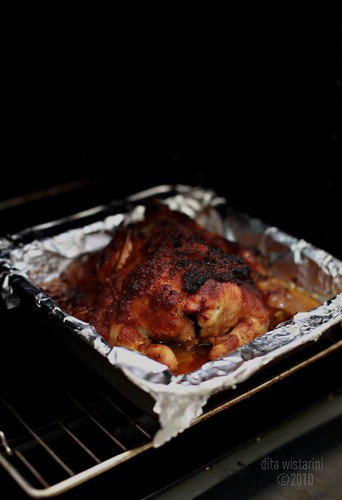
If I don't have much time in the kitchen, grilled chicken to the rescue!!!! Even only Lemon grilled chicken style,it's still yummy.

Ayam Panggang ala mamin (Grilled Chicken)


Indonesian Grilled Chicken

Ayam Panggang ala mamin (Grilled Chicken)

Ingredients :
(sorry no measurement, just put the ingredients as you like)
-1 whole chicken
-kaffir lime leaves
-lemongrass (optional)
-galangal
-oyster sauce
-tomato sauce
-sweet soy sauce
-salt and pepper

Spices to grind :
-shallots
-garlics
-ginger
-candlenuts

Direction :
1. Sautee the grinded spices with kaffir lime leaves, lemongrass and galangal until fragrant.
2. Add all sauce, and salt/pepper to taste.
3. Add chicken, stir until halfcooked. Then, transfer the chicken to the pan, put it in the oven for 1/2-1 hour (170˙C)

And enjoy it with warm cooked rice or yellow rice or rice in coconut milk

9.03.2010

Ramadan Kareem

One nice thing to do during the month of Ramadan is food exchanged between friends and neighbors. Usually sweet dessert or something sweet for iftar (breaking the fast).

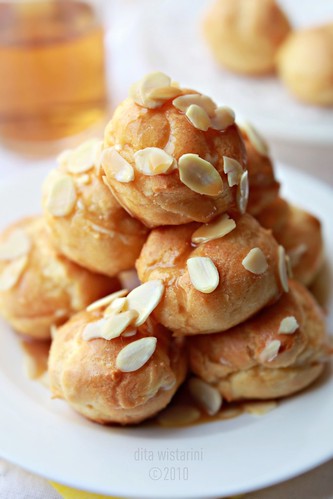
My friend, Santy gave us these Lemon Cream Puff and they were absolutely delicious!!

Sus Lemon

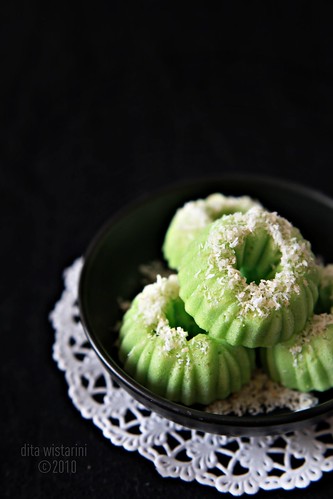
On the next day, another friend of mine mbak Ani sent us Putu Ayu...yum yumm! And I couldn't resist taking picture of this cake...they were gorgeous and so photogenic :).

putu ayu


Santy also shared the recipe. Here's the Lemon Cream Puff's recipe.

Lemon Cream Puffs

cream puff

Ingredients :
1/2 cup water,
1/4 cup butter,
1/2 cup flour,
2 eggs

Directions :
- boil water & butter, add flour, stir until smooth, let stand 5 minutes.
- add egg one at a time, beat well.
- pre heat oven 200 Celcius.
- drop teaspoonful of dough on baking sheet. bake 35 minutes.

lemon cream

Ingredients :
1 egg beaten,
1/3 cup sugar,
juice of 1 lemon,
1/2 tsp vanilla,
2 TBS butter
1 cup whipping cream,
2 tsp sugar

Directions :
- combine egg, sugar, lemon juice, butter, vanilla and bring to boil, medium heat.
- remove and cool quickly (place pan in ice water).
- transfer to bowl, close with plastic wrap, put in the fridge for 1 hour.
- beat whip cream & sugar until stiff, add lemon mixture. stir well.
- split puffs and fill in with lemon cream.

8.24.2010

Kue Lumpur Pandan (tanpa kentang)

Bikin kue lumpur ini sebenernya bukan karena emang lagi pengen, tapi karena gatel pengen merawanin cetakan kue lumpur, hasil berburu di Pasar Mayestik pas mudik kemaren *gayanya*. Bahan-bahannya juga gak lengkap, kentang terakhir udah dibuat sup-nya Neo. Iseng-iseng googling resep kue lumpur tanpa kentang, eh hasilnya banyak aja loh *yiipiiee*. Mampirlah dulu ke MP-nya cik Ine. Lucu juga kayaknya kalo bikin Kue Lumpur Pandan. Abis itu blogwalking ke tempat Hesti Kitchen Notes dan ditemukanlah resep Yasaboga ini :). Dan aku pun memilih resep yang ada di blog Hesti.

Pandan Mud Cake (Kue Lumpur Pandan)

Hasilnya, sukaaaa!! Lembut banget. Memang lebih lembut daripada yang pake kentang. Sampe-sampe Neo kesenengan makannya.

Kue Lumpur
Jajan Pasar - Yasaboga
sumber : Hesti Kitchen Notes

Bahan
75 gr margarin
250 ml air
150 gr tepung terigu
125 gr gula pasir
1/2 sdt vanili bubuk
1/4 sdt garam
5 butir telur
450 ml santan dari 1 butir kelapa, didihkan, dinginkan (aku: 200 ml santan instan + 250 ml air)

Topping:
100 gr kismis, rendam air hangat, tiriskan
100 gr kelapa muda, serut panjang, seduh air hangat, tiriskan
(aku: kismis dan keju parut)

Olesan cetakan, aduk rata (ala Widya Hidayat)(dita-gue gak ikutin cara ini,rada males rempong :D)
1 butir kuning telur
1 sdm minyak goreng

Pandan Mud Cake

Cara Membuat
- Didihkan air dan margarin, masukkan terigu, aduk cepat sampai rata. Masukkan gula, garam dan vanili, aduk rata, dinginkan.
- Panaskan cetakan kue lumpur dengan api paling kecil.
- Masukkan telur satu persatu, aduk rata. Tuangi santan bertahap sampai adonan licin dan rata.
- Olesi cetakan dengan bahan olesan (cetakan bunyi .. Cessss ....).
- Tuang adonan sampai 1/2 tinggi cetakan, tutup, masak sampai setengah matang. Taburi topping, tutup kembali, masak sampai matang.
- Ulangi sampai adonan habis.

Untuk 20 buah (dita-gue jadi 29 buah)

8.21.2010

Vote for Your Pick for PEOPLE'S CHOICE AWARD


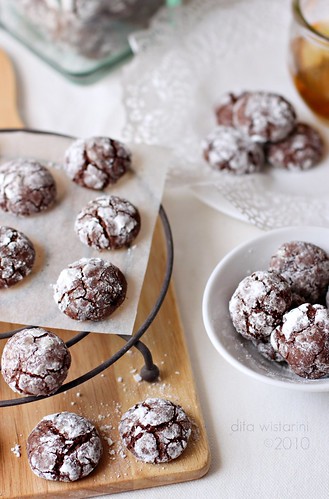
I was on vacation when David Leite from Leite's Culinaria e-mailed me. Remember my last post about Food Photography Contest organized by Leite's Culinaria? I'm so surprised that he told me about my Chocolate-Ginger Crinkle Cookies photo goes to final.

It was the only photo I sent for this contest. I don't have much time to try another recipes and to make so many photos because I was preparing my vacation to Indonesia

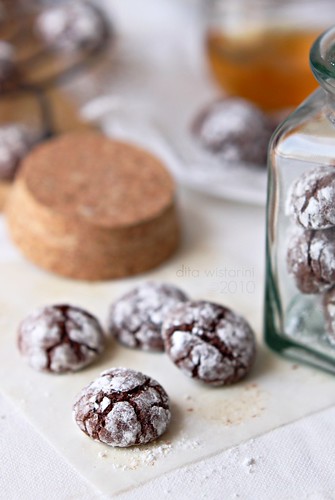
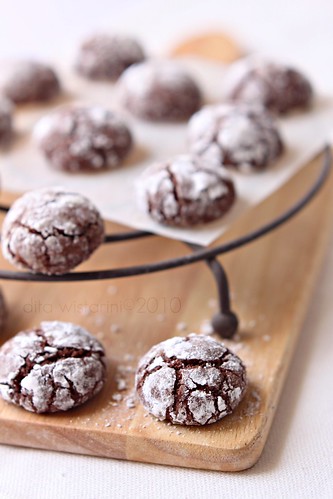
chocolate-ginger crinkle cookies

If my photo is your favorite, you can vote for me here, and I thank you for it :).

6.29.2010

Food Photography Contest : Chocolate-Ginger Crinkle Cookies

Live for food? Love photography? Join the contest here, organized by Leites Culinaria with $700 in prizes.

And I'm sending this photo as an entry.


If you want to participate just follow the link.

Chocolate-Ginger Crinkle Cookies
via Leites Culinaria
by Jennifer Lindner McGlinn
from Gingerbread: Timeless Recipes for Cakes, Cookies, Desserts, Ice Cream and Candy
(Chronicle Books, 2009)
Makes 40 cookies


Ingredients
3/4 cup all-purpose flour
1/4 cup Dutch-process cocoa powder
1 teaspoon baking powder
1/2 teaspoon salt
1 1/2 teaspoons ground ginger
1 teaspoon ground cinnamon
1/2 cup unsalted butter at room temperature
7 1/2 ounces bittersweet or semisweet chocolate, chopped
3/4 cup granulated sugar
1/4 cup packed dark brown sugar
2 large eggs
1 teaspoon vanilla extract
1/4 cup finely chopped crystallized ginger
Confectioners’ sugar for rolling

Method
1. Whisk together the flour, cocoa powder, baking powder, salt, ginger, and cinnamon in a medium bowl.

2. Combine the butter and 3 ounces of the chocolate in a medium, heat-proof bowl. Set the bowl over a saucepan filled with about 1 1/2 inches of simmering water (being sure not to let the bottom of the bowl touch the water) and stir occasionally until the chocolate and butter have melted and the mixture is smooth. Remove the bowl from the saucepan and set aside to cool slightly, about 10 minutes. (You can also melt the mixture in the microwave, heating it at about 20-second intervals and stirring periodically until it is melted and smooth.)

3. Stir the granulated and brown sugars into the melted chocolate mixture, using a wooden spoon or heatproof spatula. Drop in the eggs, one at a time, mixing briskly until smooth. Stir in the vanilla extract and gradually incorporate the flour mixture. Fold in the remaining 4 1/2 ounces of chocolate and the crystallized ginger. Cover the dough with plastic wrap and set in the refrigerator to chill for at least 2 hours or overnight.

4. Position a rack in the middle of the oven and preheat the oven to 350°F (175°C). Line baking sheets with parchment paper.

5. Shape the chilled dough into walnut-size balls, roll in confectioners’ sugar, and arrange them about 2 inches apart on the prepared baking sheets. (If your kitchen is quite warm and the dough becomes too soft, return it to the refrigerator until chilled and fairly firm.) Bake for 10 to 12 minutes, or until the cookies have spread and the tops are cracked.

6. Cool the chocolate-ginger crinkle cookies on the baking sheets set on wire racks for about 2 minutes before removing them to the racks to cool completely. Store the crinkle cookies in an airtight container or in a zip-top bag for up to 4 days.

chocolate-ginger crinkle cookies

6.24.2010

Melting Moments

It's been 2 months since my last post in this blog. So many things happened. The photograph theft issues and our move into a new apartment have drained my energy. And blogging would be the last thing in my mind.

I've been busy unpacking stuffs and decorating room by room in our new nest. Now, everything's almost back to normal except the photo theft issues (yup the thefts are still around), we start a new chapter in the new apartment.

2 years in the old apartment and we had such a really sweet memories. Especially in our artful life. We've done so many artful things.

Our Artful Life
sweet memories from the old apartment

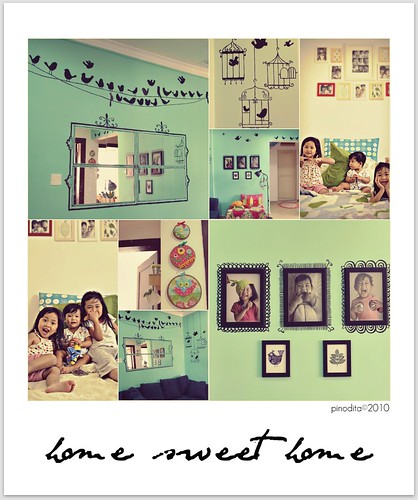
And this is what I've done for the past 2 months, painting and decorating the new place.

our artful life : new mural
new chapter in the new place

Ok, enough about our story :), now I'm ready to rock on my kitchen. This would be the first recipe from my new kitchen and the first food photos from my new food photos corner. Lucky me, the new flat has a room (kids' room) with abundant of light in the morning *yaayy*. And I think this would be my favorite spot to take picture.


For the recipe I just used what I've left in my pantry. Actually this is Arwen and Leia's project. They did it, I just supervised them, so you can imagine how easy this one.

Got the recipe from my favorite site Joy of Baking.

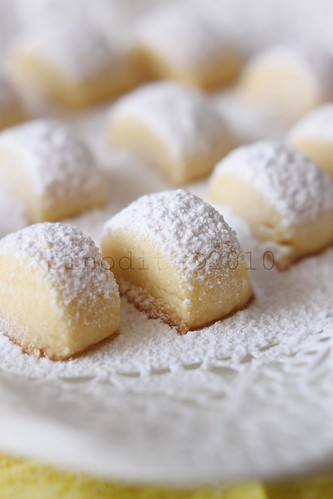
melting moments : shortbread cookies

Melting Moments
source : Joy of Baking
Ingredients :
Melting Moments Recipe:

1 1/2 cups (195 grams) all purpose flour (dita-I use 1 cup)

1/2 cup (60 grams) cornstarch (corn flour) (dita- I use 1 cup)

1/4 teaspoon salt

1/4 cup (30 grams) powdered (confectioners or icing) sugar

1 cup (227 grams) unsalted butter, room temperature

1 teaspoon pure vanilla extract

Topping:

1 cup (110 grams) powdered (confectioners) sugar, sifted

Directions :
In a medium sized bowl whisk together the flour, cornstarch and salt. Set aside.

In the bowl of your electric mixer (or with a hand mixer), beat the butter and sugar until light and fluffy (about 2 minutes). Beat in the vanilla extract. Add the flour mixture and beat until incorporated. Cover and refrigerate the dough for at least one hour or until firm.

Preheat oven to 350 degrees F (177 degrees C) and place rack in center of oven. Line two baking sheets with parchment paper.

When dough is firm, form into 1 inch (2.5 cm) balls and place the cookies on the prepared baking sheets spacing about 1 inch apart. Bake for about 12 - 14 minutes or until the edges of the cookies start to brown. Remove from oven and place on a wire rack to cool for about 5 minutes.

Meanwhile, line another baking pan or tray with parchment or wax paper. Sprinkle about half of the confectioners (powdered or icing) sugar onto the bottom of the pan and then place the slightly cooled cookies on top of the sugar. Put the remaining sugar in a fine strainer or sieve and then sprinkle the tops of the cookies (or you can just roll the cookies in the sugar).

These cookies store very well. Place in an airtight container between sheets of wax paper and they will keep a couple of weeks.

Makes about 3 dozen cookies.

I made a slight modification for the recipe. I used 1 cup of flour instead of 1 1/2 cups, then added 1/2 cup to the corn flour. So the cookies would be more delicate and melting in your mouth.

For the coating, you can create as your liking. I made the caramel coating cookies because I missed the day when I was just a kid eating Lontong Paris cookies :) (it's kind of Indonesian shortbread cookies with caramel coating and chopped nuts).

caramel coated shortbread cookies


6.19.2010

KBB#18 : French Macarons - Chocolate Peanut Butter

O my o my....jantungan banget waktu baru terima surat cinta dari KBB. Gak nyangka kalo tantangan kali ini adalah bikin French Macarons....DANG!!!!!

Gue punya pengalaman buruk dengan FM. Udah 11 kali bikin tapi gagal semua. Bayangin berapa banyak putih telur dan bubuk almond yang terbuang? :(

Tapi karena ini tantangan KBB, ya mau gak mau harus dilakoni. Bismillah ajalah. Karena kebetulan gue mau mudik Ke Indonesia, Arfi ngasih kesempatan untuk bikin duluan sebelum gue sibuk nyiapin kepulangan gue ke Indonesia *thanks Fi*

Akhirnya, tepat di hari ulangtahun gue, setelah semua bahan-bahan siap, gue nekad dan sok percaya diri ngerjain tantangan ini. Tentunya dengan harap-harap cemas semoga mac feet-nya keluar.

Waktu mau ngeluarin macaron dari oven sambil ngintip...LOL...gak berani buka mata lebar-lebar, takut kecewa kakinya gak keluar. Pas oven dibuka...loh loh apa tuh?

Yipeeeeee!!!! French Macarons-nya ada kakinya!!!!!!!!!!! Mari kita mac feet dancing!!!!! Hadoohhh masa harus bikin 12 kali dulu dan di hari ultah gue untuk bisa dapetin feet?? hahaha....macaronsnya pinter gak mau ngecewain the birthday girl.

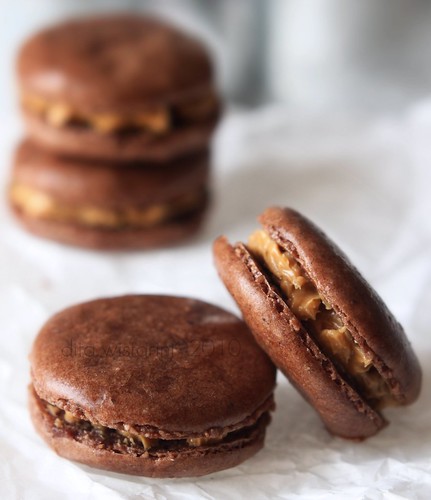
And I proudly present...my French Macarons! (walopun kakinya gak gendut gendut,tapi gue udah cukup puas)

chocolate peanut butter macarons

Snickers Macarons
source : helen tartelette
Makes about 16

For The Shells:
3 egg whites (I like to use 1-2 day old egg whites)
50 gr. granulated sugar
200 gr. powdered sugar (minus 2 Tb)
55gr. almonds
55 gr. peanuts
2 Tb cocoa powder

kbb#18 : french macarons

For the whites: the day before (24hrs), separate your eggs and store the whites at room temperature in a covered container. If you want to use 48hrs (or more) egg whites, you can store them in the fridge.In a stand mixer fitted with the whisk attachment, whip the egg whites to a foam, gradually add the sugar until you obtain a glossy meringue. Do not overbeat your meringue or it will be too dry and your macarons won't work. Combine the almonds, peanuts, cocoa powder and powdered sugar in a food processor and give them a good pulse until the nuts are finely ground. Pass through a sieve. Add them to the meringue, give it a quick fold to break some of the air and then fold the mass carefully until you obtain a batter that flows like magma or a thick ribbon. Give quick strokes at first to break the mass and slow down. The whole process should not take more than 50 strokes. Test a small amount on a plate: if the tops flattens on its own you are good to go. If there is a small beak, give the batter a couple of turns. Fill a pastry bag fitted with a plain tip (Ateco #807 or #809) with the batter and pipe small rounds (1.5 inches in diameter) onto parchment paper baking sheets. Preheat the oven to 300F. Let the macarons sit out for an hour to harden their shells a bit and bake for 8-10 minutes, depending on their size. Let cool. If you have trouble removing the shells, pour a couple of drops of water under the parchment paper while the sheet is still a bit warm and the macarons will lift up more easily do to the moisture. Don't let them sit there in it too long or they will become soggy. Pipe or spoon some ganache on one shell and sandwich with another one.
If you use fresh whites, zap them up in the microwave on medium high for 20 seconds to mimic the aging process.

4.14.2010

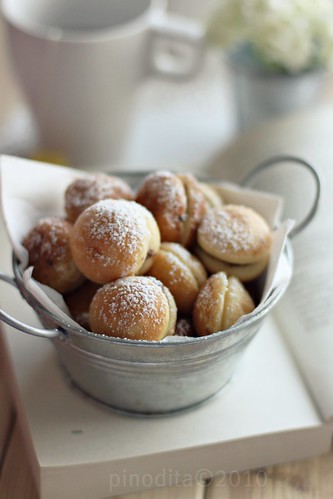
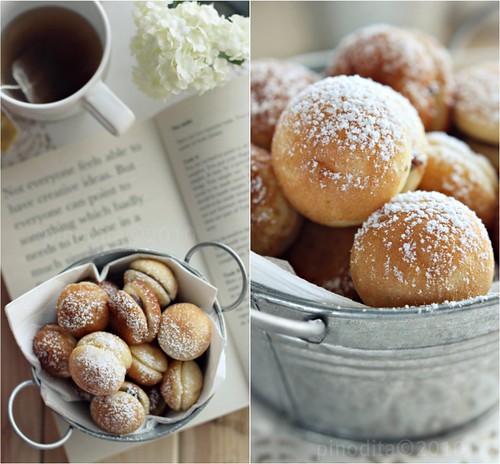
Poffertjes

Nih dia poffertjes yang lagi hits di NCC. Thanks to mbak Wati yang udah rekomendasiin resep ini. Bener...dari beberapa resep yang pernah gue coba, resep ini yang paling nampol.

poffertjes


POFFERTJES
Source: Resep Pilihan Ahli Masak PRIMARASA FEMINA "Hidangan Peranakan Belanda & Cina"
Modifikasi sedikit oleh mbak Wati, di bahan dan cara membuat

Bahan:
250 gr tepung cakra (kl aku, 125 gr tepung segitiga + 125 gr tepung cakra) (dita-pake tepung all purpose)
75 gr gula pasir halus
1/2 sdt ragi instan (kalo aku 1 sdt)
3 butir telur
400 ml susu cair (kl mo lbh yummy, 100 ml susu evaporated + 300 ml susu cair biasa)
50 gr mentega, dicairkan
1/4 sdt garam
50 gr keju cheddar, potong dadu

Pelengkap:
Gula bubuk, untuk taburan

Cara Membuat:
Aduk rata tepung, gula dan ragi instan. Sisihkan.

Hangatkan susu cair (jgn sampai mendidih). Kocok lepas telur. Masukkan susu hangat, aduk rata.

Tuangkan adonan telur susu ke dalam wadah berisi campuran tepung. Aduk/uleni hingga rata dan licin. (kl aku pake mikser dgn kocokan yg buat roti).

Masukkan mentega cair dan garam. Aduk rata.

Istirahatkan adonan kurleb 15 menit (kalo aku 30 menit).

Panaskan cetakan poffertjes. Olesi mentega (sekali saja diawal). Tuang adonan setengah tinggi cetakan. Tunggu sampai permukaannya berlubang2. Sementara itu, isi adonan di cetakan yg belum terisi. Tunggu sebentar. Beri potongan keju dadu. Adonan pertama yg sudah setengah matang dicungkil dgn tusuk sate, kemudian digabung diatas adonan yg ada kejunya (mudah2an ngerti ya maksudnya..). Putar2 dgn tusuk sate, hingga adonan membulat dan matang.

Taruh diatas piring saji, taburi gula bubuk. Hidangkan.

poffertjes collage

4.12.2010

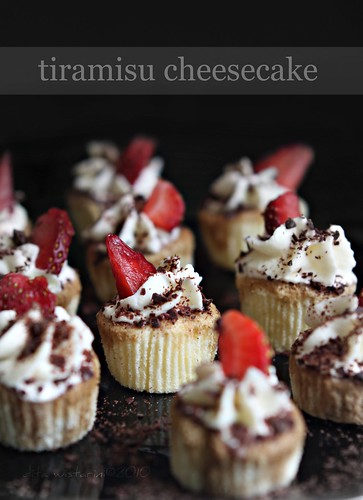
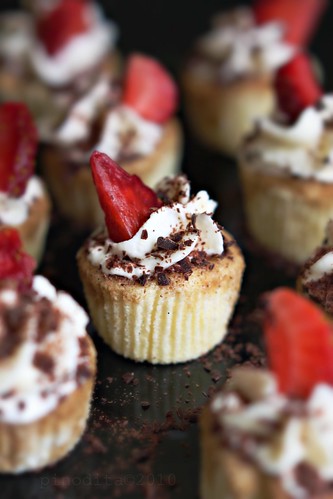
Tiramisu Cheesecake

Sebenernya cake ini aslinya pake Mascarpone Cheese yang merupakan ciri khas tiramisu. Tapi berhubung gak ada mascarpone, gue substitute dengan cream cheese. Untuk frostingnya gue juga pake resep sendiri, krim kental dikocok sampe mengembang terus campur dengan cream cheese dan sedikit butter plus gula icing. Sengaja gue cetak jadi cupcake supaya enak makannya. Buat yang punya anak-anak, sirup kopi bisa diganti dengan coklat (pake coklat bubuk, caranya sama dengan bikin sirup kopi)

Step-nya sih keliatannya aja panjang, tapi sebenernya nggak kok. Rasanya? Recommended banget!

Tiramisu cheesecake


Makasih ya mama Pindi aka Findrie K. Irawan. TFS!

Tiramisu Cupcake
(in Bahasa Indonesia)
source : Mama Pindi's Kitchen

I. Mascarpone Cheese Cake

Bahan:
(campur dan ayak)
50 gr tepung terigu
50 gr tepung maizena
Bahan:
60 gr mentega tawar
250 gr Mascarpone cheese, biarkan pada suhu ruang
120 ml whip cream
5 kuning telur
5 putih telur
1/8 sdt garam
125 gr gula pasir halus
1 batang Vanilla, srapped ambil bagian dalamnya

Caranya:
Siapkan loyang cupcake, Pasang oven 150 derajat Celsius, masukkan alas loyang yang diisi air panas.

Campur mentega, Mascarpone cheese, whip cream, vanilla pod & batangnya dalam wadah.
Didihkan dengan api kecil, aduk hingga lembut, angkat dari api (diamkan sampai uapnya hilang).

Masukkan campuran tepung, aduk rata. Masukkan kuning telur aduk rata. Buang batang Vanilla. Sisihkan.

Kocok putih telur hingga berbusa, masukkan gula sedikit demi sedikit sambil terus dikocok sampai terbentuk kerucut-kerucut tumpul (soft peak).

Tuang 1/3 adonan putih telur ke adonan mascarpone cheese, aduk rata. Tuang campuran ini ke sisa adonan putih telur, aduk rata.

Tuang adonan ke loyang, panggang dengan cara au bain marie, kurang lebih 20-30 menit sampai permukaan matang, kuning keemasan. Keluarkan dari oven. (Cara test kue sudah matang atau belum, tusuk dengan tusuk gigi, bila adonan lengket di tusuk gigi maka kue belum sepenuhnya matang, bila sudah tidak ada yg lengket, tandanya kue sudah matang secara menyeluruh).

Setelah benar-benar dingin, lepaskan cake dari loyang, taruh di atas rak kawat hingga dingin.

II. Coffee Syrup
1 sachet bubuk kopi instan, seduh air hangat (pilih yang bau kopi-nya strong)
2 sdm Rhum (optional)
2 sdm Kahlua (optional

III. Mascarpone Frosting
1 cup heavy cream
8 ounces mascarpone cheese, room temperature
1/2 cup gula halus
Kocok cream dengan mixer hingga mengembang dan stiff peak (kaku). Di wadah lainnya, kocok mascarpone dan gula hingga halus. Kemudian campur whipped cream kedalam mascarpone hingga rata.

Tiramisu cheesecake

IV. Penyelesaian
Bila cup cake sudah dingin, berikan beberapa sendok cairan Kopi hingga cake terlihat coklat. Jangan ragu untuk memberikan kopi yang banyak hingga meresap ke dalam kue, karena ini yang akan membuat rasanya beda. Masukkan mascarpone frosting ke dalam plastik segitiga dan gunakan tip yang diinginkan lalu semprotkan ke atas masing-masing cupcake hingga habis. Taburi coklat bubuk, lalu hias dengan coklat serut. Tambahkan buah dan daun mint sebagai pemanis.

4.09.2010

Orange Chiffon Cake

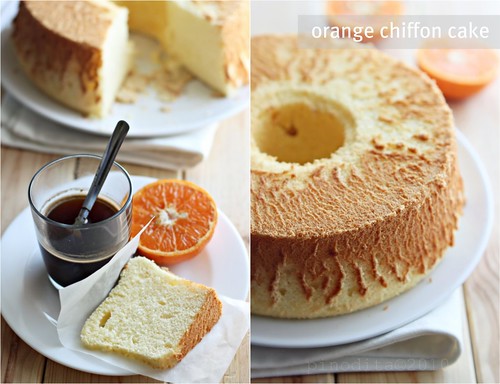
Masih dalam rangka keranjingan bikin chiffon cake, gue udah gak tau lagi ini percobaan yang keberapa XD. Gue suka resep ini dan tekstur cake yang dihasilkannya. Dan yang pasti resep ini hemat telur.

Sengkyu Mindy buat rekomendasi resepnya.

orange chiffon cake

Orange Chiffon Cake
source : happyhomebaking

Ingredients:
100 gr flour
1 1/2 tsp baking powder
1/2 tsp salt
3 egg yolks
40 gr caster sugar
50 ml vegetable oil
50 ml water
25 ml fresh orange juice
Zest of orange

3 egg whites
40 gr caster sugar

orange

Directions:
Preheat oven to 170C

Combine the flour, the baking powder and the salt. Set aside

In a mixing bowl, whisk manually the egg yolks the add the sugar in 3 times. Whisk until the mixture becomes sticky and turns pale. Drizzle in the oil, whisking at the same time until the mixture is well combined. Repeat the same with the water, followed by the orange juice. Sieve the flour mixture over the yolk mixture and whisk until fully incorporated into the batter. Add in the lemon zest (if used) and combine well

In a clean, dry mixing bowl, beat egg whites with an electric mixer until mixture becomes frothy and foamy. Gradually beat in the sugar and beat on high speed until stiff peaks form. Then add the beaten egg whites into the yolk batter in 3 separate times then folding gently with a spatula until just blended after each adding

orange chiffon cake

Pour batter into a 18cm (7 inch) tube pan (do not grease the pan). Tap the pan lightly on a table top to get rid of any trapped air bubbles in the batter. (Note: my pan is bigger, that's why the cake doesn't look so high). Bake for 45 to 50 mins or until the cake surface turns golden brown and a skewer inserted into the centre comes out clean. Remove from the oven and invert the pan immediately. Let cool completely before unmould. To remove the cake from the pan, run a thin-bladed knife around the inside of the pan and the center core. Release the cake and run the knife along the base of the pan to remove the cake

orange chiffon cake

4.06.2010

Lawan Pencurian Foto & Konten Blog


Pencurian foto dari blog ataupun konten blog, menurut saya sudah sampai tahap memprihatinkan. Gak tanggung-tanggung, sekarang bukan cuman 1-2 foto atau 1-2 resep yang di copy paste tanpa ijin dari sebuah blog tapi bisa juga 1 blog dicopy semua isinya dan diterbitkan dalam bentuk buku :(. Silahkan baca kasus mbak Pippi di sini dan di sini.

Sejalan dengan makin menjamurkan penerbit-penerbit kecil/indie, sepertinya saat ini begitu mudah orang menerbitkan buku. Tinggal comot karya orang kemudian terbitkan jadi buku.

Beberapa hari yang lalu saya juga mendapat laporan, seorang rekan Food Blogger, blognya diterbitkan juga oleh sebuah penerbit tak bertanggungjawab (saat ini rekan saya tersebut sedang mencari bukti-buktinya)...ck...ck...ck...

Marah, sedih, jengkel, kesal, tak tahu lagi apa yang harus kami ucapkan. Sudah terlalu sering kasus-kasus seperti ini terjadi. Berlanjut terus dan terus. Tak ada perlindungan bagi para blogger yang karya-karyanya dicuri/dipakai tanpa ijin.

Seandainya mereka tahu betapa panjangnya proses penciptaan sebuah karya yang kami pajang di blog kami. Atau memang mereka tak peduli, yang penting perut mereka kenyang. Atau memang mental copy paste sudah menjadi hal yang biasa, bukan lagi sesuatu yang tabu. Dan mencuri bukan lagi barang haram.

Dan sekarang semua pencuri-pencuri itu sedang tertawa-tawa mengeruk keuntungan atas karya-karya kami dan karya teman-teman blogger lain.

Apa yang bisa kami lakukan saat ini adalah menggalang kekuatan para blogger untuk melawan pencurian karya cipta dari blog. Sampai kapan karya-karya kami bisa digunakan semena-mena seperti ini? Dikomersialisasikan secara tak bertanggungjawab.

Untuk itu, saya dan rekan-rekan Food Blogger mengajak Anda para blogger untuk mengkampanyekan gerakan "Lawan Pencuri Foto & Konten Blog" di fanpage situs jejaring sosial facebook. Di halaman tersebut, kita bisa saling berbagi informasi tentang pencurian karya dari blog dan mengumpulkan bukti-buktinya. Mari berjuang bersama mendidik lebih banyak orang untuk menghargai dan menghormati hasil karya orang lain. Jika Anda menemukan karya dari blog dibajak/dicuri untuk kemudian diterbitkan menjadi sebuah buku ataupun dipakai tanpa ijin di website-website atau blog-blog komersial, jangan ragu untuk mempublikasikannya di blog Anda atau share di wall fanpage "Lawan Pencuri Foto & Konten Blog", cantumkan nama penerbit nakal-nya.

Blogging juga ada etikanya,jika menggunakan foto/konten/hasil karya orang lain dari blog lain, minta ijin/cantumkan sumbernya sebagai bentuk penghargaan atas karya cipta.


related links :
Lawan Pencurian Foto & Konten Blog by MayIrianti
Lawan Pencurian Foto & Konten Blog Fanpage-Facebook

4.01.2010

(Baking with Kids) Cheese Biscuits

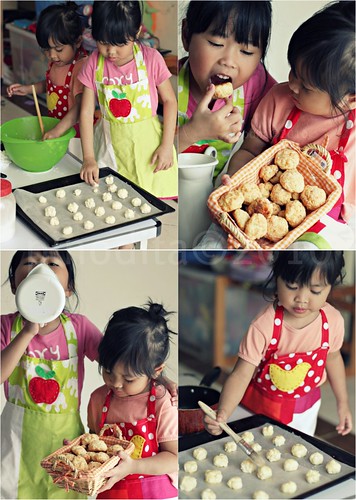
Salah satu kegiatan pelepas stres dan relaksasi buat Arwen dan Leia, selain menggambar dan crafting adalah baking. Biasanya gue pilih resep-resep yang simple dan gak ribet juga anti gagal :D.

Postingan ini sebenernya untuk episode Cooking Friday, tapi berhubung videonya blm diedit, jadi resepnya dulu aja ya. Video menyusul ya.

Resep ini super duper gampil, gak perlu pake mixer pula.

cheese biscuits


Cheese Biscuits
source : Food Network

Ingredients :
2 cups self-rising flour (gue pake all purpose flour)
1 teaspoon baking powder
1 teaspoon sugar
1/3 cup shortening
3/4 cup grated sharp Cheddar (gue pake permessan)
1 cup buttermilk (gue pake yogurt)
Salt
1/4 stick butter, melted

Directions :
Preheat oven to 350 degrees.

In a medium bowl, mix flour, baking powder, salt, to taste, and sugar together using a fork; cut in shortening until it resembles cornmeal. Add cheese. Sir in buttermilk all at one time just until blended. Do not over stir.

Drop by tablespoonfuls, or use an ice cream scoop, onto a well-greased baking sheet. Brush dough with melted butter. Bake for 12 to 15 minutes.

CHEESE BISCUITS

Bageeuss! Maling Fotonya Kabur

31 Maret 2010, saya berusaha menghubungi kembali pihak penerbit IN AzNA BooKs di Bantul, Jogja, melalui e-mail. Dan apa yang terjadi? Seperti yang sudah diduga banyak orang, pihak tak bertanggungjawab ini menghilang. E-mail yang saya tujukan padanya bounced terus, alamat e-mail yang bersangkutan sudah dinonaktifkan. Saya kejar ke Facebook-nya juga sudah non aktif.

Dan kenyataan seperti ini yang saya dapatkan dari teman saya yang mewawancarai narasumbernya :

"..Memang banyak sekali penerbit amburadul, Mas..! Kantor kayak kos-kosan dengan satu komputer. Mereka terima naskah apa aja asal laku. Biasanya satu naskah yang diserahkan, dibuat penulisnya selama satu-dua minggu. Paling laku buku2 tentang doa, perempuan shaleh, dan tips-tips. Buku novel juga laku asal Islami dan pengarangnya rada Arab namanya. Gimana cara bikin seminggu 1 buku? O itu mah gampang, Mas.... recycle aja dan pake nama samaran....Duit langsung bisa dibayar, Mas...tapi aku ga mau cetak ulang. Malu, aku"

Menyedihkan! Jadi bisa Anda bayangkan, maling-maling foto dan isi blog masih banyak dan akan terus berkeliaran mengintai karya-karya Anda.