12.28.2009

Chocolate Cream Cheese Loaf Cake

Paduan keju dan coklat selalu yummy. Sebelum keburu lupa, buat yg kemaren nanya, ini resepnya ya :)

Chocolate Cream Cheese Loaf Cake

Chocolate Cream Cheese Cake
source : Thibeaultstable

Ingredients

Mixture ‘A’
250g cream cheese, softened
60g castor sugar
1 egg
1 teaspoon vanilla

1. Beat cream cheese with sugar until light and fluffy
2. Beat in egg until well incorporated and set it aside

Mixture ‘B’
180g butter, softened
150g sugar
3 eggs
3 tbsp cocoa
120g self-raising flour
1 tsp baking powder
2 teaspoons vanilla

chocolate cream cheese loaf

1. Sieve flour, baking powder and cocoa together and put aside
2. Beat butter and sugar until light and fluffy
3. Add egg, one at a time and beat until well incorporated into mixture
4. Fold flour mixture into egg mixture.
5. To assemble, pour half of mixture ‘B’, then all of mixture ‘A’, then followed by the remaining mixture ‘B’.
6. Bake in preheat oven at (350°F)180C for 45-50 min or until skewer comes out clean.

12.24.2009

Raspberry Jelly Swiss Roll Cake

Jaman masih kecil dulu siapa sih yang gak tertarik sama Swiss Roll Cake aka Bolu Gulung. Udah capek-capek digulung sama yang bikin eh sama yang makan dibuka gulungannya :D. Kejadian juga sama anak-anak gue. Emaknya udah deg-degan nggulung cakenya, begitu udah dipotong-potong, kuenya dibuka gulungannya sama mereka :P.

Resep ini bukan resep bolgul ala Indonesia yang telornya seabrek-abrek. Cukup 3 telor dan hasilnya empuk dan lembut.

Silahkan dicoba! Bikin bolu gulung gak sesusah yang dibayangin kok

Raspberry Jelly Roll Cake

Swiss Roll Cake

Recipe Ingredients
3 eggs
1 cup granulated sugar
1/3 cup water
1 tspn vanilla
3/4 cup all-purpose
1 tspn baking powder
1/4 tspn salt
Powdered Confectioner's sugar - for dusting
2/3 cup spreadable raspberry jelly/jam (or any other filling of your choice)

Method
Heat oven to 375 deg F. Line a baking pan, preferably (15 × 10 × 1) inches, with cooking parchment paper or aluminum foil. Spray with non-stick cooking spray.

Beat eggs in small bowl with electric mixer on high speed for about 5 minutes or until very thick and lemon colored. Gradually beat in the granulated sugar. Beat in water and vanilla on low speed. Finally add the flour, baking powder and salt, beating just until batter is smooth. Pour into the prepared pan, spreading out well to form a thin even layer.

Bake for 12 to 15 minutes (NOT MORE) until toothpick inserted in center comes out clean. Spread a clean kitchen towel on the platform and sprinkle some powdered sugar on it. Now loosen the edges of the cake, then turn the whole pan upside down upon the towel. Carefully remove the paper from the top. Trim off the hard edges of the cake, and while its hot, carefully roll cake lengthwise from one end to the other. Keep the roll as tight as possible, but apply very little pressure so as not to crack the cake a lot. A few cracks are normal, so don't worry. it is going to be covered with frosting later! Now refrigerate the rolled cake for 40 mins to an hour. (This was the only change I made from the About recipe video)

Remove the cake from fridge and unroll it gently and remove the towel. Beat the raspberry jelly/jam slightly to soften; it's better to use a spreadable jelly. Now spread it evenly over the cake. Do NOT use a lot of jelly as it would ooze out of the cake once you finish rolling it up again.

Raspberry Jelly Roll Cake

Now again roll up the cake, which should be fairly easier this time. If you are not ready to serve, place it in the fridge again, so it becomes a bit harder and easier to slice. When ready to serve, place it on a serving dish, with the seams facing down. Sprinkle generously with confectioners sugar, making sure you cover all the flaked ends or cracks and edges that you incurred while rolling it up. You can even cover the whole cake with chocolate icing or any other frosting. Gently slice at a 30deg angle to form beautiful raspberry swiss rolls.

12.21.2009

New York-Style Homemade Bagels

Permisi...nongol bentar ya sharing resep...
Ternyata emang gue bener-bener gak bisa ninggalin dunia baking dan food photography. Walopun sekarang rada kurang leluasa untuk masuk dapur dan motret tapi sesekali gue perlu refreshing baking.

Entah kenapa ujug-ujug pengen banget makan bagel. Udah ngincer resepnya mbak Wien Wardana, tapi akhirnya gue nyobain satu resep ini yg konon otentik rasanya seperti New York Style Bagels yang kondang itu.

Rasanya enaakkkk!! Dicocol cheese spread sedap banget!

IMG_3922

Authentic New York-Style Homemade Bagels
source : CD Kitchen
Ingredients:

***Dough:***
1 1/2 cup warm water (110 to 115*F / 45*C )
1 tablespoon dry active yeast
1 tablespoon sugar
1 tablespoon vegetable oil
2 teaspoons malt syrup
2 teaspoons salt
4 1/2 cups unbleached bread flour (more if needed)

***Kettle Water:***
6 quarts water
2 tablespoons malt syrup or powder
1 teaspoon salt

***Toppings: (optional)***
Sesame seeds
Poppy seeds
Minced fresh garlic
Minced fresh onion
Caraway seeds
Coarse salt
Corn meal for sprinkling baking sheets (optional)

Directions:

In a large mixing bowl, stir together water, yeast, and sugar. Let stand for 5 minutes. With a wooden spoon, stir in oil, malt and one cup of the flour. Add salt, then enough of remaining flour to make a stiff dough. On a lightly floured surface, knead for 10 to 12 minutes. Cover with a floured dish towel and allow dough to rest on a board for about 15 minutes. Divide dough into 8 sections and form each section into 10-inch long strips. Roll the ends together to seal and make a ring. Place on a lightly floured surface, cover, and let bagels rest 15 to 20 minutes, rising about halfway and becoming slightly puffy. Meanwhile, fill a large cooking pot or Dutch oven three quarters full with water. Add the malt syrup and salt. Bring water to a boil. Preheat oven to 450F (230C). Line two large baking sheets with baking parchment and, if desired, sprinkle generously with corn meal. Set aside.

Line two other baking sheets with a kitchen towel, set near your stove. Reduce boiling water to a simmer and cook 2 bagels at a time (do not crowd the pot). Simmer bagels for about 45 seconds on one side, then turn and cook other side for another 45 seconds and then drain bagels on the towel-lined baking sheet. Carefully place bagels on the parchment-lined baking sheets. Bake bagels plain or sprinkle with a topping of your choice. Place in the hot oven, immediately reduce heat to 425F (220C), and bake about 17 to 25 minutes. When almost baked, turn bagels over (a pair of tongs do the job easily). If you have a baking stone, finish bagels on the stone directly. Transfer bagels to wire rack to cool. These freeze well, which helps to retain a just-baked taste, if they aren't all eaten on the first day. To freeze, slice cooled bagels first, place a small strip of plastic between the bagel halves and place in a plastic self-sealing freezer bag. When you're ready for a bagel, they'll come apart easily, ready to pop into the toaster/oven and enjoy.

NY style bagels

Serves 8

12.12.2009

Mini Potato Bread

Waktu liat foto roti gendut ginuk-ginuk ini di tempat Lina, gue langsung tertarik. Begitu nodong langsung dikasih pulak resepnya *thanks ya Lin*.

Bikinnya emang agak lama...proofingnya sampe 3 kali bow! Tapi worth to try kok. Proofing beberapa kali kan untuk menghasilkan tekstur roti yang soft and light.

Sekalian juga nyobain mikser BOSCH kecil gue buat ngulenin adonan roti (bilang aja males ngulenin pake tangan...wakakakakak)...woooww takjub gue....ternyata doi sanggup :D

Mini Potato Bread

Mini Potato Bread
sumber : Majalah SEDAP via Lina Hidayat

Bahan:
200 gr kentang kukus, haluskan
300 gr tepung terigu protein tinggi
100 gr tepung terigu protein sedang (Dita - pake 400 gr all purpose flour)
20 gr susu bubuk
75 gr gula pasir
8 gr ragi instan
2 btr putih telur
100 ml air es
50 gr mentega tawar
1 sdt garam

Olesan:
3 sdm susu evaporated (Dita - pake sisa kuning telur)
50 gr keju parut

Cara bikinnya:
1. Campur terigu, susu bubuk, gula pasir & ragi instan. Aduk rata.
2. Masukkan kentang, uleni rata.
3. Masukkan putih telur dan air es sedikit-sedikit sambil diuleni sampai kalis.
4. Tambahkan mentega tawar & garam. Uleni sampai elastis. Diamkan kurleb 30 menit.
5. Kempiskan adonan, timbang @30gr. Bentuk bulat. Diamkan 10 menit.
6. Pipihkan adonan bentuk bulat lagi (gue diberi isi dulu). Letakkan di sup kertas. Diamkan 60 menit sampai ngembang.
7. Oles susu evaporated. Tabur keju parut.
8. Oven 10 menit dengan suhu 190 derajat celcius sampai matang

Mini Potato Bread

11.12.2009

Chocolate Rice Krispies Cookies

Si Papin salah beli cereal. Paling males beli rice krispies soalnya anak-anak kalo makan cereal ini pasti messy kemana-mana. Berantakan, rumah jadi makin penuh remah-remah. Yang ada gue umpetin tuh cereal, gue bilang udah abis....xixixixixixiiii. Dan lama banget ngendon di lemari dapur.

Pas bersih-bersih laci dapur gak tega mbuangnya, akhirnya rice krispies-nya gue bikin cookies aja. Bosen cookies yang chewy and cakey, gue putusin untuk bikin yang crispy.

Resepnya standar resep cookies biasa aja :). Kalo mau ditambahin oatmeal juga bisa loh, tepungnya jadi 2 cup aja, terus masukin 1 cup oatmeal.....jadinya bakal agak chewy)

Chocolate Rice Krispies Cookies

Chocolate Rice Krispies Cookies

Ingredients :
1 cup Butter
1 cup brown sugar
1 cup sugar
2 large Eggs
1 teaspoon vanilla
1 teaspoon baking soda
1/2 teaspoon salt
2 1/2 cups flour
2 cups Rice Krispies

Directions :
Preheat oven to 350˚F.

Cream butter and sugars. Mix in eggs, vanilla, baking soda and salt. Then add remaining dry ingredients and mix thoroughly. Place heaping teaspoons full on an ungreased cookie sheet.

Bake at 350˚F for 12 minutes or until golden brown around edges.

Chocolate Rice Krispies Cookies

11.05.2009

KBB # 14 : White Bread

IMG_7846

Setelah absen di KBB #13 2 bulan lalu, paska melahirkan, kali ini gue memberanikan diri untuk menyanggupi ikut tantangan ke-14. Sempet maju mundur, bisa gak ya gue ngerjain dengan adanya baby yang belum genap 3 bulan. Tapi kemudian gue jadi makin semangat ketika melihat "surat cinta" yang dikirimkan ke e-mail gue. Ternyata challenge kali ini emang bener-bener menantang.....bikin roti tapi pake metode Baker's Percentage (BsP)!

Waduh apaan lagi nih? Bener-bener baru denger metode BsP ini. Ternyata metode ini sering digunakan oleh professional Bread Baker. Mereka biasanya tidak menggunakan istilah resep tetapi menggunakan istilah formula. Formula ini menunjukkan proporsi dasar bahan-bahan, terhitung dan diekspresikan sebagai hitungan persen walaupun BsP bukan merupakan hitungan persentasi sebenarnya yang jumlah total adalah 100%. BsP ini menghitung bahan-bahan baik kering atau basah dalam satuan berat, baik metric atau imperial. BsP menggunakan berat tepung sebagai acuan dasarnya. Lebih jauh mengenai BsP silahkan klik di sini.

Singkat cerita, gue nekad mau ikutan, saking penasarannya sama metode ini. Bener juga yang gue duga, baby Neo dikit-dikit nyari emaknya...walah-walah gimana gue mo kerja kalo kayak gini. Akhirnya baby bouncer gue boyong ke dapur, nyalain mesin cuci dan baby Neo pun anteng (terhibur suara mesin cuci) nungguin emaknya ngulenin roti :D.


Untuk resep/formula, gue menggunakan patokan tepung cuman 250 gr (gak berani banyak-banyak dulu, takut gagal), bahan-bahan lain menyesuaikan dg BsP. Proses pembuatannya sendiri gak terlalu ribet dan gak susah. Menurut gue kita mesti jeli di awal aja, saat menghitung formula.

Shapingnya gue bikin dinner rolls, biar cepet abis dan anak-anak gampang makanya. Hasil akhirnya cukup memuaskan. Empuk tapi tidak lembut, menurut gue sih cocok dibikin dinner rolls atau loaf. Buat yang suka manis, mungkin roti ini akan terasa kurang manis.

white bread

White Bread, variation 1
Source: The Bread Baker’s Apprentice by Peter Reinhart, 2001, page 265-267

Ingredients - Baker’s Percentage
Bread flour - 100%
Salt - 1.8%
Granulated sugar - 7.7%
Powdered milk (Dried Milk Solid) - 6.2%
Instant yeast - 1%
Egg, slightly beaten at room temperature - 7.7%
Butter, room temperature - 7.7%
Water - 62.8%


Methods :

* Mix together the flour, salt, powdered milk, sugar and yeast in a 4-quart bowl (or in the bowl of an electric mixer). Pour in the egg, butter and water and mixt with a large metal spoon (or on low speed of the electric mixer with the paddle attachement) until all the flour is absorbed and the dough forms a ball. If the dough seems very stiff and dry, trickle in more water until the dough is soft and supple.
* Sprinkle flour on the counter, transfer the dough to the counter, and begin kneading (or mix on medium speed with the dough hook), adding more flour, if necessary, to create a dough that is soft, supple, and tacky but not sticky. Continue kneading (or mixing) for 6 to 8 minutes. (if the electric mixer, the dough should be clear the side of the bowl but stick ever so slightly to the bottom.) The dough should pass the windowpane test and register 80oF. Lightly oil a large bowl and transfer the dough to the bowl, rolling it to coat it with oil. Cover the bowl with plastic wrap.
* Ferment at room temperature for 1.5 to 2 hours, or until the dough doubles in size (the length of time will depend on the room temperature).
* Remove the fermented dough from the bowl and divide it in half for sandwich loaves, into eighteen 2-ounce pieces for dinner rolls, or twelve 3-ounce pieces for burger or hot dog buns. Shape the pieces into boules for loaves or tight rounds for dinner rolls or buns. Mist the dough lightly with spray oil and cover with a towel or plastic wrap. Allow to res for about 20 minutes.
* Shaping. For loaves, shape like rolling a Swiss roll but pinch the crease with each rotation to strengthen the surface tension. Pinch the final seam closed with the back edge of your hand or with your thumbs. Lightly oil two 8.5 by 4.5-inch loaf pans and place the loaves in the pans. For rolls and buns, line 2 sheet pans with baking parchment. Rolls require no further shaping. For hot dog buns, shape into a pistolet without tapering the ends. Transfer the rolls or buns to the sheet pans.
* Mist the tops of the dough with spray oil and loosely cover with plastic wrap or a towel. Proof the dough at room temperature for 60 to 90 minutes, or until nearly doubles in size.
* Preheat the oven to 350oF for loaves or 400oF for rolls and buns. Brush the rolls or buns with the egg wash and garnish with poppy or sesame seeds. Sandwich loaves also may be washed and garnished, or score them down the centre and rub a little vegetable oil into the slit.
* Bake the rolls or buns for approximately 15 minutes, or until they are golden brown and register just above 180oF in the centre. Bake loaves for 35 to 45 minutes, rotating 180 degrees halfway through for even baking, if needed. The tops should be golden brown and the sides, when removed from the pan, should be golden. The internal temperature of the loaves should be close to 190oF, and the loaves should sound hollow when thumped on the bottom.
* Cooling. When the loaves have finished baking, remove them immediately from the pans and cool on a wire rack for at least 1 hour before slicing or serving. Rolls should cool for at least 15 minutes on a rack before serving.

Sedikit tips :
Untuk pembagian telur berhubung telur susah untuk dibagi-bagi, sebaiknya dikocok lepas dulu baru dibagi sesuai ukuran. Kalo gue sendiri menggunakan telur sesuai dengan berat telur perbutirnya, sisanya ditambahin dari bahan hidrasi (bahan yang mengandung air) lain seperti, susu/air/air jus.

7.14.2009

CLICK July 2009 : BI-COLOUR : Turkish Delight


Bee and Jai, this is my entry for Click : Bi-Colour

IMG_3484.jpg
Camera : Canon EOS 500D
Lens : 50 mm f/1.4
Natural lighting


If you are interested, please join the fun here.

Here's another shot

Turkish Delight

7.01.2009

Strawberry Yoghurt Ice Cream

Summer treat!!!! Fiiuuhhh....It's really hot in here (45˚C), we need something fresh. Simple yet refreshing. You don't need to think to make this dessert :)....easy peasy! And the most important thing, my kids like it.

Strawberry Yoghurt Ice Cream

Strawberry Yoghurt Ice Cream
(No Ice Cream Maker needed)

Ingredients :
Fresh Strawberries
1 cup yoghurt
1 cup whipping cream
sugar

Directions :
Put all the ingredients on Food Processor and process until smooth. Cool in the refrigeratorfor 2 hours. Taarraaaaa and enjoy your treat.

Strawberry Yoghurt Ice Cream Collage

6.29.2009

KBB # 12 : Cheese Soufflés


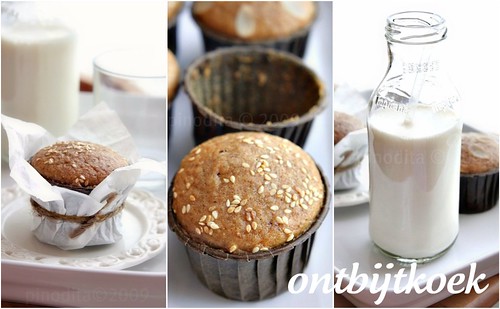
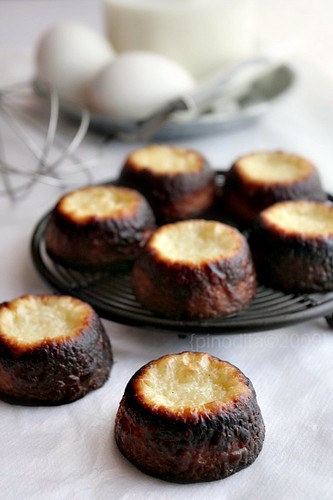
I never made souffle before, because some people said, it's a bit tricky to make one. So this is my first attempt. If it wasn't KBB's challenge, I don't think I want to try making it :)).

Then I made it. And you know what? Believe it or not, it wasn't as difficult as I thought! The taste was great. I added chopped spinach in it.

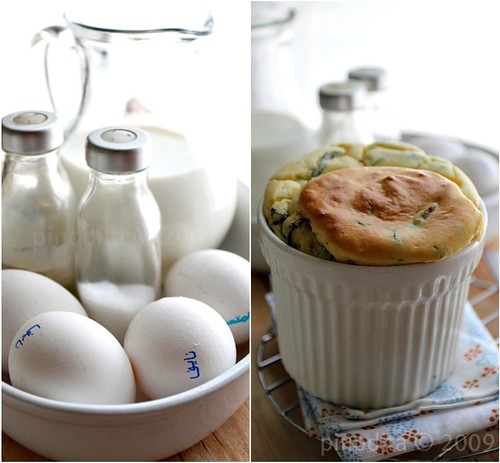
The thoughest part actually came up on the photo session. I have to work fast. Maaannn....souffle is easy to collapse. On the oven it rises beautifully...and DANG...5 minutes outside the oven, it collapsed!! And it become ugly. See my souffle? Not that appetizing, eh?
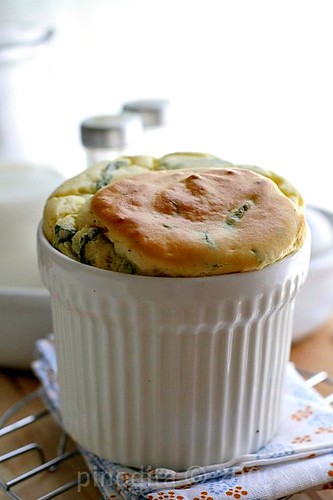
Cheese Souffle

Cheese Souffles
Source : The Perfect Cookbook by David Herbert. Penguin Books Australia Ltd 2003.

Ingredients/Bahan-bahan:
* 100g unsalted butter / mentega tawar
* ½ cup plain (all-purpose) flour / tepung terigu
* 300ml milk / susu
* 1 cup grated cheddar / cheddar parut
* 2 Tbs / sdM freshly grated parmesan / parmesan parut
* ½ tsp Dijon mustard / mustard Dijon
* pinch / sejumput cayenne pepper
* 4 eggs / telur, separated / pisahkan


Directions/Cara Pembuatan:
Preheat the oven to 190C (375F, Gas Mark 5). Grease and lightly flour six ½-cup-capacity souffle dishes.
Panaskan oven suhu 190C (375F, Gas Mark 5). Minyaki/olesi mentega dan taburkan tepung loyang souffle dengan kapasitas ½ cup sebanyak 6 buah.

Melt butter in a small saucepan over low heat. Add the flour and cook, stirring constantly, for 1 minute. Gradually add the milk and whisk continuously over medium heat until the mixture is smooth, thickens and comes to the boil. Allow to cool for 5 minutes.
Lelehkan mentega di panci kecil dengan api kecil. Tambahkan tepung lalu masak sambil diaduk-aduk selama 1 menit. Tambahkan susu sedikit demi sedikit dan whisk terus menerus dengan api sedang hingga adonan lembut, mengental dan mendidih. Biarkan dingin sejenak selama 5 menit.

Transfer the mixture to a bowl and stir in the cheddar, parmesan, mustard and cayenne pepper. Mix well.
Pindahkan adonan ke dalam mangkuk dan masukkan keju cheddar, parmesan, mustard dan cayenne pepper. Aduk rata.

Lightly beat the egg yolks and add these to the cheese mixture. Mix well.
Kocok ringan kuning telur dan masukkan ke dalam adonan keju. Aduk rata.

With an electric mixer, whisk the egg whites in a clean bowl until firm peaks form. Fold a quarter of the whites through the cheese mixture to slacken it slightly, then gently fold through the remaining whites.
Kocok putih telur menggunakan electric mixer hingga mencapai firm peak. Masukkan seperempat adonan putih telur ke dalam adonan keju untuk sedikit 'melemaskan' adonan, lalu masukkan sisanya perlahan.

Spoon the mixture into the prepared dishes and bake for 20-25 minutes, or until risen and golden. Don't be tempted to open the oven until the souffles have risen. Serve immediately.
Sendokkan adonan ke dalam loyang yang sudah disiapkan lalu panggang selama 20-25 menit, atau hingga mengembang naik dan kecoklatan. Jangan tergoda untuk membuka oven sebelum souffles betul-betul sudah mengembang/naik. Hidangkan segera.

Cheese Souffle

6.26.2009

Black Cherry Sour Cream Muffins

It's cherry season! And I got a bunch of cherries in my hand. Kids and me are cherry-addict so I always stocked them in my fridge. We like to eat them as it is or in baking goods.

Mindy post this recipe on her blog and I'd love to try. And this recipe turned out great. Love it! The texture of the muffin is so light and soft with a touch of sourness from the cherries.

Black Cherry Sour Cream Muffin

Black Cherry Sour Cream Muffins
Source : Baking Bites via Mindy's Deli

Ingredients :
1 3/4 cups all purpose flour
1/2 tsp baking soda
1/2 tsp baking powder
1/2 tsp salt
1 cup sugar
1 large egg
1 tbsp butter, melted
1/2 cup sour cream (light or regular)
1/4 cup cherry juice (or milk, if juice is unavailable)
3/4 cup pitted black cherries (defrosted, if frozen), chopped
coarse sugar, for topping

Directions :
Preheat oven to 375F and line a 12-cup muffin tin with paper liners.
In a small bowl, whisk together flour, baking soda, baking powder and salt.
In a large bowl, beat together sugar, egg and melted butter. Add in 1/2 of the flour and the sour cream and stir to combine. Stir in cherry juice (or milk) and remaining flour, just until no streaks of flour remain. Stir in cherries and divide into prepared muffin cups. Sprinkle each generously with sugar.
Bake for 16-19 minutes, or until a toothpick inserted into the center comes out clean.

Makes 1 dozen.

Black Cherry Sour Cream Muffin

6.19.2009

Black Forest Cake and Cupcakes

Now it's time to treat myself. I've been wanting to make my own Black Forest Cake since a long time ago. This classic cake always attracted my attention. Actually I'm a bit picky with BF recipe. I want my cake turn to be moist. When I saw the recipe at Eliza's, I fell in love at the first sight. I knew this is what I really wanted. And that was my first self made proper birthday cake for myself. Happy birthday to me! :)

Black Forest

If you ask me which Black Forest recipe that I recommend...definitely this is the ONE!

I also made a cupcake version for this cake. For the filling, I use cherry puree which cooked with sugar.

Filling cupcakes with cherry puree

BLACK FOREST CAKE
Makes 9-inch three-layered cake
source : via Eliza

Cherries and syrup:
2 cups jarred sour cherries in light syrup, drained with 1 cup syrup reserved
1/2 cup (3 1/2 ounces) sugar
1/2 cup kirsch or other cherry flavored liqueur

Whipped cream frosting:
1/4 cup (1 3/4 ounces) sugar
1 tbsp cornstarch
3 cups heavy cream, chilled
1 1/2 tsp vanilla extract

1 recipe Devil’s Food Layer Cake, baked and cooled, but unfrosted, recipe below
Chocolate shaving (see note), for serving

FOR THE CHERRIES AND SYRUP: Reserve 8 of the prettiest cherries for garnish in a small bowl. Slice the remaining cherries in half and place in a medium bowl. Simmer the reserved cherry syrup and sugar together in a medium saucepan over medium heat until mixture is thickened and measure about 1/2 cup, 8 to 10 minutes. Off the heat, stir in the kirsch.

Toss 1 tbsp of the syrup with the cherries reserved for garnish. Toss 3 tbsp more syrup with the halved cherries. Poke the top of the cake layers thoroughly with a wooden skewer and brush with the remaining syrup.

FOR THE WHIPPED CREAM: Whisk the sugar and the cornstarch together in a small saucepan and slowly whisk in 1/2 cup of the cream. Bring the mixture to a simmer over medium heat, whisking constantly, until the mixture thickened,2-3 minutes. Let the mixture cool to room temperature, about 30 minutes.

In a large bowl, whip the remaining 2 1/2 cups cream and the vanilla together with an electric mixer on low speed until frothy, about 30 seconds. Increase the mixer speed to medium and continue to whip the mixture until it begins to thickened, about 30 seconds. Slowly add the cooled cornstarch mixture and continue to whip until the mixture forms soft peak, 1-3 minutes.

Line the edges of a cake platter with strip of parchment paper to keep the platter clean while you assemble the cake. Place one of the cake layers on the platter. Spread 1/2 cup of the whipped cream over the top, right to the edge of the cake, then cover with half of the sliced cherries. Repeat with another cake layer, 1/2 cup more whipped cream, and the remaining sliced cherries. Place the remaining cake layer on top and press lightly to adhere. Frost the cake with the remaining whipped cream.

Refrigerate the cake until it absorbs the soaking syrup, at least 2 hours or up to 24 hours. Before serving, let the cake sit at room temperature, 30-60 minutes, then gently press the chocolate shavings into the sides of the cake. Evenly space 8 small pile of chocolate shavings around the top of the cake and top each with a cherry. Remove the parchment strip from the platter before serving.

NOTE: Be sure to buy jarred or canned cherries packed in syrup, not water. You will need about 7 ounces of chocolate for the shavings to decorate the sides and top of the cake. Letting the cake to sit at least 2 hours before serving allows the soaking syrup to sink in and the flavors to meld; however in a pinch, you could serve it right away.

DEVIL’S FOOD LAYER CAKE

1/2 cup Dutch-processed cocoa powder, plus extra for dusting
1 1/2 cups all-purpose flour
1 tsp baking soda
1/2 tsp baking powder
1/4 tsp salt
1 1/4 cups boiling water
4 ounces unsweetened chocolate, chopped
1 tsp instant espresso or instant coffee
10 tbsp (11/4 sticks) unsalted butter, softened
1 1/2 cups packed light brown sugar
3 large eggs, room temperature
1/2 cup sour cream, room temperature
1 tsp vanilla extract

Adjust the oven racks to the upper-middle and lower-middle position and heat the oven to 350 degrees Fahrenheit. Grease 3 9-inch round cake pan, then dust with cocoa powder and line the bottoms with parchment paper. Whisk the flour, baking soda, baking powder, and salt together in a large bowl. In a medium bowl, whisk the boiling water, chocolate, 1/2 cup of the cocoa powder, and instant espresso together until smooth.

In a large bowl, beat the butter and sugar together with an electric mixer on medium speed until light and fluffy, 3-6 minutes. Beat in the eggs, one at a time, until combined, about 30 seconds. Beat in the sour cream and vanilla until incorporated.

Reduced the speed to low and beat in 1/3 of the flour mixture, followed by 1/2 of the chocolate mixture. Repeat with half of the remaining flour mixture and the remaining chocolate mixture. Beat in the remaining flour mixture until just incorporated.

Give the batter the final stir with a rubber spatula to make sure it is thoroughly combined. Scrape the batter into the prepared pans, smooth the tops, and gently tap the pans on the counter to settle the batter. Bake the cakes until a toothpick inserted in the center comes out with a few crumbs attached, 15-20 minutes, rotating and switching the pans halfway thorough baking
Let the cakes cool in the pans for 10 minutes. Runs a small knife around the edge of the cakes, then flip them out onto the wire racks. Peel off parchment paper, flip the cakes side up, let cool completely before frosting, about 2 hours.

Source: adapted from America’s Test Kitchen Family Baking Book

Black Forest

On the next day we had a fabulous family dinner at Le Notre.....the food is so yummy!!!

Birthday Girl

Dinner at LeNotre Kuwait

6.15.2009

Yorkshire Pudding

If you just have a little time in the morning to prepare breakfast, try this recipe. This pudding supposed to eat with grilled chicken/meat, but it's great for breakfast with scramble egg and sausage :).

Yorkshire Pudding

Yokshire Pudding
Original recipe by Mrs Gladman through her daughter in-law Lina Gladman (via Sefa Firdaus)

Ingredients:
1 cup fresh milk
1 cup all-purpose-flour, sieve
2 eggs
1/2 tsp salt
(Dita - I added chopped spring onion)
Vegetable oil

Directions :
1. Preheat oven to 200°C.
2. Combine eggs and milk in a mixing bowl. Mix until incorporated using whisker.
3. Gradually add flour and salt. Continue whisking to create a lump free batter resembling thick cream, if there are any lumps pass the batter through a fine sieve.
4. Prepare 6-hole muffin tin. Pour half tablespoon of vegetable oil in each hole. Place the muffin tin into oven and let the oil become really hot (produce smoke). Take it out.
5. Pour batter into each hole. Fill a half to each and return quickly to the oven. Leave to cook until golden brown for around 25-30 minutes. Remove immediately from the oven and serve.

Note:
- You can blend all the ingredients in a blender or food processor.
- Store Yokshire pudding in an airtight container. Warm it on the microwave and can be served with jam, golden syrup, honey or sugar.
- It's known as Popover in USA.

Yorkshire Pudding collage

6.08.2009

Peanut Butter Choco Chips Cookies

Time to treat my girls!!!!! Arwen! Leia! Here are your cookies. Thanks Bunda Nadine for the recipe!

Peanut Butter Cookies

Peanut Butter Choco Chunk Cookies
source: Everyday food magazine - March'09

Ingredients :
1.5 cup all purpose flour
1 tsp baking soda (dita - use only 1/2 tsp baking soda)
1 cup peanut butter
1/2 stick (4 tbsp) butter,room temp
1/4 cup packed brown sugar
1/4 cup sugar
2 eggs
1 tsp vanilla extract (dita - use only 1/2 tsp vanilla)
8 ounces semi sweet chocolate,cut into chunk (dita - use chocolate chips and butterscotch chips)

peanut Butter Cookies

Directions :
1. Preheat oven to 350. In bowl whisk fluor and baking soda,set aside. In mixer bowl,beat peanut butter,butter and sugars until light and fluffy. Add eggs and vanilla, and beat until smooth. With mixer on low,gradually add fluor mixture,beating just until combined. Stir in choco chunk.
2. Drop dough by heaping tablespoons,1 inch apart,onto two large baking sheets. Bake until golden,13 to 15 mins,rotating sheets halfway through. Transfer to wire racks to cool.

Peanut butter cookies

6.05.2009

Classic Sour Cherry Pie with Lattice Crust

I love this recipe! No egg needed, so the texture will be more like puff pastry. Light and flaky crust with incredible sour cherry filling....YYUUUMMM!!!

Cherry Pie

Classic Sour Cherry Pie with Lattice Crust
adapted from : Bon Appétit Magazine June 2008

Ingredients :
CRUST

* 2 1/2 cups unbleached all purpose flour
* 1 tablespoon sugar
* 3/4 teaspoon salt
* 1 cup (2 sticks) chilled unsalted butter, cut into 1/2-inch cubes
* 5 tablespoons (or more) ice water

FILLING

* 1 cup plus 1 tablespoon sugar
* 3 tablespoons cornstarch
* 1/4 teaspoon salt
* 5 cups whole pitted sour cherries or dark sweet cherries (about 2 pounds whole unpitted cherries)
* 1 teaspoon fresh lemon juice (if using sour cherries) or 3 tablespoons fresh lemon juice (if using dark sweet cherries)
* 1/2 teaspoon vanilla extract
* 2 tablespoons (1/4 stick) unsalted butter, cut into 1/2-inch cubes
* 1 tablespoon (about) milk
* Vanilla ice cream


(Tips : Since I don't have cherry pitter, I used a Chopstick to push the pit through the fruit)

Manual Cherry Pitter

Directions :
CRUST

Whisk flour, sugar, and salt in large bowl to blend. Add butter and rub in with fingertips until small pea-size clumps form. Add 5 tablespoons ice water; mix lightly with fork until dough holds together when small pieces are pressed between fingertips, adding more water by teaspoonfuls if dough is dry. Gather dough together; divide into 2 pieces. Form each piece into ball, then flatten into disk and wrap in plastic. Refrigerate at least 30 minutes. DO AHEAD Can be made 2 days ahead. Keep chilled. Let dough soften slightly before rolling out.

FILLING :

1.Position rack in lower third of oven and preheat to 425°F. Whisk 1 cup sugar, cornstarch, and salt in medium bowl to blend. Stir in cherries, lemon juice, and vanilla; set aside.

2. Roll out 1 dough disk on floured surface to 12-inch round. Transfer to 9-inch glass pie dish. Trim dough overhang to 1/2 inch. Roll out second dough disk on floured surface to 12-inch round. Using large knife or pastry wheel with fluted edge, cut ten 3/4-inch-wide strips from dough round. Transfer filling to dough-lined dish, mounding slightly in center. Dot with butter. Arrange dough strips atop filling, forming lattice; trim dough strip overhang to 1/2 inch. Fold bottom crust up over ends of strips and crimp edges to seal. Brush lattice crust (not edges) with milk. Sprinkle lattice with remaining 1 tablespoon sugar.

Cherry Pie Fresh from the Oven

3. Place pie on rimmed baking sheet and bake 15 minutes. Reduce oven temperature to 375°F. Bake pie until filling is bubbling and crust is golden brown, covering edges with foil collar if browning too quickly, about 1 hour longer. Transfer pie to rack and cool completely. Cut into wedges and serve with vanilla ice cream.

Cherry Pie Collage

Another Pie recipes ;
1. Banofee Pies
2. Apple Tart

6.04.2009

CLICK : June 2009 - Stacks


This month's theme in Click is Stacks. Couple days ago I took a shot of these cookies and I thought that would be good to be submitted to CLICK.

Jai and Bee...here's my entry for Stacks.

Pennylane's Choco Cookies
Camera : Canon EOS 350 D
Lens : 17-40 mm f/4L


Here are some other shots

Pennylane's Choco Cookies Pennylane's Choco Cookies

Pennylane's Choco Cookies collage

5.30.2009

Eggless Ontbijtkoek

As I promised you, this is the other recipe of Ontbijtkoek which doesn't use any eggs. No mixer is needed! You'll love the recipe :).

Eggless Ontbijtkoek

I made this cake as a cupcake so my kids could easily eat it. The texture of the cake was dense (pretty similar with muffin) but moist. It's because the usage of honey.

Eggless Ontbijtkoek
source : Eat Dutch

Preparation time: 15 minutes
Cooking time: 1 hour

Ingredients:
9 oz / 250 g self-raising flour
Pinch of salt
2 teaspoons ground cinnamon
½ teaspoon ground cloves
½ teaspoon ground nutmeg
½ teaspoon ground ginger
4 oz / 100 g brown sugar
4 oz / 100 g honey
6 fl oz / 175 ml milk

Eggless Ontbijtkoek Ontbijtkoek

Directions :
Preheat the oven to 320 degrees F / 160 degrees C.

Mix the flour, salt and spices together in a bowl. Add the sugar, milk and honey and beat until smooth. Add a little more milk if the mixture is too thick.

Lightly grease an 8 in x 4 in / 20 cm x 10 cm bread tin and pour the cake mix into it.

Put on the floor of the oven and bake for an hour. The cake is done when a knife inserted into it comes out clean. If it comes out moist, cook for a further 10 minutes.

Remove from the oven and turn out onto a cooling rack.

Serve warm from the oven on its own, or spread with butter. The cake’s delicate sweetness also makes it a great accompaniment to cheese.

Eggless ontbijtkoek collage

If there’s any left over, wrap it in aluminium foil to keep moist.

5.27.2009

(Faux) Canelés

When a friend of mine mentioned about this French tiny cake, I got very excited. I really wanted to taste it. Since she didn't have the recipe, so I googling around and found tons of recipes. I decided to use Clotilde's recipe. And quite surprised that the ingredients are so easy to find in your kitchen.

Actually, Canelés is French Rum and Vanilla Cake. Since I don't have the mold, I just used the mini muffin tin *oopsss*....that's why I call it Faux ;)(find here for the real Canelés). Nearly black at first sight, bittersweet at first bite, the crunchy burnt sugar canelé-shell makes an exquisite complement to its smooth, sweet filling, fragrant with vanilla and rum.

Faux Canelés

Canelés
adapted from : Chocolate and Zucchini

Ingredients :
- 1/2 liter (2 cups) milk
- 30 g (3 tablespoons) salted butter, diced
- 1 vanilla pod, split, or 1 teaspoon vanilla extract or paste
- 100 g (3/4 cup) all-purpose flour
- 180 g (1 cup minus 2 tablespoons) sugar
- 3 eggs
- 80 ml (1/3 cup) good-quality rum

Yields about 20 medium canelés.

Faux Canelés

Directions :
Combine the milk, butter and vanilla in a medium saucepan, and bring to a simmer. In the meantime, combine the flour and sugar in a medium mixing-bowl. Break the eggs in another, smaller bowl, and beat gently. When the milk mixture starts to simmer, remove from heat, fish out the vanilla pod if using, and set it aside.

Pour the eggs all at once into the flour mixture (don't stir yet), pour in the milk mixture, and whisk until well combined and a little frothy. Scrape the seeds from the vanilla pod with the dull side of a knife blade, and return the seeds and pod to the mixture. Add the rum and whisk well. Let cool to room temperature on the counter, then cover and refrigerate for at least 24 hours and up to 3 days.

The next day (or the day after that, or the day after that), preheat the oven to 250° C (480° F). Butter the canelé molds if they are made of copper (unnecessary if you're using silicon molds). Remove the batter from the fridge: it will have separated a bit, so whisk until well blended again. Pour into the prepared molds, filling them almost to the top. Put into the oven to bake for 20 minutes, then (without opening the oven door) lower the heat to 200° C (400° F) and bake for another 40 to 60 minutes (depending on your oven and how you like your canelés). The canelés are ready when the bottoms are a very dark brown, but not burnt. If you feel they are darkening too fast, cover the molds with a piece of parchment paper.

Unmold onto a cooling rack (wait for about ten minutes first if you're using silicon molds or they will collapse a little) and let cool completely before eating.

5.22.2009

[Indonesian Food] Wajik

Gue sebenernya gak nge-fans banget sama wajik, tapi kalo udah lama gak makan ya pengen juga. Kebetulan pas mudik kemaren sempet jajan wajik di ITC Mangga Dua. Enak banget. Pas sampe Kuwait jadi pengen bikin sendiri. Udah gitu abis liat postingan wajiknya mbak Retno, jadi makin puengennn deh.

wajik

Resep yang gue pake punya mas Budi Sutomo, cuman gue modif dikit, tambahin jahe bubuk, biar ada wangi jahenya *thanks ya mas Budi*

(if you need recipe in English please let me know)

Wajik Ketan
sumber : Budi Boga

Bahan:
700g beras ketan putih
200 g gula Jawa, sisir (dita-kalo mau lebih pekat, tambahin 150 gr gulanya trus gula pasirnya di skip)
75 g gula pasir
650 ml santan dari 11/2 butir kelapa parut
½ sdt garam
1 lembar daun pandan, potong-potong
(dita - gue tambahin 1 tsp bubuk jahe)

Cara membuat:
• Cuci beras ketan, rendam air selama 2 jam. Tiriskan

• Kukus ketan selama 30 menit atau hingga beras ketan setengah matang. Angkat.

• Rebus gula pasir, gula jawa, santan, garam, dan daun pandan. Masak hingga mendidih.

• Tambahkan ketan ke dalam rebusan santan. Masak sambil di aduk-aduk hingga santan terserap habis. Angkat.

• Kukus kembali ketan selama 20 menit atau hingga ketan benar-benar matang. Angkat.

• Tuang adonan wajik ke dalam loyang yang sudah dioles minyak atau dialas dengan plastic/daun pisang. Tekan dan ratakan. Setelah dingin, potong-potong. Sajikan.

[Indonesian Food] wajik (diamond cake) collage

Untuk 20 Potong