3.10.2009

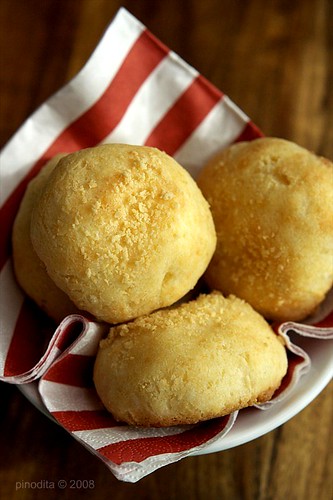
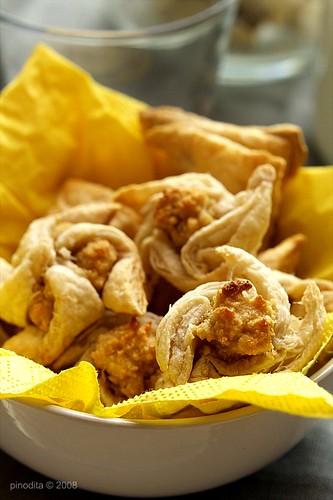
Pao de Queijo

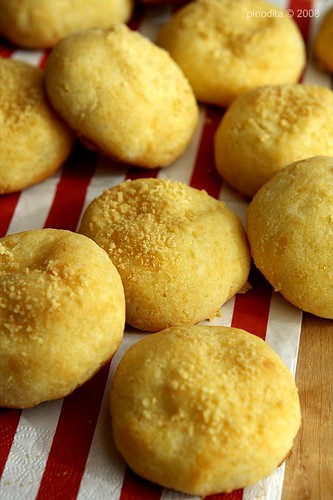
These Brazilian cheese puffs are wonderfully melt in your mouth. Savoury little snacks that are made with tapioca flour instead of wheat flour, making them good for people with an intolerance to wheat.

They are best served straight out of the oven, when they're still a bit gooey inside from the delectable cheese.

Pao de Queijo

Pao de Queijo
source : Recipezaar
Ingredients :

* 2 cups sweet manioc starch or sour manioc starch alias tepung tapioka
* 1 cup milk
* 1/2 cup margarine (dita - I prefer butter)
* 1 teaspoon salt
* 1 1/2 cups grated parmesan cheese
* 2 eggs

Directions :
1. Preheat oven to 400 degrees F.
2. Bring the milk, salt, and margarine to a boil.
3. Remove from heat.
4. Slowly add manioc starch, stirring constantly until thoroughly mixed.
5. Add the cheese and eggs.
6. Knead until smooth.
7. Form into balls approximately 2-inches in diameter and place on a greased baking sheet.
8. Sprinkle with Parmesan cheese.
9. Bake until golden brown (dita - 15-20 minutes).
10. Eat while hot.
11. Makes 20 cheese buns.

Pao de Queijo

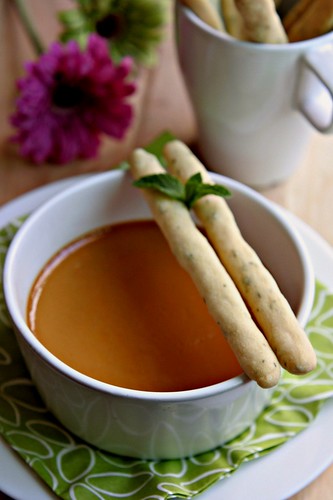
KBB # 10 : Caramel Pots with Minted Shortbread Sticks


Sesuatu yang berhubungan dengan karamel, gue pasti suka. Makanya ngerjain tantangan kali ini juga semangat banget, walaupun dalam kondisi hamil yang sekarang, rasa kantuk yang parah sering menjajah gue. Dan lagi gue memang berniat nyelesaiin tantangan ini cepet-cepetan supaya acara liburan keluarga di tengah bulan bisa berjalan dengan lancar.

Caramel Pots

Kebetulan pula pada tantangan ke-10 ini, gue dan Lina dipercaya untuk menjadi host. Wuuiihhh....ternyata banyak banget ya bo suka dukanya. Pesan gue bagi temen-temen untuk the next challenge, please ikuti tata cara pengiriman sesuai format yang sudah ditentukan, supaya round up bisa berjalan dengan lancar. Kalo entry gak komplit-komplit, round up jadi tersendat dan host juga jadi pening :). Mohon kerjasamanya ya di lain waktu, supaya member senang, host senang, semua pun senang :). Sampe akhirnya....gue kelupaan untuk nge-publish kerjaan gue sendiri *oppsss sorry*. Over all sih seneng banget jadi host, banyak pengalaman yang didapet.

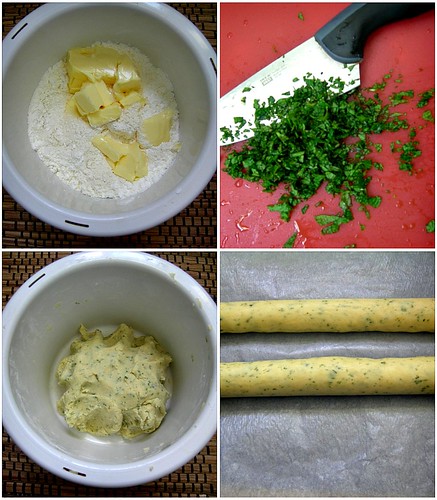
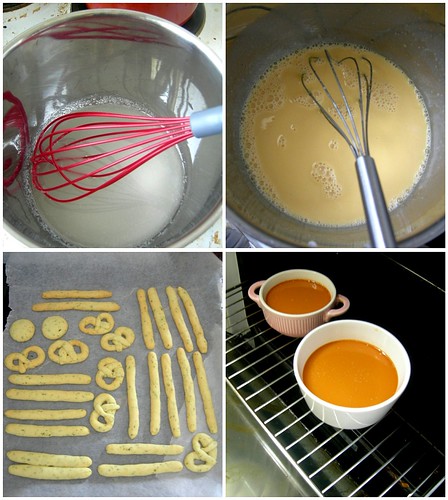
Untuk tantangan sendiri, gue gak menemukan kesulitan berarti. Bikin Shortbread sticksnya gampang banget. rasanya renyah dengan wangi vanilla dan sama-samar rasa mint. Karena gak ada vanilla batangan, gue pake esens vanila. Pada saat pembuatan caramel yang agak tricky. Tapi untung aja inget ilmu bikin karamel waktu bikin Paris Brest (bahwa saat bikin karamel gula gak boleh diaduk-aduk kalo diaduk jadinya mengkristal) jadi semuanya bisa berjalan lancar. Cuman karena bikin karamel itu lama dan harus sabar, sementara kondisi hamil gue gak memungkinkan untuk berdiri lama di depan kompor, terpaksa gue menggotong kursi untuk duduk di depan kompor. Karena takut ninggalin karamel, ngeri gosong.

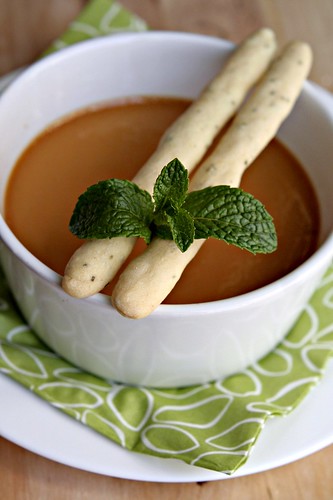
Caramel Pots with Minted Shortbread Sticks
Source: Chef Fred Wiesehutter, Heritage Christchurch, posted at Foodtown Magazine.

Caramel Pots with Minted Shortbread Sticks

Minted Shortbread Sticks

Ingredients :
100g icing sugar
200g flour
100g cornflour
250g unsalted butter, softened
1 vanilla pod, seeds removed and reserved
1 sprig mint, chopped

Picnik collage kbb # 10

Directions :
Preheat the oven to 150C. Line a baking tray with baking paper.

Combine the icing sugar, flours, butter, vanilla seeds and mint in a bowl and mix well. Roll out to about 1cm thick. Cut into 2 x 8cm fingers. Place on the prepared tray and bake for 20-25 minutes, until lightly golden. Cool and store in an airtight container until required. Makes about 30.

Caramel Pots

Ingredients :
125g caster sugar
2 Tbs water
125ml milk
250ml cream
3 egg yolks

Picnik collage kbb

Directions :
Whisk the sugar into the water in a saucepan. Heat carefully and cook to a golden caramel. Combine milk and cream in a separate saucepan and warm-do not boil. Whisk the milk into the caramel. Cool slightly.

Beat the egg yolks, until creamy. Gradually pour the hot caramel onto the egg yolks, mixing well.

Pour into four ramekins. Bake in a water bath at 160C for 30 minutes or until set. Remove the ramekin, cool then chill. Serves 4.

2.27.2009

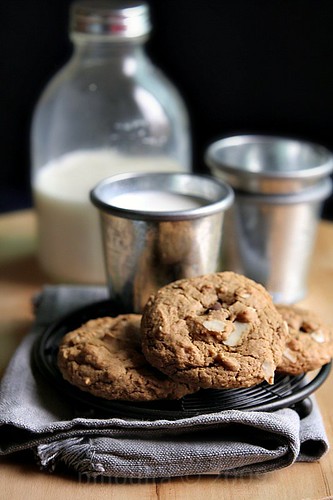
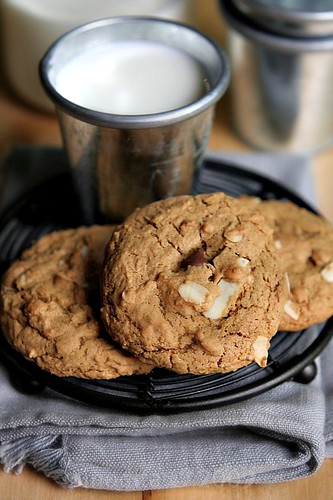
Milky Almond Chewy Cookies

Milky Almond Cookies

Making cookies should be fun, simple yet easy. Coz for me it's time to introduce the kitchen to my girls. Since I only had the leftover ingredients, I create this recipe. And heyyy....they turned out good. So milky!

Milky Almond Chewy Cookies
by : Dita

Milky Almond Cookies

Ingredients :
1 1/4 cup shortening (you can use butter or margarine)
1 1/4 cup dark brown sugar
1 1/4 cup sugar
3 eggs
1 tsp vanilla
1/2 cup milk powder
3 1/2 cups flour
1 tsp baking soda
1 cup slivered almond
1/2 cup chocolate chips or white choco chips

Directions :
Cream shortening and sugar; add slightly beaten egg and vanilla. Then add milk powder, flour mixed with baking soda. Then add almond and chocolate chips. Drop by teaspoonful on greased cookie sheet. Bake at 375 degrees (190˙C) for 8 to 10 minutes until light brown.

2.22.2009

Yogurt Panna Cotta with Strawberry Compote

This simple dessert is wonderfully tangy. I love the sour sensation, mixed with the delicate texture of it.

Yogurt Panna Cotta with Strawberry Compote

Yogurt Panna Cotta with Strawberry Compote
adapted from: btn's Kitchen

Ingredients (for two portions):
200 ml heavy cream (dita - I used 1/2 milk-1/2 whipped cream)
2 teaspoons vanilla extract
3 tablespoons sugar
7 g gelatin + 4 tablespoons cold water for dissolving it.
150 g yogurt

Directions:

1. Dissolve gelatin in cold water.
2. In a saucepan on medium heat mix cream, vanilla and sugar, stirring continuously until sugar melts.
3. Add gelatin and stir until it dissolves.
4. In a separate bowl stir the yogurt to get rid of any lumps.
5. Slowly pour the hot cream mix into the yogurt, whisking constantly.
6. Pour mix into two glass bowls or ramekins or whatever suitable bowls you have.
7. Refrigerate for about 4 hours or until firm.

To serve:

Flip onto chilled plate, and garnish with warm raspberry preserves, or cranberry sauce or fresh fruit or any combination of those.

Strawberry Compote

Ingredients :
1 cup Fresh Strawberry, sliced
Sugar to taste
Lemon juice
Wine/Rhum (optional)

Directions :
Mix all the ingredients until sugar dissolved. Bring to a boil. Remove from heat. Chilled.

Tips :
To invert panna cotta, set the ramekins into a pan of hot water for 15 seconds. Make sure the water does not get into the ramekins. Run a knife around the edges of ramekins and invert them onto plates. Remove the ramekins. Top panna cotta with strawberry compote.

2.12.2009

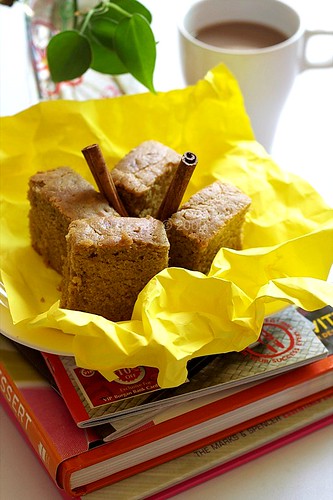
Banana Cake Amanda

Banana cake is always my all time favorite! There are tons of recipes that I have tried. A good friend of mine, Isti, gave me this simple and easy recipe.

banana cake

Thank you Tis!

Ingredients :
3 eggs
125 gr butter, melted
1 cup sugar (dita - I used light brown sugar)
2 cups all purpose fluor
1 tsp baking powder
3 very ripe bananas, mashed

banana cake

Directions:
Pre-heat the oven to 150 deg C. Line the base of 20x20 cm non stick pan with baking paper.

Place the eggs in amixing bowl and beat at medium speed until fluffy. Add sugar and beat until incorporated.

Add in flour, mix well and then melted butter, fold until well mixed.

Add in baking powder and bananas, fold until mixed well.

Pour the batter to the baking pan. Check the doneness at 50 minutes with a skewer. Continue baking for another 5-10 minutes or until a toothpick inserted into the centre of the bread comes out clean.

Let it cool in the pan for 5 minutes (dita - brush the cake with butter while still warm). Turn the cake out of the pan and let it cool completely before serving.

Another recipes with Banana :
1. Banofee Pie
2. Banana Cake
3. Banana Chocolate Chips Cookies
4. Banana Pistachio Biscotti
5. Butterscotch Pudding with Coffee-Caramelized Banana
6. Banana Cake with Choco Chips

1.30.2009

KBB # 9 : Classic Puff Pastry

Sebenernya dari dulu keinginan untuk bikin kulit pastry sendiri udah ada. Cuman ketunda-tunda terus. Thanks to Klub Berani Baking yang tantangannya kali ini adalah membuat Classic Puff Pastry. Jadi ngerasa "dipaksa" untuk mau gak mau bikin.
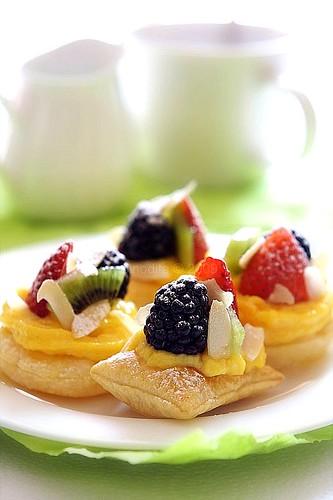
fruits pastry

Bikin kulit pastry sendiri ternyata tidak sesulit yang dibayangkan, kalo buat gue sih cenderung menantang dan mengasikkan. Apalagi cuaca di sini yang lagi sangat mendukung. Pastry emang rada rewel dikerjain di tempat panas. Bersyukur di sini lagi winter, jadi gak perlu keluar masuk kulkas dan bocor sana-sini. Proses pengerjaannya pun gak makan waktu lama, karena butter block-nya gak gampang mencair. Pastry yang dihasilkan gendut-gendut alias mengembang dengan tinggi, padahal gue gak menggunakan pastry margarine atau korsvet. Layer-layernya juga banyak (sayang banget gue lupa motret layer-layer-nya). Over all gue puas udah menaklukkan Classic Puff Pastry. Agak nyesel cuman bikin 1/2 resep, padahal hasilnya enak, gurih dan renyah.

Kebetulan resep yang dipilih KBB pun juga gak terlalu rumit. Keliatannya aja stepnya panjang. Tapi percaya deh begitu udah dijalani gampang banget. Apalagi kalo udah masuk dalam tahap Shaping...wuuiihhh pasti penasaran pengen bikin beragam bentuk dan model pastry.

Untuk fillingnya, gue bikin dua rasa, asin dan manis. Yang manis pake campuran custard dan buah segar, sedangkan yang asin pake campuran daging asap, bayam dan keju.

Thanks to Mae dan Rachmah yang udah jadi host kali ini. Next challenge kayaknya gue yang bakal bertugas.....wiiddiiihhh nervous-nya udah dari sekarang, ngebayangin bakal ngurusin 100 orang.

Classic Puff Pastry
Source: King Arthur Flour 200th Anniversary Cookbook
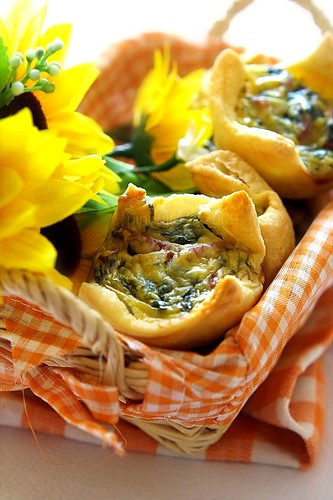
Cheese Spinach Pastry

Ingredients :
1 pound (4 cups) unbleached all purposed flour/plain flour/tepung terigu (or 3 ½ cups all-purposed/plain flour + ½ cup cornstarch/cornflour-atau dengan menggunakan 3 ½ cup tepung terigu dicampur dengan ½ cup tepung maizena)

1 pound (4 sticks) unsalted butter/mentega tawar, ½ stick chilled/dinginkan, the rest at room temperature/sisanya di suhu ruangan
1 – 2 tsp salt/garam (1 for sweet, 2 for savory/1 untuk yang manis, 2 untuk asin)

1 ¼ cups cold water/air dingin (or substitute it with 1 Tbs lemon juice for 1 water if you wish to further temper the gluten in the flour/atau ganti dengan 1 sdM sari jeruk lemon jika diinginkan untuk lebih melunakkan gluten di tepung)

*Dough :
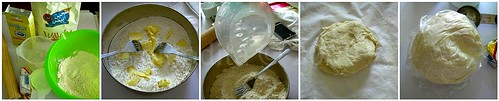
Puff Pastry : How to - 1

Measure the flour into a mixing bowl. Remove ½ cup and set it aside in another bowl.

Timbanglah tepung di dalam mangkuk mixer. Ambil ½ cup dan sisihkan di dalam mangkuk lainnya.

Take the half stick of chilled butter, cut it into small pieces and drop it into the flour. With two knives, a pastry blender or your fingertips, cut or rub the butter into the flour until it resembles cornmeal.

Gunakan ½ batang mentega yang didinginkan tadi, potong2 kecil2 dan masukkan ke dalam tepung. Menggunakan dua buah pisau, blender (dengan fungsi pastry) atau menggunakan jari-jari anda, potong atau remas-remas mentega ke dalam tepung hingga menyerupai remah-remah roti atau cornmeal.

Add the salt (and optional lemon juice) to the water and add this to the flour. Mix gently with a fork until you have a rough dough that pulls away from the sides of the bowl. If you need to add more water, do it a tablespoon at a time until the dough holds together.

Tambahkan garam (dan sari jeruk nipis, jika pakai) ke dalam air dan masukkan campuran ini ke dalam tepung terigu. Aduk perlahan memakai garpu hingga adonannya tercampur rata dan tidak melekat di sisi2 mangkuk. Jika masih memerlukan air, tambahkanlah sesendok makan setiap kali penambahan hingga adonan tercampur rata.

Turn the dough out onto a lightly floured surface and knead until it is smooth and the gluten has been somewhat developed, about 2-3 minutes. Wrap it in plastic and refrigerate for at least 30 minutes.

Letakkan adonan ke atas permukaan/meja yang sudah ditaburi tepung, dan uleni hingga lembut dan gluten-nya sudah terbentuk, sekitar 2-3 menit. Bungkus dengan plastik dan biarkan dingin di kulkas selama 30 menit.

*Butter
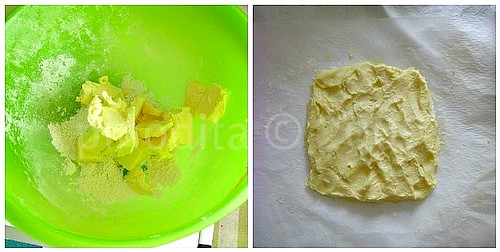
Puff Pastry : How to - 2

Take the remainder of the butter and the reserved flour and mix the two together until they're well blended and smooth. You can do this with a mixer, a food processor or with a spoon, by hand.

Ambil sisa mentega dan tepung yang disisihkan tadi, campur keduanya hingga tercampur rata dan lembut. Anda bisa mencampur kedua bahan ini dengan menggunakan mixer, FP atau sendok, tangan.

Pat this butter/flour mixture into an 8-inch square on a lightly floured piece of waxed paper. Cover it with second sheet of waxed paper and refrigerate it for at least 30 minutes. By mixing the butter with flour, you stabilize it somewhat so it won't decide to 'flow'.

Campur adonan ini sambil ditepuk-tepuk dan dijadikan segiempat dengan ukuran 8 inci di atas waxed paper yang sudah ditepungi. Tutup dengan selembar waxed paper lagi dan dinginkan di kulkas kurleb 30 menit. Dengan mencampur tepung dan mentega, anda menstabilkan adonan supaya tidak meleleh.

*Rolling-Folding
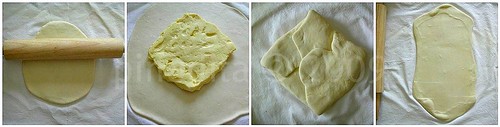
Puff Pastry : How to - 3

Remove the dough from the refrigerator and put it on a lightly floured surface. Gently roll it into a square about 12 inches on a side. You don't have to be obsessive about the dimension but be pretty close.

Keluarkan adonan dari kulkas dan letakkan di atas permukaan/meja yang sudah ditepungi. Gilas perlahan ke samping hingga membentuk segiempat kurleb 12 inci. Tidak perlu terlalu obsesif menjadikan adonan berbentuk segiempat tapi setidaknya sudah hampir menyerupai segiempat.

Put the butter square in the centre of the dough square but turn it so that the corners of the butter square point toward the sides of the dough square. Fold the corners of the dough over the butter until they meet in the middle. Pinch and seal the edges of the dough together.

Letakkan balok mentega/tepung tadi di tengah2 adonan yang sudah berbentuk segiempat, sehingga sudut-sudut balok menunjuk ke sisi-sisi adonan tadi. Lipat sudut adonan ke atas balok mentega/tepung sehingga setiap sudut adonan bertemu di satu titik di tengah2nya. Lekatkan sisi-sisi adonan ini satu sama lainnya.

Turn the square over and tap it gently with your rolling pin or by hand into a rectangular shape. Rolling the dough into a larger rectangle 20 inches long and 10 inches wide.

Balikkan adonan segiempat ini dan tepuk2 perlahan menggunakan rolling pin atau tangan membentuk persegi panjang. Gilas adonan hingga membentuk persegi panjang yang lebih lebar dengan ukuran 20 inci ukuran panjang dan 10 inci ukuran lebar.
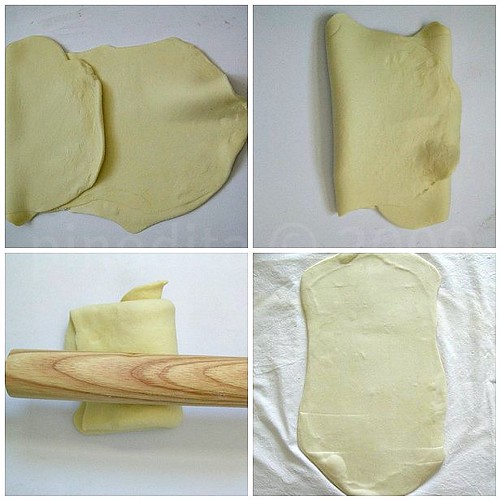
Puff Pastry : How to - 4

When the dough is the right size, fold the bottom third of the dough up to the centre and the top third over and turn the dough package ¼ turn to the right so it looks like a book ready to be opened. If the dough is still nice and cold and still relaxed, do another rolling and turning the same way. (If it begins feel too soft or wants to resist being rolled, cover it, put it on a small baking sheet and refrigerate it for 15 minutes).

Jika adonan sudah pada ukuran yang benar, lipat sepertiga adonan bagian bawah ke tengah-tengah adonan, begitu juga sepertiga adonan bagian atas lipat ke arah tengah adonan, kemudian lipat lagi ¼ adonan ke arah kanan, sehingga kelihatan seperti sebuah buku yang siap dibuka. Jika adonan masih bagus dan dingin serta masih relaks, gilas sekali lagi dan lipat seperti tadi. (Jika masih terlalu lunak dan tidak dapat digilas lagi, bungkus/tutup, letakkan ke atas loyang dan dinginkan di kulkas selama 15 menit, sebelum digilas dan dilipat seperti tadi).

If you've successfully rolled it out and folded it twice, you've completed 2 turns. Classic puff pastry gets six. Continue refrigerating it after each 2 turns (or more often if necessary) until all 6 turns are completed.

Jika anda sudah sukses menggilas dan melipatnya dua kali, berarti anda sudah menyelesaikan 2 turns. Classic puff pastry turn 6 kali. Lanjutkan mendinginkan adonan selama 2 kali turning (atau lebih jika diperlukan—misalnya jika adonan terlalu lembek) hingga 6 turns sudah diselesaikan.

*Chill

When all 6 turns are done, put the dough in the refrigerator for at least an hour (and preferable overnight) before shaping.

Jika sudah selesai 6 kali turning, letakkan adonan di kulkas dan dinginkan selama sekurang2nya 1 jam hingga semalaman sebelum dibentuk.

*Shaping

After being thoroughly chilled, the dough can be shaped into croissants, patty shells, twists, straws, etc. Scraps can be chilled and rerolled.

Setelah selesai didinginkan, adonan dapat dibentuk menjadi croissants, patty shells, twists, straws, dsb. Sisa2nya dapat didinginkan lagi dan digilas lagi.

*Freezing

Like other pastry doughs, you can freeze puff pasty in a non-self defrosting freezer for up to a year if it's well wrapped. It can also be frozen at any time during rolling, folding, turning process. Defrost it thoroughly before you use it, just to make sure it does not get too soft.

Seperti adonan pastry lainnya, puff pastry dapati dibekukan hingga satu tahun jika pengemasannya bagus. Dapat juga dibekukan pada setiap proses manapun (pada proses penggilasan, pelipatan, dan turning). Defrost (biarkan dalam suhu ruangan) dulu sebelum digunakan, hanya saja harus dipastikan jika adonan tidak betul2 menjadi terlalu lunak.
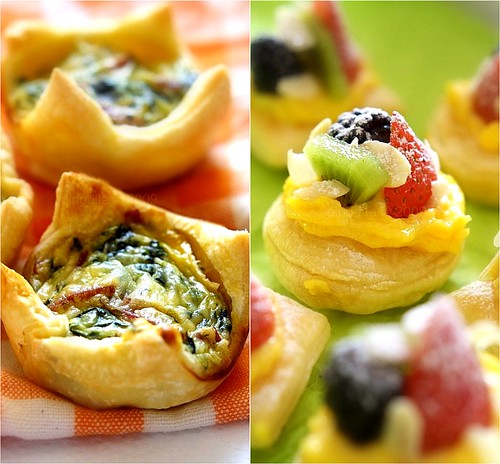
Puff Pastry collage

1.28.2009

[Indonesian Food] Soto Mie

Kalo lagi winter, selalu pengennya masak dan makan makanan yang berkuah dan hangat. Menu andalannya pasti seputaran sop dan soto-sotoan. Buat gue, musim dingin adalah saatnya eksplorasi kekayaan jenis-jenis soto Indonesia.

Resepnya Yuli ini berhasil menghantui gue siang dan malam dari sejak beliau posting di Multiply-nya. Emang kebetulan udah lama banget juga gak bikin soto mie, kayaknya sih terakhir ya pas winter tahun lalu :).

Seperti biasa bikin soto prentilannya banyak, tapi worth it banget lah. Mo coba?

[Indonesian Food] Soto Mie

SOTO MIE
adapted from : Mboke Nadine

Bahan:

Daging, rebus, potong2 sesuai selera
Mie telur, rebus sampe mateng, tiriskan
Kol, potong tipis2
Kentang, rebus, potong-potong (dita-kalo gue abis direbus sebentar trus digoreng sama kulit2nya)
Spring roll isi bihun, goreng sampe kecoklatan
Daun salam
Daun jeruk
Sereh
Lengkuas, memarkan
Jahe, memarkan
Daun bawang, potong 2 cm-an

Bumbu halus:
Bawang merah
Bawang putih
Cabe merah
Ketumbar
Kemiri
Merica

Pelengkap:
Tomat
Bawang goreng
Seledri

Cara memasak:
1. Tumis bumbu halus bersama dengan daun salam, daun jeruk, sereh, lengkuas & jahe sampe harum, kemudian masukkan ke air rebusan daging. Tambahkan garam & gula secukupnya. Rebus sampai mendidih & daging empuk.
2. Cara menyajikan: taruh dimangkuk, kol, mie, kentang, tomat, irisan spring roll isi bihun kemudian tuangi kuahnya. Taburi bawang goreng & seledri, beri kecap manis & jeruk nipis secukupnya. Hidangkan segera.

1.20.2009

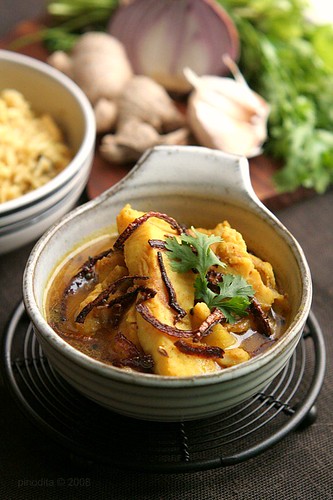
Fish Kodampuli

It's been almost 4 months since I tried this recipe. Gosh....I forgot to post it here ;).

I'm always interested in Indian Culinary (I'm a spice lover) but sometimes I don't have a gut to try them. So, I'm just here waiting any Indian recipes recommendation from my friends. Thanks to Lia, who always share her Indian recipes and encourage me to try ones.

Fish Kadampuli

I think this recipe would become one of our favorite. Serve with warm rice and make you want to lick your plate ;).

Fish Kodampuli
adapted from : Lia's Home

Ingredients :
King fish - 1kg
Red chilli powder - 2.5 tbsp
Turmeric powder - 1/4 tsp
Onions, thinly sliced - 1/2 tbsp
Ginger, thinly sliced pieces - 1 tsp
Garlic, thinly sliced pieces - 1/2 tsp
Salt to taste
Fish tamarind (Kodampuli) - 2-3 pieces
Oil - 1.5 tsp

Oil - 1 tsp
Mustard seeds - 1/2 tsp
Fenugreek seeds - 1/4 tsp
Shallots thinly sliced - 1 tsp
Curry leaves to taste

Kodampuli is a special tamarind normally used in kerala style of cooking

Fish Kadampuli

Directions :
Cut the fish into pieces of desired size.

Soak the fish tamarind (kodampuli) in a cup of water and set aside.

Heat oil in a deep pan, and fry the onions until fragrant. Add ginger and garlic and saute until soft.

Mix the red chilli powder and turmeric powder with a few drops of water to make a paste. Add the spice paste to the pan and saute on low heat till the oil separates.

Add salt and kodampuli water + one more cup of water and bring to a boil.

Add fish pieces and cook on medium heat until the fish is cooked.

Heat oil in a small frying pan and add the fenugreek seeds, saute until brown. Now add the mustard seeds and when the mustard seeds start to splutter, add the shallots and curry leaves. Pour this over the prepared fish curry.

Serve with warm rice.

Foodie Event : (Almost) Forgotten Indonesian Culinary Heritage

button new

My foodie fellow, Rurie is inviting us to join a foodie event. It's not just foodie event, it's a contest too. Share your food knowledge and photo, and get the prizes. So, what are you waiting for? Come and join to "know your Indonesian culinary heritage".

The food that we have to share is Indonesian cuisine that is almost disappeared from the market and society. Let me make it clear here, you may notice when you were a kid, you had that food/beverage so often. You might eat them from your grandmother's kitchen. As you grew up, you barely see the dish or it is only seen once a while in a special/traditional feast or ceremonial. The dish can be rice, fish, meat, and vegetable. Dessert, snack and beverages are acceptable too. It doesn't have to be an extravagance dish, show us what you have got in your hometown (or used to have) or may be a childhood memory dish that your grandmother used to make but nobody hardly make it anymore.

For more information, please click here

1.13.2009

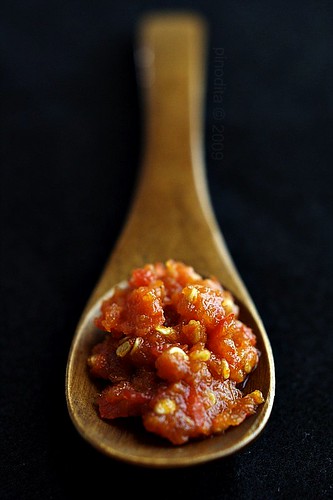
CLICK : January 2009 - RED Chili Sauce


Many Indonesian can't live without sambal or chili sauce :D. We usually make our own fresh sambal not the kind packed in a bottle. There are countless recipes for chili sauces in Indonesia (sambal kacang or nut chili sauce, sambal kemiri or candlenut chili sauce, sambal bawang or onion chili sauce, etc). Indonesian sambal usually come as a thick paste, and are used either as a dipping sauce or in stirfrying.

One of the most common sambal recipe use these ingredients : bird eye chili, sometimes cayenne, dried shrimp paste (terasi), coconut sugar, tomato and salt.

And here's my entry for CLICK : January 2009 - RED

Chili Sauce

Another shots of Red Chili Sauce :

Chili Sauce Chili Sauce
Chili Sauce

1.12.2009

Gingerbread House

I don't celebrate christmas, but I love the spirit within. A month ago to celebrate the holiday spirit, Arfi of Homemades challenged us at Klub Berani Baking (Indonesian Baking Club) to make our own gingerbread house. I was so excited, since my daughter, Arwen had asked me to build her gingerbread house since couple of months ago. I thought that was the best time making her dream comes true.

Gingerbread house

I used the recipe from Taste Magazine. I turned out perfect. The kids and I really love the cookies. When it's time to assemble the house, Arwen and Leia got so excited. While I was gluing the house, they were putting the sweets and decorated the house using their own creativity.

Nothing compares than seeing happiness in their faces when they pushed joy to the limit.

Weekend project : Gingerbread house

Gingerbread
Source : Sarah Bowman. NZ Taste magazine. December 2007.

Ingredients:
125g butter
¾ cup golden syrup
1 cup sugar
3 cups flour
2 Tbsp ginger
3 Tbsp mixed spice (dita - you can use cinnamon, clove and nutmeg)
1 tsp baking soda
2 Tbsp milk

Icing
3 egg whites
5 cups icing sugar

Directions :
Melt butter, golden syrup and sugar in a large pot and bring to the boil. It is very important to let the mixture boil rapidly for several minutes and stir it as it boils. This ensures a smooth and elastic dough.

Sift the flour, ginger and mixed spice into a large bowl. Pour melted butter mix into the dry ingredients and mix to combine.

Mix baking soda and milk in a cup and pour into the dough, stirring until it is well combined. Rest dough for 15-20 minutes, covered in plastic wrap.

Roll out handfuls of dough (5mm thick) on lightly floured pieces of baking paper. Use pattern pieces to cut out house shapes (removing excess dough as you go and returning it to the bowl). Leave room between each piece for expansion during cooking. Slide pieces of baking paper with the biscuit pieces onto baking trays. (Bake in batches.) Bake for 10-15 minutes at 170°C. Cool on wire racks.

Cook’s tip :
Use leftover dough to make people and trees for the house, or Christmas tree decorations. With a skewer, put a hole in the top of each decoration biscuit (to thread a ribbon through) before baking and repeat straight after cooking, as the holes close over during baking. Decorate when cool.

Icing :
Whisk egg whites until frothy, then beat in icing sugar until thick (about 5 minutes). Cover with a damp tea towel or
paper towel and plastic wrap to prevent the icing drying out.

Weekend project : Gingerbread house

Get your gingerbread cut-outs in pdf format here.

1.07.2009

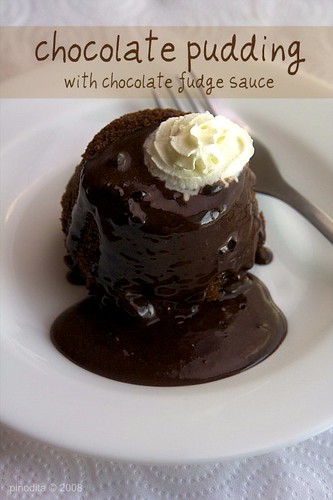
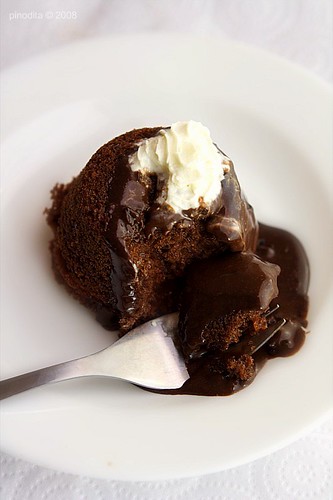
Chocolate Pudding with Chocolate Fudge Sauce

I do really miss eating Indonesian kind of pudding which made from agar-agar. And here I'm desperately seeking agar-agar and I only found gelatine or jelly :(. Even in Asian Grocery Store I couldn't find it! Do you have any idea what to substitute agar-agar instead of jelly or gelatine?

Chocolate Pudding with Chocolate Fudge Sauce 3 -choco

Anyway, I was so craving for Indonesian Chocolate Pudding and ended up with this recipe. Not bad, though! Eventhough it didn't use agar-agar ;). I really recommended this recipe especially for chocoholic. The chocolate pudding was so moist, with a touch of chocolate fudge sauce, it's heavenly melt in your mouth and impossible to resist.

Chocolate Pudding with Chocolate Fudge Sauce
adapted from : Chcocolatetradingco

Ingredients (SERVES 8) >> dita - I used cupcake pan :
185g self raising flour
1 level tsp baking powder
1 level tsp bicarbonate of soda
2 rounded tbsp cocoa powder (dita - I used Cadburry Cocoa Powder)
150g caster sugar
2 extra large eggs, beaten
2 tbsp golden syrup or thick pure maple syrup
200ml milk
200ml sunflower oil

Chocolate Pudding with Chocolate Fudge Sauce 1

Sauce :
175g extra bitter dark chocolate
250ml double (48%) cream (dita - I used whipping cream)
250g icing sugar - sifted (dita - I used only 150g)

Directions :
Preheat oven to 150C/300F/Gas 2

Grease eight individual 175ml pudding moulds

Prepare pudding :
Sieve all dry ingredients together into a mixing bowl. Make a well in the centre.

Pour beaten eggs into the well with the syrup, milk and oil. Gradually draw dry ingredients in from the sides of the bowl and beat to make a smooth batter.

Pour into prepared moulds and bake in preheated oven for about 25 to 30 minutes, until springy to the touch.

Prepare sauce :
Melt chocolate and cream together in a double boiler.

Gradually beat in the icing sugar until glossy.

To serve, un-mould puddings onto dessert plates and pour fudge sauce over and around the puddings.

12.15.2008

Dziriate - Algerian Almond Tarts

Dziriate? Never heard before.

Actually I made these cookies because of their unique name ;).

Dziriate (Algerian Almond Tarts)

This is a smart idea to use your "ready to use pastry". But the result is just too sweet for me. And I don't like the scent of the rose water. Lucky me, my girls will always be there to empty the jar.

Dziriate (Algerian Almonds Tart)
adapted from Dessertmag

Ingredients :
Ready to use pastry

Filling :
3 cups slice almonds
1 1/2 cups sugar (dita - I used brown sugar)
2 eggs
1 1/2 tsp lemon zest
2 tbsp rose water or orange flower water
1/2 tsp vanilla extract

Topping :
1/2 cup honey
Pine nuts (optional)

Dziriate

Directions :
1. Preheat oven to 350˙F (180˙C). Lightly grease a few cookie sheets or line with silicone baking mats (dita - I used parchment paper). Using a food processor, grind almonds and sugar to a fine meal. Add eggs, lemon zest, rosewater and vanilla. Process until all ingredients are evenly incorporated.

2. Use 2- to 3- inch cookie cutter to cut out circles from the dough.

3. Drop tablespoons of filling into the center of each circle. Wet fingers with water and pinch the dough together into four corners, forming a cup around the filling. Or, if you have a mini muffin tin or other small molds, fit the dough circles into the molds and fill about 3/4 full with filling.

4. Place tarts on sheet. bake for 20 mins, rotating sheets halfway through until filling begins to brown and the cookies are a light golden color. Remove sheets from oven and place on wire racks. Drizzle honey over each of the tarts. Let tarts cool on sheets before serving. Yield : about 2 1/2 dozen cookies

Storage : store in an airtight container for up to 1 week

Dziriate

12.10.2008

[Indonesian Food] Ayam Kremes

Sebenernya usaha yang dilakukan dan dapur yang dikorbankan untuk jadi penuh minyak, saat bikin ayam ini, terbayarkan dengan rasanya. Gimana gak penuh minyak tuh dapur, lha wong nggorengnya itu nyiprat ke mana-mana minyaknya :P

Dimakan pake nasi anget dan sambel terasi.....hhmmmm nikmat banget!!!

[Indonesian Food] Ayam Goreng Kremes

Ayam Kremes ala Mamin

Bahan-bahan :
1 ekor ayam, potong sesuai selera
3 lembar daun jeruk
3 cm lengkuas

Bumbu halus :
6 bawang merah
8 siung bawang putih
3 sdm ketumbar
1 sdt merica
3 cm jahe
garam dan gula secukupnya

Bahan kremes:
2 cup air kaldu ayam (dari rebusan ayam)
1/4 cup tepung beras+5 sdm tepung tapioca
1 butir telur, kocok asal
5 sdm (atau sesuai selera) garlic powder (karena gue suka banget kalo kremesnya berasa bawang putih)

Cara Membuat :
1. Rebus ayam dengan semua bumbu hingga empuk, angkat ayam dari air rebusan.
2. Goreng ayam hingga kekuningan (kalo gue doyan yang agak gosong).
3. Campur semua bahan kremes, goreng (pake sendok sayur dan per satu sendok aja) dalam minyak panas dengan api agak besar. Goreng hingga kering. Angkat.
4. Sajikan ayam dengan taburan kremes, nasi panas dan sambel terasi....yum yum yum!!

Tips :
1. Kalo mau bumbu ayam lebih meresap, setelah direbus dan api dimatikan, diamkan semalamam, baru digoreng besok paginya.
2. Kalo mau menggoreng kremes mending pake minyak baru, jangan pake minyak bekas menggoreng ayamnya, supaya hasil kremesnya terlihat bersih tidak hitam.

[Indonesian Food] Ayam Goreng Kremes

12.02.2008

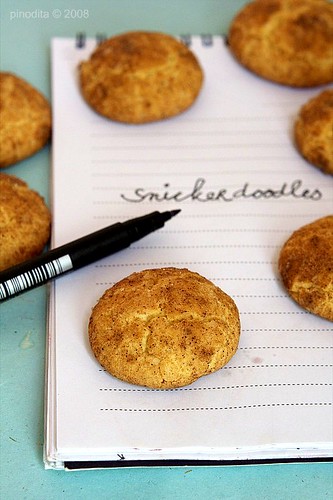
Snickerdoodles

Cute name!!
Cinnamony butter cookies....definitely my favourite!

Snickerdoodles

They were gone in a day! Thanks Van, for the recipe.

Snickerdoodles
adapted from : Vania's

Snickerdoodles

Original Source: Martha Stewart's Cookies. The origin of the name of these homey, drop-style cookies is unclear, but recipes for them appear in early-twentieth-century American cookbooks and newspapers. After rolling balls to dough in cinnamon sugar, give them ample room on baking sheets; they spread quite a bit.

Ingredients :
2 3/4 cups all purpose flour
2 tsp baking powder
1/2 tsp salt
1 cup unsalted butter, room temperature
1 1/2 cups plus 2 tbsps sugar
2 large eggs
2 tsp ground cinnamon

Directions :
1. Preheat oven to 350 F. Sift together flour, baking powder, and salt into a bowl. Put butter an 1 1/2 cups sugar in the bowl of an electric mixer fitted with the paddle attachment. Mix on medium speed until pale and fluffy, about 3 minutes. Mix in eggs. Reduce speed to low; gradually mix in flour mixture.

2. Stir together cinnamon and remaining 2 tbsp sugar in a small bowl. Shape dough into twenty 1 3/4 inch balls; roll in cinnamon sugar. Space 3 inches apart on baking sheets lined with parchment paper.

3. Bake cookies, rotating sheets halfway through, until edges are golden, 12-15 minutes. Let cool on sheets on wire rack. Cookies can be stored between layers of parchment in airtight containers at room temperature up to 3 days.