Yiippeeee!!! Happy 1st anniversary KBB (Klub Berani Baking is Indonesian Baking Club where a bunch of Indonesian ladies gather and daring ourselves to try new recipes every 2 months)! Through KBB, we share recipes and make friends. And to celebrate KBB 1st anniversary, they gave us 3 special options for the challenges : COOKING, BAKING and FOOD PHOTOGRAPHY. It's up to us which one we want to choose.
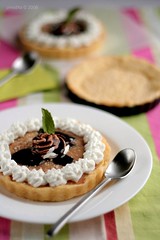
I chose 2 challenges to join, BAKING and FOOD PHOTOGRAPHY. And here's my entry for BAKING competition.
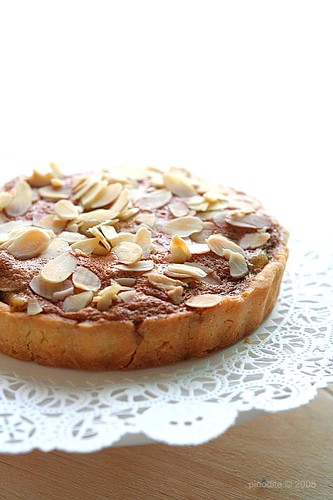
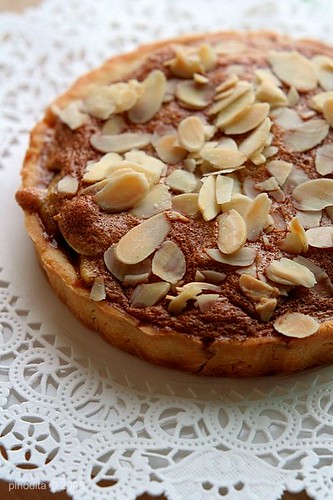
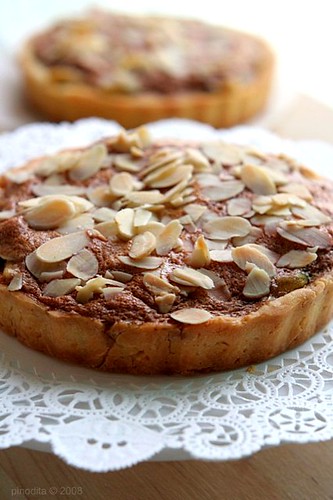
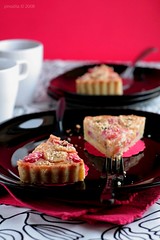
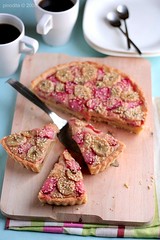
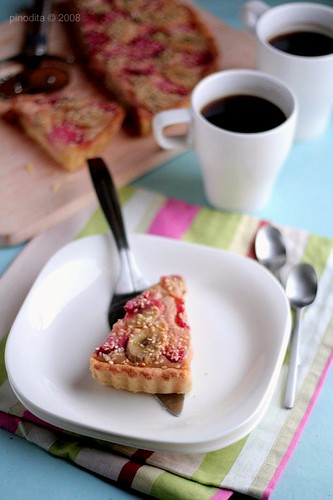
My entry for FOOD PHOTOGRAPHY competition, here. Apple Tart with Almond Nougatine adapted from Ripe for Dessert by David Lebovitz (the original recipe is Rhubarb Tart with Almond Nougatine)
The Dough : 6 tbsp (3/4 stick) unsalted butter, chilled 1/2 cup sugar 2 large egg yolks (reserve the whites for the nougatine topping) 1 1/4 cups flour 1/2 tsp salt
The Filling (dita's version) : 1/2 stick butter 4 apples, peeled and cored 1/2 cup brown sugar 1/4 tsp ground cinnamon a pich of ground black pepper a pinch of ground nutmeg
The Almond Nougatine : 2 large egg whites 1/4 cup firmly packed light brown sugar 1/2 tsp ground cinnamon 1 1/2 cups sliced almond
Directions : To make the dough : 1. Cut the butter into 1-inch pieces and let stand at room temperature for 10 minutes. Butter the bottom of a 9-inch springform pan. 2. With an electric mixer or by hand, beat the butter with the sugar until no visible lumps of butter remain. Beat in the egg yolks. Add the flour and salt and mix at low speed until the dough begins to come together. 3. Gather the dough and press it evenly over the bottom and halfway up the sides of the prepared pan. Use the heel of your hand. (Dust your hand with a bit of flour if the dough is sticking to them). Put the pan in the freezer for at least 30 minutes. 4. Position the oven rack in the center of the oven and pre-heat the oven to 375 degrees.
To make filling : 4. Melt the butter in heavy medium skillet over medium-high heat. 6. Add brown sugar. Cook until thick grainy sauce forms, about 1 minute. 7. Mix in apples. Cook until apples are tender and sauce is reduced to glaze, tossing often, about 7 minutes. 8. Mix in spices. Cool filling at least 30 minutes and up to 3 hours.
9. Remove the springform pan from the freezer (dita-prick the base of the pastry with fork several times) and line with foil. Pour in a single layer of pie weight, dried beans or raw rice. Bake the dough for 20 minutes (dita-15 minutes). Remove the pie weights and foil and bake for 5 to 10 minutes more, until the dough is browned. Remove from the oven and cool on a wire rack. Do not turn off the oven. 10. When tart shell has cooled, spread the apples filing in it.
To make the almond nougatine : 11. beat together the egg whites, brown sugar and cinnamon with a fork. Stir in the almonds. Spread the nougatine evenly over the tart. 12. Bake the tart for 40 minutes (dita-30 minutes), until the nougatine is crisp and browned. Cool the tart on a wire rack for 15 minutes. To serve, remove the sides of the springform pan.
Serving : serve with vanilla ice cream or grand marnier-flavored whipped cream, or simply eat by itself.
Take a seat and please enjoy the step by step video ;)
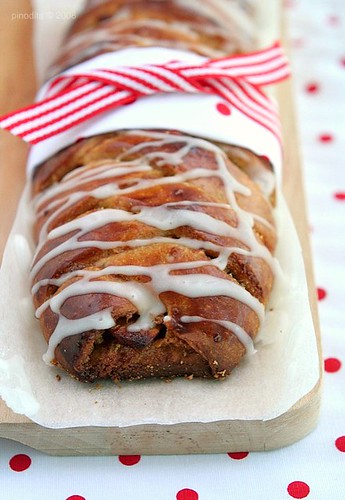
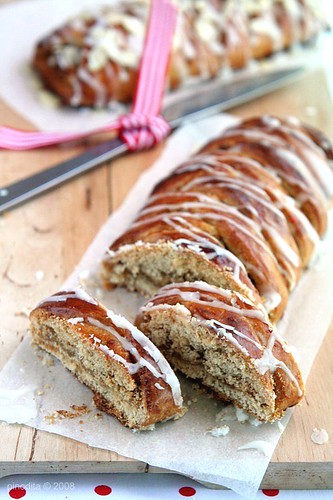
I saw this coffee cake at Patricia's, my sweet foodie blogger buddy. Yes, it was love at the first sight. I never knew Glazed Apple Lattice before, so that was just my first time ever. And I was just so curious to try the recipe out. With that lattice top and the drizzle of the icing, it was just so pretty!
So I e-mailed dear Pati, asked a few things and I told her this would be great for my 5th episode of cooking podcast project "COOKING FRIDAY".
Just don't get fooled by the long list of ingredients. This delectable and fragrant coffee cake does take a bit of time to prepare, but is actually quite easy to make, and well worth the effort. The recipe itself is very detailed and well explained. It calls for orange zest but since I didn't have one, I substitute it for keylime zest.
When I made this, actually it wasn't really perfect at proofing stage. The dough didn't rise perfectly and doubled in volume. I doubt it and thought, "this is not gonna work!"
But to my surprise, when it came out from the oven, this coffee cake turned out so wonderful and rise perfectly (at least to me...hahaha), not to mentioned the fragrant of the cake hhmmm....makes my mouth watering!
Thanks for sharing, Patricia. The result was superb! I never expected the combination beetwen cardamon, nutmeg and cinnamon could be so delish!
Glazed Apple Lattice Coffee Cake source : Bon Appetit, Oct 2007 via Patricia's
Dough: 2 tablespoons warm water (40 to 46ºC/105ºF to 115ºF) 1 package (2 ¼ teaspoons) active dry yeast
½ cup (120ml) whole milk 6 tablespoons sugar 5 tablespoons (70g) unsalted butter, diced, room temperature 1 teaspoon salt 2 large egg yolks 1 teaspoon finely grated orange zest (dita-I used keylime zest) ½ teaspoon ground cardamom ¼ teaspoon ground nutmeg 2 to 2 ¼ cups (280 to 315g) all purpose flour
Filling: 2 tablespoons (¼ stick) unsalted butter 6 tablespoons (packed) golden brown sugar 1 ¼ pounds (565g) Golden Delicious apples (about 3 medium), peeled, cored, quartered, cut crosswise into ¼-inch slices 1 teaspoon finely grated orange zest (dita-I used keylime zest) 1 teaspoon finely grated lemon zest (dita-I used keylime zest) ½ teaspoon ground cinnamon 1/8 teaspoon ground cardamom 1/8 teaspoon ground nutmeg
Nonstick vegetable oil spray or vegetable oil 1/3 cup finely crumbled vanilla wafer cookies or soft ladyfingers
Glaze : 1 ½ cups powdered sugar (dita-I only used 5 tablespoon) 2 tablespoons (or more) orange juice (dita-I used keylime juice)
Start with the dough: place 2 tablespoons warm water in small cup. Mix in yeast. Let stand until yeast dissolves, about 6 minutes.
Stir milk, sugar, butter, and salt in medium saucepan over medium-low heat just until sugar dissolves and butter melts (mixture should be just warm). Scrape milk mixture into large bowl; cool to lukewarm if necessary. Whisk in yeast mixture, egg yolks, orange peel, and spices. Add 2 cups flour; mix with rubber spatula until dough comes together. Turn dough out onto floured work surface. Knead until smooth and silky, sprinkling with more flour by tablespoonfuls as needed, about 6 minutes – it’s a very tender dough, delicious to work with. Place in clean large bowl. Cover with plastic wrap and kitchen towel. Place in warm draft-free area (I use my microwave oven); let rise until light and almost doubled in volume, about 2 ½ hours.
Now, the filling: melt butter in heavy medium skillet over medium-high heat. Add brown sugar. Cook until thick grainy sauce forms, about 1 minute. Mix in apples. Cook until apples are tender and sauce is reduced to glaze, tossing often, about 7 minutes. Mix in all grated peel and spices. Cool filling at least 30 minutes and up to 3 hours.
Place large sheet of foil (dita-I used parchment paper) on work surface; spray with nonstick spray. Turn dough out onto foil. Roll out to 14x12-inch (35x30cm) rectangle. Sprinkle cookie crumbs in 4-inch-wide (10cm) strip down center, leaving ½-inch (1.25cm) border at top and bottom. Arrange apples with any juices atop crumbs. Starting ½ inch (1.25cm) from each long side of apples, cut straight to edge of dough at 1-inch (2.5cm) intervals, making about 13 strips on each side. Fold dough strips alternately and on slight angle over filling, forming lattice. Seal open ends of dough.
Slide foil with dough onto large rimmed baking sheet; trim foil overhang. Cover cake loosely with plastic and towel. Place cake in warm draft-free area; let dough rise until light and puffy, about 1 ¾ hours.
Preheat oven to 190ºC/375ºF. Bake cake uncovered until golden brown, 30 to 35 minutes. Cool 30 minutes.
For glaze: Mix powdered sugar and 2 tablespoons orange juice in small bowl to blend, adding more juice by ½ teaspoonfuls if too thick. Drizzle glaze over cake. Gently run spatula under cake to loosen from foil. Cut crosswise into slices. Serve slightly warm or at room temperature.
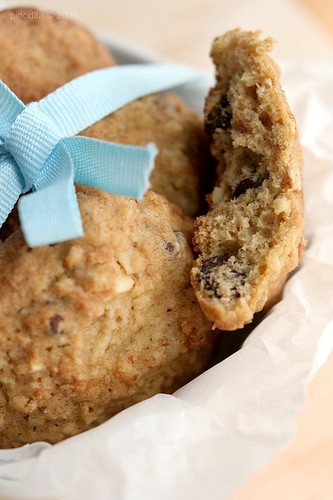
Thanks to Vania for sharing this recipe. Say no more, just like you said, "this is the best cookies!"
The kids absolutely love it. We are so addicted to these rich-chewy-cakey kind of cookies. I made twice and it didn't take long to dissapear from my cookie jar.
If you want to try, I suggest over-ripe banana for a strong banana flavour (the more spotted banana the tastier).
Enjoy the video!
Support us by visiting and leave comment in our podcast ;). And here's the original recipe!
Banana-Walnut Chocolate-Chunk Cookies Source : Martha Stewart's Cookies, The Very Best Treats to Bake and to Share via Vania's
Ingredients : 1 cup all- purpose flour 1/2 cup whole wheat flour 1 tsp coarse salt 1/2 tsp baking soda 3/4 cup (1 1/2 sticks) unsalted butter, room temperature 1/2 cup granulated sugar 1/2 cup packed light brown sugar 1 large egg 1 1/2 tsp pure vanilla extract 1/2 cup mashed ripe banana (about 1 large) 1 cup old-fashioned rolled oats 8 ounces semisweet chocolate, coarsely chopped into 1/2 inch chunks (~224 gr) (dita- I used chocolate chips) 1/2 cup coarsely chopped walnuts (about 2 ounces), toasted (dita-I used cashew nut)
Directions : 1. Preheat oven to 375 F. Whisk together both flours, salt and baking soda in a bowl. 2. Put butter and both sugars into the bowl of an electric mixer fitted with the paddle attachment; mix on medium speed until pale and fluffy. Reduce speed to low. Add egg and vanilla; mix until combined. Mix in banana. Add flour mixture just combined. Stir in oats, chocolate chunks, and walnut. 3. Using a 1 1/2 inch ice cream scoop, drop dough onto baking sheets lined with parchment paper, spacing about 2 inches apart. Bake cookies, rotating sheets halfway through, until golden brown and just set, 12-13 minutes. Let cool on sheets on wire racks 5 minutes. Transfer cookies to wire racks; let cool completely. Cookies can be stored in airtight containers at room temperature up to 2 days. Makes about 3 dozen.
Cooking Friday episode kali ini sekedar sumbangan ide untuk temen-temen yang pengen mengajak anak-anak balitanya masuk dapur. Kegiatan cooking/baking buat balita adalah salah satu kegiatan yang menyenangkan dan menerbitkan rasa ingin tahu yang sangat besar. Arwen dan Leia sudah terbiasa ikut masuk dapur kalo gue lagi cooking dan baking. Biasanya kalo gue lagi masak, mereka juga akan sibuk sendiri dengan potongan wortel yang gue kasih atau bermain-main dengan kentang menggunakan pisau plastik mereka.
Gue dan Pinot memang menciptakan kelas-kelas untuk membuat sebuah proyek bagi mereka. Misalnya hari ini kelas menggambar, besoknya kelas crafting, besoknya lagi kelas masak. Sebisa mungkin hari mereka dilalui dengan sebuah kegiatan yang bermakna. Maklum kami tinggal di rumah susun yang kanan kiri mentok tembok. Gak ada playground dan gak ada lapangan tempat anak-anak berlari-lari.
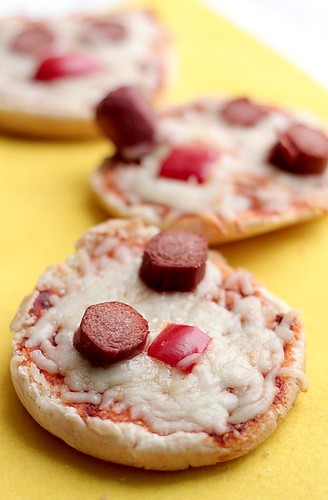
Untuk pilihan makanan yang akan dibuat, cari yang sederhana dan simple. Mereka hanya butuh proses pengerjaannya kok, yang membuat mereka merasa fun. Pilihan kami kali ini adalah membuat Pizza yang terinsipirasi dari Elmo, makanya dinamain anak-anak Pizza Elmo. Pizza ini sangat sederhana, jangan dibayangin bikin Pizza kayak Pizza Hut ya :P. C'mon join the fun with us!
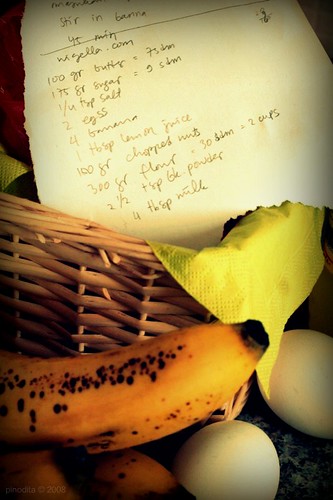
Inget Banana Cake gue yang resepnya hilang? Sampe sekarang gak ketemu. Emang ajaib banget deh tuh, gue gak inget sama sekali ambil dari mana.
Udah beberapa minggu ini, kami mencanangkan tiap hari Jumat adalah waktunya membuat podcast cooking/baking. Kami memang bukan profesional, gak mahir-mahir amat, kami cuman suka coba-coba, tapi kami berniat membagi pengalaman (syukur-syukur ada ilmu yang bisa didapat) yang kami punya kepada temen-temen yang mau tau resep-resep cooking dan baking yang pernah kami coba.
Kok hari Jumat, soalnya ini berhubungan dengan hari liburnya sang cameraman :P. Biasanya kalo udah menjelang Jumat, Papin udah mulai tanya-tanya, bikin apa kita besok Jumat :)). Akhirnya kita namain Cooking Friday.
Jumat kemaren, kebetulan punya pisang yang udah mateng banget, mo dimakan gitu aja juga udah males, pasti udah lembek banget. Akhirnya gue putusin untuk dibikin cake aja. Browsing sana sini nemu tiga kandidat resep dari Allrecipes, Recipezaar dan Nigella. Akhirnya diputuskan pake resep Nigella dengan alesan klasik, paling simple dan pasti jadinya :P.
Enjoy the video! Silahkan didownload, semoga berguna :).
Ingredients : 100 grams of butter or margerine 175 grams of sugar 1/4 teaspoon salt 2 eggs grated zest of 1 lemon 100 grams of raisins (optional) 1 tablespoon of Rhum (optional?!!???) 400 grams of (over)ripe bananas, mashed (about 4) 1 tablespoon lemon juice 150 grams roughly chopped nuts (optional) 300 grams flour 2 1/2 teaspoons baking powder 4 tablespoons milk (optional)
Directions : Cream butter and sugar together. Easiest is to use the stand-alone mixer, you don't need to bring the butter to room temp first then. Just let the machine churn and churn as you weigh off and prepare the rest of the ingredients. Best use eggs at room temp though.
Add the eggs, churn until the mixture changes in color and becomes light and fluffy.
Add the lemon zest, and if using raisins (or currants, or even cranberries), soak them in the rhum. I usually add a healthy glug of rhum and forget about the raisins alltogether. =)
Add the bananas and the lemon juice. Again, I usually don't measure out the juice but squeeze in roughly a tablespoon's worth, sometimes more.
Once the bananas are mixed in, you might notice the mix looks curdled. Don't worry. Add the nuts (if you want to use them).
Sift flour and baking powder together, or just loosely whisk them together in a bowl. Add to the egg-flour-banana mix and combine.
If the dough/batter seems too heavy, add milk. I usually don't need to because (boozer that I am!) I have already added a healthy dose of rhum!
This is for an oblong caketin about 30 cms long. Butter the tin, line it with parchment. Bake for 75 minutes in an oven preheated at 180 °C.
If making cupcakes, add 2 tablespoons of batter in each cupcake paper. I used the Lakeland ones, the box says 44x25 mm. The batter is enough for 20 cupcakes, plus 9 larger muffin cases (the ones you need for a 12-muffin size muffin tin).
Bake cupcakes for 20 minutes at 180°C, muffins for 25-30 minutes.
I don't like the greyish tinge a lot of banana cakes get. So I always use the darkest type of brown sugar I can get. I also substitute part of the weight of the flour with custard powder for that reason. The bright yellow color kind of masks the grey. You can substitute up to 30 % of the flour in any cake recipe with either corn flour or custard powder. This also helps make your cake lighter. Again, I go by the seat of my pants: Add corn flour/custard powder first, when your bowl is on the scales, and top up with flour.
This cake will keep for up to a week in the fridge, wrapped in tin foil. If it lasts that long... It yields a very moist cake, and the riper the bananas you use, the more fragrant the cake will be.
As you might have gathered, this is a very forgiving recipe. You can play around with the proportions quite a lot. Just make sure the sugar is well-dissolved before adding your other ingredients and use fresh baking powder.
If you don't have any bananas, use other fruit or fruit pulp. I have successfully made this cake with mashed apricots too, I've even topped up the weight of the mashed bananas with applesauce and the result was fine. My sister successfully used rhubarb compote and Mum once used blueberry compote. The result of that one looked a bit halloween-ish though. But it was delicious!
Sometimes I use all the ingredients. Sometimes I don't. I never leave out the lemon juice, though. But leaving out the zest and using chocolate chips instead of nuts is a pretty yummy idea, even though I say so myself.
Hot tip: If you want the tear in the cake to be nice and straight, wet your finger and draw a straight line across the top of the (raw) batter, lengthwise, before putting it in the oven. Or have a knife at the ready, and as soon as you see your cake starting to rise, cut the top with the knife (lengthwise). The tear will follow that line.
If the top of the (large) cake browns too much, cover with tin foil to protect it and prevent more browning.
Tantangan KBB ke-5 bikin Pie?? Kok ya kebeneran banget. Pas menjelang dikirimnya suryocinto (kata Mindoel) alias surat cinta tantangan, gue emang lagi pengen banget bikin sejenis pastry atau pie-pie-an. Jadilah gue nyetok bahan-bahan buat pie. Eh...ndilalah kok, tantangannya ternyata bikin Banoffee Pie atau Banana Toffee Pie. Dan gue tuh gak biasa-biasanya beli pisang, lah kok menjelang tantangan, gue beli pisang lumayan banyak, tadinya sih buat bikin banana cake. Tapi keburu digondol krucils akhirnya tinggal tersisa satu :). Hahaha...jodoh emang feeling gue!
Trus nih yang kebeneran lagi, kok setiap menjelang tantangan gue selalu ketiban rejeki punya gadget baking baru! *asik-asik*. Dua bulan lalu, Papin mengabulkan permintaan gue untuk punya mikser baru. Nah, di tantangan sekarang gue dapet food processor baru menggantikan chopper gue yang jebol karena tragedi cireng, which is akan dipakai buat bikin pie :).
Jadi ceritanya, beberapa minggu yang lalu, gue dan Pinot dapet proyek motret dari Rami, temen kantornya Pinot. Yang dipotret gak tanggung-tanggung, salah satu anggota parlemen. Katanya sih foto-fotonya akan dipakai untuk keperluan kampanye Pemilu. Duhh rada kikuk juga, secara baru kali ini bener-bener berinteraksi dengan Kuwaiti, belum kenal baik pula, dah gitu orang penting pulak di negeri ini :P. Tapi untung aja orangnya santay geboy, jadi suasana pemotretan gak kaku.
Setelah acara foto-foto selesai, kami nge-teh bareng sambil ngobrol-ngobrol, beliau secara serius menawarkan gue untuk membuka usaha di Kuwait. FYI, expat yang ingin punya usaha di Kuwait harus punya kenalan orang penting :). Wiiii....sejenak angin sejuk berhembus. Beliau juga menawarkan gue untuk dibuatkan ijin kerja di Kuwait. Tawaran yang sangat menarik....buat yang otaknya otak bisnis. Lah gue?? Gue tuh paling dodol deh kalo disuruh bisnis. Emang it's not in my blood, deh. Tawarannya sih membuka usaha studio foto...seru kan? Dia bilang just think about it, kalo gue memang berminat, gue bisa menghubungi dia. Kata temen-temen, "udah ambil aja!"
Gila, man, belum brani! Gue belum tau peta bisnis di sini soalnya. Nanti aja deh kalo gue udah punya cukup nyali!! :D
Back to the story, dari acara foto-fotoan ini, kami dapet sedikit rejeki (alhamdulillah). Pinot langsung nawarin (apa gue yang minta...hwahahaha), apa gue mau beli chopper baru? Kalo yang kayak ginian, otak cepet banget deh nyambernya, gak tanggung-tanggung gue mau beli food processor sekalian aja, daripada beli chopper lagi...wekekekekkkk!!!
Wah, ternyata kayaknya emang udah diatur banget deh semuanya, semua kejadian saling terkait gitu.
Wokeehhhh kembali ke Banoffee Pie...
Setelah suryocinto tiba, gue semangat 45 untuk nyoba. Gak perlu nunggu berhari-hari, resep udah gue praktekkan. Pada saat proses pengerjaan, gue gak menemukan kendala yang berarti. Hasil akhirnya pun cukup memuaskan untuk gue yang baru pertama kali bener-bener nyoba bikin pie shell. Renyah tapi gak hancur saat dipotong. Padahal ada satu poin yang gak gue patuhi dari resep, yaitu mentega gak gue potong kecil-kecil...hihihihii....pemalas!
Gue bikin pie ini 3 kali tapi gak dalam satu hari loh...gila aja kali! Pertama, karena penasaran pengen nyoba-nyoba lagi, kedua susah banget buat gue menumbuhkan mood motret, sementara pie udah bulak-balik ludes, jadi untuk tantangan ini gue sampe 3 kali motret dengan set yang berbeda...busyeett!!
Yang pertama bikin, gue pake loyang individual kecil-kecil dengan filling banana dan toffee, resep sesuai dalam suryocinto, kecuali urusan mentega aja yang gak gue patuhi.
Kedua kali bikin pake loyang gede dengan metode 2 kali masuk fridge, pertama saat adonan belum dicetak, kedua setelah adonan dimasukkan ke dalam loyang pie dan didiamkan dalam kulkas semalaman baru besoknya dipanggang. Pengen tahu aja hasilnya apakah lebih renyah. Ternyata perbedaannya gak terlalu signifikan *kecian deh*. Fillingnya masih sama, pake banana dan toffee yang gue buat dari susu kental manis yang diboiled selama 2 jam dalam keadaan kaleng tertutup.
Nah, yang ketiga kali bikin, ini buat proyek podcast kami. Sekalian berbagi pengetahuan dengan yang pengen bikin pie shell sendiri. Sebagian scene, diambil dari percobaan pertama. Jadi ini penggabungan dari 3 kali percobaan....hehehe...maklum cameramannya kan musti ngantor, jadi syutingnya ke-pending-pending.
Untuk percobaan terakhir, gue variasikan di filling. Tambahin strawberry biar rasanya gak manis doang, ada asem-asemnya.
Result secara keseluruhan, buat yang gak suka manis musti mikir-mikir dulu deh. Tapi kalo gue sekeluarga sih doyan-doyan aja tapi dengan catatan, makannya memang lebih enak pake krim, karena kalo cuman pie dengan banana dan toffee berasa manis banget. Krimnya bisa menetralisir kemanisan itu (krimnya gak perlu digulain). Pas banget lah dikasih krim, dengan tekstur pie yang renyah dan rasa yang buttery berpadu dengan manisnya toffee dan pisang, terakhir ada sensasi creamy-nya.
Buat yang mau nyoba, here's the step by step video and the recipe !
Banoffee Pies Source: Foodtown Magazine. October-November 2007; Cuisine Magazine, November 2002. with adjustments of pastry making and filling.
Directions : Combine the flour, butter and sugar in the food processor and process until well mixed. Then mix in the egg yolks and process in small bursts until the mixture appears crumbly. Add the water a little at a time. As the crumbs get larger, turn the motor off and check that the pastry will come together when pressed between your fingers. Turn the mixture on to a clean board or bench and work very gently into a ball. Refrigerate for 30 minutes.
Roll out the dough to line 20-22cm flan or loose-bottomed tart tin, prick the base of the pastry with fork several times. Set aside for 30 minutes.
Preheat the oven to 180C. Line the base of the pastry with baking paper and beans, bake blind for 12-15 minutes or until the pastry turns golden brown. Remove the paper and beans. (Return the pastry base into the oven for 5 minutes or until the base becomes dry.)
Filling Ingredients : 75g butter, 50g brown sugar, 3 Tbs milk, 300g sweetened condensed milk, 2 firm bananas, 300ml cream, ½ -1 cup white chocolate curls atau grated white chocolate
Directions : Place the butter and sugar in a non-stick pan and heat gently until the butter melts and the sugar dissolves. Bring to the boil and simmer for one minute, stirring continuously using a wooden spoon. Remove from the heat and add the milk and condensed milk. Return to the heat and bring to the boil. Allow to gently bubble for 5-6 minutes, stirring continuously until the mixture thickens and turns a light golden brown. Cool slightly.
Cut the bananas and put them on the base of the pastry. Pour in the caramel mixture. Leave to cool then chill for at least 2 hours. Serve topped with the whipped cream, spooned or spread over the caramel, and the grated chocolate. (You can always use your piping bag and noozle! You are allowed to use nuts if you'd like). Makes 4-6.
Enjoy your pie!! Vin, Santi, lunas ya utang pe-er-nya!
Waktu pindah-pindahan ke Kuwait, buku-buku cooking dan baking koleksi gue terpaksa "dikorbankan" untuk gak dibawa (begitu juga dengan baking tools gue). Prioritas bawaan adalah kebutuhan krucils. Karena takut overweight dengan sangat berat hati gue ucapkan selamat tinggal pada koleksi gue...hiksss...
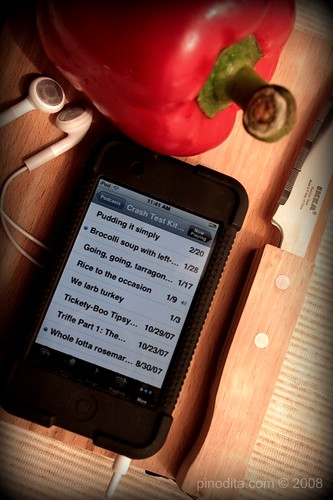
Tapi selalu ada jalan menuju Roma *halah*, dipikir-pikir kenapa gak memberdayakan Ipod Touch gue aja ya? Kan asik tuh bisa download podcast-podcast/video-video baking dan cooking, kumplit dengan tutorial yang detil. Tinggal pilih mo masak ditemenin si ganteng Jamie Oliver atau pasangan suami istri Lenny and Waz dari crashtestkitchen atau chef dari Videojug dan YouTube, dan masih banyak lagi. Favorit gue adalah Lenny and Waz, mereka bukan chef, menonton podcast mereka terasa tidak dibuat-buat, natural banget. Mereka gak pernah menyembunyikan kesalahan dan kegagalan. Selain itu, gue seneng banget "nongkrongin" Videojug. Koleksi video resepnya lumayan banyak dan instruksinya sangat detil dan jelas. Website-nya juga sistematis, mudah banget buat kita mencari video yang dibutuhkan. Best of all, semuanya gratisan bow dan gue gak perlu nge-print-ngeprint-in resep atau bolak-balik nengokin komputer buat ngeliat resep...wekekekek! Udah gitu asiknya, masak berasa didampingin chef profesional :P.
Sekarang download-download podcast bukan cuman kebutuhan gue, tapi juga kebutuhan keluarga. Since, we don't have any TV, Ipod dan Iphone akhirnya diberdayakan untuk bisa tetep keep up dengan berita di luar melalui podcast-podcast free. Gitu juga dengan anak-anak, mereka sudah terbiasa gak nonton TV, tapi mlototin podcast-podcast film anak-anak di MacBook, Ipod ataupun Iphone (please drop by at Our Mac for more stories).