12.15.2011

Super Easy Raspberry Muffins

Super easy recipe! I bet your kids can do this! Simple ingredients and methods, you don't even need a mixer :).

berries muffin

I baked these muffins with Arwen and Leia for their lunchboxes. I can imagine how proud they were when showing their muffins to their friends :).

Easy Raspberry Muffins
source : Good to Know
Ingredients :
250g (9oz) plain flour
1tbsp baking powder
100g (4oz) golden caster sugar
75g (3oz) butter, chilled
1 large egg
175ml (6fl oz) milk
150g (5oz) fresh raspberries
Extra sugar for sprinkling (optional)

berries muffin

Directions :
1. Preheat the oven to 200ºC (400ºF, gas mark 6). Line a 12-hole muffin tray with paper muffin cases.
2. Sift the flour and baking powder into a large bowl and stir in the sugar. Coarsely grate the chilled butter into the bowl and stir with a fork to coat in the flour mixture.
3. Beat together the egg and milk then pour into the bowl. Mix lightly with a fork until just combined. Take care not to over-beat the mixture - it should still be a little lumpy. Gently fold in the raspberries.
4. Spoon into the muffin cases. Bake for 20-25 mins until the muffins are risen and golden. Sprinkle lightly with a little extra sugar while still warm.

Tips : Add other fruit to this basic recipe: blueberries, chopped dried apricots, mashed ripe bananas or diced apples all taste great.

Red Velvet Cupcakes

I may say not so Red Velvet Cupcakes :D, because I was running out of liquid red food color. Made these treats couple of months ago and I can't believe it I just posted now *sigh* *busy mommy*.

Red Velvet Cupcakes

I tried recipe from Joy of Baking. It was simple and easy recipe with quite good result. Not that special though. Recommended for a beginner baker :).

Red Velvet Cupcakes
source : Joy of Baking

Ingredients :
1 1/4 cups (125 grams) sifted cake flour
1/4 teaspoon baking powder
1/4 teaspoon salt
1 tablespoons (10 grams) regular or Dutch-processed cocoa powder
1/4 cup (57 grams) unsalted butter, at room temperature
3/4 cups (150 grams) granulated white sugar
1 large egg
1/2 teaspoon pure vanilla extract
1/2 cup (120 ml) buttermilk
1 tablespoon liquid red food coloring
1/2 teaspoon white distilled vinegar
1/2 teaspoon baking soda

Cream Cheese Frosting:
8 ounces (227 grams) cream cheese, room temperature
1/2 teaspoon pure vanilla extract
1/2 cup (60 grams) confectioners' (icing or powdered) sugar, sifted
2/3 cup (160 ml) cold heavy whipping cream (double cream) (35-40% butterfat)

Red Velvet Cupcakes

Directions :
Red Velvet Cupcakes: Preheat oven to 350 degrees F (175 degrees C) and line 12 muffin tins with paper cupcake liners.

In a large bowl sift together the flour, baking powder, salt, and cocoa powder.

In the bowl of your electric mixer, or with a hand mixer, beat the butter until soft (about 1-2 minutes). Add the sugar and beat until light and fluffy (about 2-3 minutes). Add the egg and beat until incorporated. Scrape down the sides of the bowl. Add the vanilla extract and beat until combined.

In a measuring cup whisk the buttermilk with the red food coloring. With the mixer on low speed, alternately add the flour mixture and buttermilk to the butter mixture, in three additions, beginning and ending with the flour.

In a small cup combine the vinegar and baking soda. Allow the mixture to fizz and then quickly fold into the cake batter.

Working quickly, divide the batter evenly among the 12 muffin cups and smooth the tops with an offset spatula or the back of a spoon. Bake in the preheated oven for approximately 18 - 23 minutes, or until a toothpick inserted in the center of the cupcakes comes out clean.

Cool the cakes in their pans on a wire rack for 10 minutes and them remove from pan. Let cool completely before frosting. Either spread the frosting with a knife or offset spatula, or use a large 1M Wilton open star decorating tip to pipe the frosting.

Cream Cheese Frosting: In the bowl of your electric mixer, or with a hand mixer, beat the cream cheese until smooth. Add the vanilla and confectioners sugar and beat until smooth. Using the whisk attachment, gradually add the heavy cream and whip until the frosting is thick enough to pipe. Add more sugar or cream as needed to get the right consistency.

Makes 12 cupcakes.

Red Velvet CUPCAKES Red Velvet CUPCAKES

11.23.2011

Indian Chai Latte ala Helen K.Manik

Homemade chai latte. Recipe by my friend, Helen K.Manik

In this cold weather of winter, you must try this recipe :). Thank you, mbak Helen for sharing the recipe.

Indian Chai ala Helen
for 1 cup (235 ml) Chai

Ingredients :
3 tbsp (45 ml) water
1/2 tbsp plain tea dust/tea powder (without flavour)
35 grams Indonesian palm sugar, shaved
1/4 tsp sugar
1/2 cup (120 ml) evaporated milk
1/4 cup (60 ml) long life milk
2 butir cardamom (optional)
15 grams fresh ginger, thinly sliced

The ingredients of homemade chai latte

Directions :
1. Put ginger in a cup.
2. In a small pan, put water and tea powder. Cook in medium-low heat.
3. Add palm sugar and sugar. When palm sugar already melted, add evaporated milk and milk. Stirring occasionally.
4. Add cardamom and bring it to boil. Set aside.
5. Then, one more time, heat the pan over medium heat for 1-2 mins. Set aside.
6. Pour tea through a fine-mesh sieve into a cup with sliced ginger in it.

Enjoy your chai!

Super Moist Banana Cake

Happy weekend Kuwait! Enjoy your day.

If you're looking for a super moist banana cake recipe, this is the one. I'll tell you another secret why this cake could turn to be super moist.

Banana Cake
source : Spark Recipe

Ingredients :
1/2 cup (1 stick) Butter, softened
1 1/4 cups Granulated Sugar (Dita-I used brown sugar, I guess it taste better. But you might cut down the amount of the sugar to 1 cup, because it's just to sweet)
2 Eggs
4 tbsp. Sour Cream (Dita-I used 4 tbsp milk mixed with 2 tbsp vinegar)
1 1/2 cups Flour, all-purpose (white)
1 tsp. Baking Soda
1 tsp. Vanilla Extract
1.5 cups (2-3) ripe Bananas, mashed (NOTE: Original recipe called for 1 cup and baked a little less, but I usually use more banana and bake it a wee bit longer. The tracker includes the extra bit of banana!)

Directions :
1. Grease 9" x 5" loaf pan.
2. Beat together butter and sugar.
3. Add eggs. Mix well.
4. Add sour cream, flour, baking soda, vanilla, and bananas. Mix well.
5. Pour into prepared loaf pan.
6. Bake at 350 degrees F for 45 - 55 minutes, or until toothpick in center comes out clean.
7. Cool on rack, and wrap in plastic wrap overnight to bring out the moisture in the bread. (Dita-here's my secret : put the WARM cake wrapped in a plastic wrap in refrigerator overnight, it will make the cake turn super moist)
8. Makes 1 loaf, cut into 14 slices about 5/8" thick each.

Number of Servings: 14

Meringue Cookies

Hello there! Been busy in the kitchen. Still have plenty of egg whites, I decided to make meringue cookies.

Still have plenty of egg whites after making panettone, I decided to make something sweet and light for my kids. This cookies brings back my childhood memories.

Meringue Cookies
source : Joy of Baking

Ingredients :
3 large egg whites (3 ounces or 90 grams)
1/4 teaspoon cream of tartar
3/4 cup (150 grams) superfine or caster sugar (if you don't have superfine sugar simply take granulated white sugar and process it for about 30-60 seconds in a food processor)
1/4 teaspoon pure vanilla extract

Directions :
Meringue Cookies: Preheat oven to 200 degrees F (95 degrees C) and place the rack in the center of the oven. Line a baking sheet with parchment paper. You can form the cookies with a pastry bag fitted with a 1/2 inch (1.25 cm) plain tip, or I often just use two spoons to make the cookies.

In the bowl of your electric mixer, with the whisk attachment, beat the egg whites on low-medium speed until foamy. Add the cream of tartar and continue to beat the whites until they hold soft peaks. Add the sugar, a little at a time, and continue to beat, on medium-high speed, until the meringue holds very stiff peaks. Beat in the vanilla extract.

Note: The meringue is done when it holds stiff peaks and when you rub a little between your thumb and index finger it does not feel gritty. If it feels gritty the sugar has not fully dissolved so keep beating until it feels smooth between your fingers.

Before placing the cookies on the cookie sheet, place a little of the meringue on the underside of each corner of the parchment paper. This will prevent the paper from sliding. Transfer the meringue to a pastry bag fitted with a 1/2 inch (1.25 cm) tip. Pipe 2 1/2 inch (6 cm) rounds of meringue in rows on the prepared baking sheet. Alternatively, spoon mounds of meringue, using two spoons, onto the prepared sheets. Sprinkle the tops of the cookies with a few shaved almonds, if desired.

Bake the meringues for approximately 1 1/2 to 1 3/4 hours, rotating the baking sheet from front to back (about half way through) to ensure even baking. The meringues are done when they are pale in color and fairly crisp. (The meringues will release easily from the parchment paper.) Turn off the oven, open the door a crack, and leave the meringues in the oven to finish drying several hours or overnight. The meringues can be covered and stored at room temperature for several days.

Makes about 10 - 2 1/2 inch (6 cm) meringues


Brownie Biscuits with Peanut Butter Filling

Brownie biscuits with peanut butter filling. Inspired by @arfib 's post.  #baking
There's no particular recipe. I just used my favorite brownies recipe from my friend Rachmah. Modified it a bit, add more flour, so it suitable for cookie dough.

Brownie Biscuits
The original recipe is CHERRY DROP BROWNIES, modified by Rachmah Setyawati, source : Buku BROWNIES by Ambarini

Ingredients :
200 gr butter
200 gr Dark Cooking Chocolate (melted together with butter)
4 eggs (Dita-I used 2 eggs)
a pinch of vanilla extract
320 gr Sugar (Dita-I used 280 gr sugar)
160 gr flour (Dita-I used 250 gr flour)
15 gr milk powder
50 gr chocolate powder

Cara membuat :
1. Preheat oven at 160 C, prepare baking trays with baking paper.
2. Place the eggs, sugar and vanilla in a bowl, mix together until pale and creamy.
3. Add melted chocolate+butter.
4. Stir in dry ingredients (flour, milk powder and chocolate powder). Mix well.
5. Spoon tablespoons of the mixture onto baking trays. Bake for about 10-15 mins until the brownie puffed and cracked. Let cool completely on trays.

Now #baking : brownie biscuits

And for the Peanut Butter Filling...it's just a no brainer recipe...LOL. I just grabbed chunky peanut butter in my pantry, then mixed it with thick cream and icing sugar. Stir vigorously until you get a creamy texture.

Spread half of the cookies with peanut butter and sandwich with the remaining cookies.

Who's coming for a tea?

Strawberry Cream Tart

Strawberry cream pie, anyone? Morning folks! Enjoy your pretty wednesday.

Been MIA and didn't have time to sit in front of the computer for a long time. So this is a quick update in my abandoned blog :'(

A simple tart with pastry cream filling and topped with fresh strawberries and shaved chocolate.

The Pie/Taart Dough
adapted from Ripe for Dessert by David Lebovitz (the original recipe is Rhubarb Tart with Almond Nougatine)

Sweet treats for lil' sweethearts. #ditutbaking

Ingredients :
6 tbsp (3/4 stick) unsalted butter, chilled
1/2 cup sugar
2 large egg yolks (reserve the whites for the nougatine topping)
1 1/4 cups flour
1/2 tsp salt

Directions :
To make the dough :
1. Cut the butter into 1-inch pieces and let stand at room temperature for 10 minutes. Butter the bottom of a 9-inch springform pan.
2. With an electric mixer or by hand, beat the butter with the sugar until no visible lumps of butter remain. Beat in the egg yolks. Add the flour and salt and mix at low speed until the dough begins to come together.
3. Gather the dough and press it evenly over the bottom and halfway up the sides of the prepared pan. Use the heel of your hand. (Dust your hand with a bit of flour if the dough is sticking to them). Put the pan in the freezer for at least 30 minutes.
4. Position the oven rack in the center of the oven and pre-heat the oven to 375 degrees.
5. Remove the springform pan from the freezer (dita-prick the base of the pastry with fork several times) and line with foil. Pour in a single layer of pie weight, dried beans or raw rice. Bake the dough for 20 minutes (dita-15 minutes). Remove the pie weights and foil and bake for 5 to 10 minutes more, until the dough is browned. Remove from the oven and cool on a wire rack.

Pastry Cream
Source: Le Cordon Bleu, London

Ingredients :
1 1/4 cups (300 ml) milk (whole or 2%)
1/2 vanilla bean, split lengthwise or 1 teaspoon pure vanilla extract or vanilla bean paste
3 large egg yolks
1/4 cup (50 grams) granulated white sugar
2 tablespoons (20 grams) all-purpose flour
2 tablespoons (20 grams) cornstarch (corn flour)
1/2 tablespoon liqueur (Grand Marnier, Brandy, Kirsch) (optional)

For lighter pastry cream fold in 1/2 cup (120 ml) softly whipped cream to cooled pastry cream.

Pastry Cream: In a medium-sized heatproof bowl, mix the sugar and egg yolks together. (Do let the mixture sit too long or you will get pieces of egg forming.) Sift the flour and cornstarch (corn flour) together and then add to the egg mixture, mixing until you get a smooth paste.

Meanwhile, in a saucepan bring the milk and vanilla bean just to boiling (just until milk starts to foam up.) Remove from heat and add slowly to egg mixture, whisking constantly to prevent curdling. (If you get a few pieces of egg (curdling) in the mixture, pour through a strainer.) Remove vanilla bean, scrape out seeds, and add the seeds to the egg mixture. (The vanilla bean can be washed and dried and placed in your sugar bowl to give the sugar a vanilla flavor.) Then pour the egg mixture into a medium saucepan and cook over medium heat until boiling, whisking constantly. When it boils, whisk mixture constantly for another 30 - 60 seconds until it becomes thick. Remove from heat and immediately whisk in the liqueur (if using). (Stir in vanilla extract if using instead of a vanilla bean.) Pour into a clean bowl and immediately cover the surface with plastic wrap to prevent a crust from forming. Cool to room temperature. If not using right away refrigerate until needed, up to 3 days. Whisk or stir before using to get rid of any lumps that may have formed.

Makes about 1 cup (240 ml). Preparation time 20 minutes.


11.09.2011

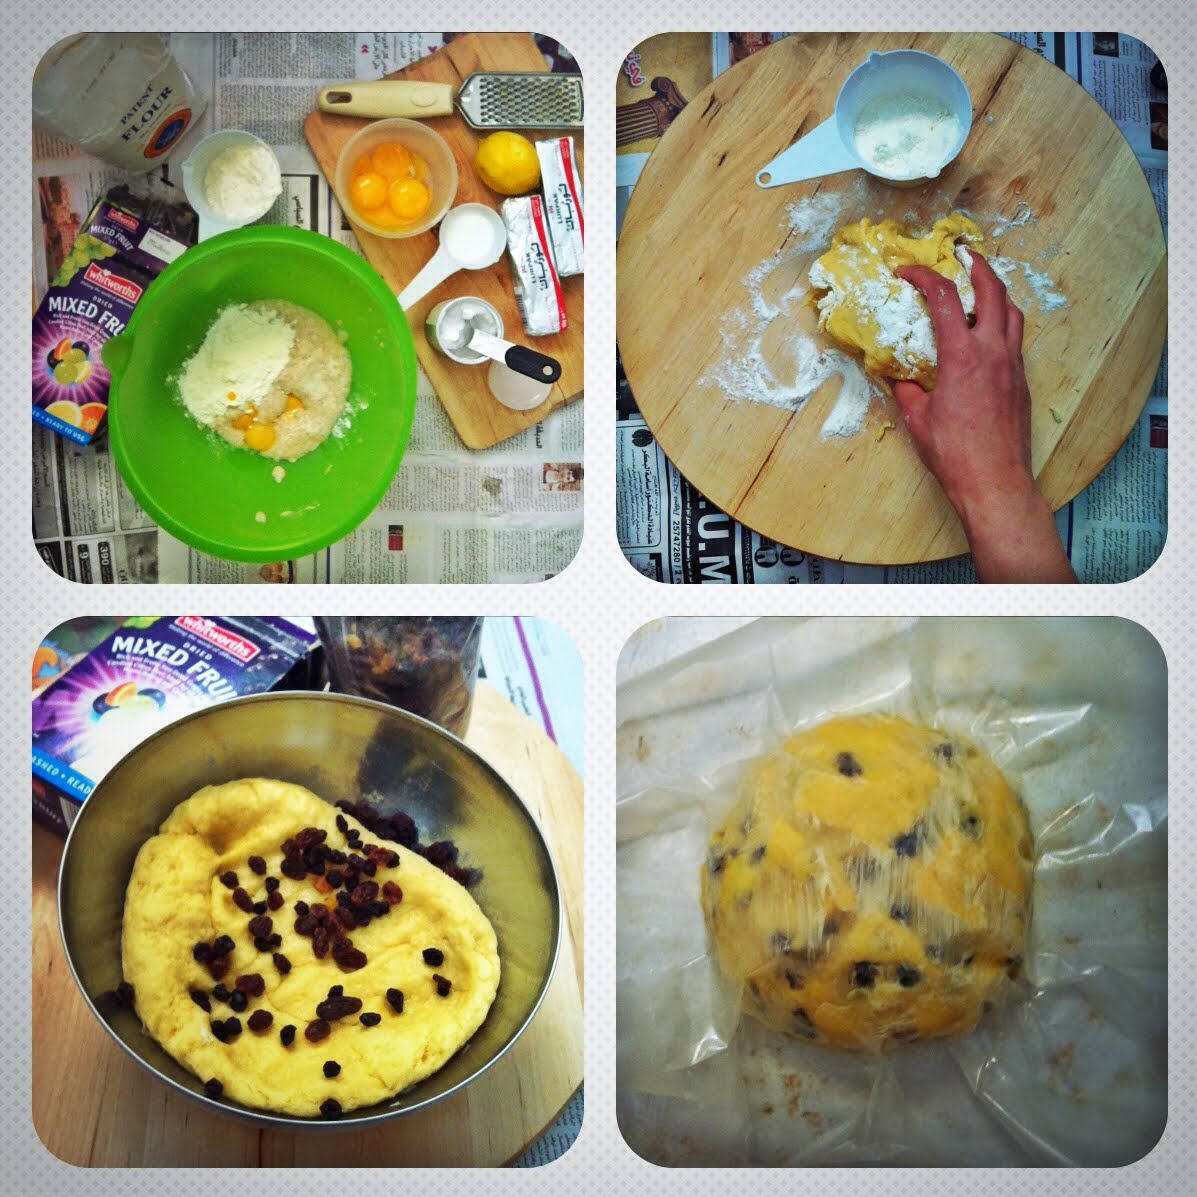
KBB #26 : Panettone


Waktu terima surat cinta, penasaran banget bacanya. Apa sih panettone? Terus terang belum pernah denger. Kalo gak ikutan KBB, saya gak tau kali, makanan jenis apa pula ini. Ternyata sejenis roti-rotian, tepatnya roti dari Italia. Biasanya roti jenis ini keluar pada saat menjelang natal. Mumpung udara belum terlalu dingin, mending garap rotinya sekarang-sekarang, daripada nanti susah ngembang.

Kata orang bikinnya ribet dan lama. Tapi saya enjoy kok ngerjainnya dan gak berasa ribet. Terbayar dengan rasanya yang enak banget :).

Saya puas banget dengan hasilnya. Enaakkkkkkkkkk!!!! :D. Rasanya itu campuran antara roti dan cake dengan hint wangi lemon, vanilla, susu dan roti. Pokoknya wangi banget deh. nikmat banget buat temen ngopi. Sepertinya ini bakal jadi resep favorit saya.

Panettone (traditional Italian christmas bread)
Source: The Worldwide Gourmet


Ingredients
- 1 1/2 cakes of fresh baker's yeast
- 65 ml (1/4 cup) sugar
- 6 tbsp. warm water
- 6 egg yolks
- Finely grated zest of 1 lemon
- A pinch of salt
- 500-750 ml (2-3 cups) flour
- 100 ml (6 tbsp.) diced candied peel
- 100 g (6 tbsp.) + 2 tbsp.butter
- 4 tbsp. sultanas
- 4 tbsp. currants
- 1 tsp. vanilla

Method :
1. Sprinkle 1 tbsp. granulated sugar and the yeast over the warm milk and let sit 3 minutes; mix and let rest in a warm draft-free place (e.g., a warm oven that has been turned off) until the mixture has doubled in volume, approximately 5 minutes;
2. pour the mixture into a bowl, add in the egg yolks, vanilla, lemon zest, salt and remaining sugar;
3. gradually mix in 500 ml (2 c.) of the flour by hand until a smooth consistency is attained - the dough should easily come together into a ball;
4. gradually add the butter cut into small dice and beat until the dough becomes smoother and more elastic;
5. add 125 to 250 ml (1/2 to 1 c.) more flour until the dough is firm and silky but not sticky;
6. place the ball onto a lightly floured surface. Knead the dough for approximately 10 minutes. When the dough is smooth and shiny, place into a buttered bowl; dust lightly with flour, cover with a kitchen towel and place in a warm draft-free place for about 45 minutes until doubled in volume;
7. punch down the dough firmly with your fist and flatten it out in the bowl; add the candied lemon peel, raisins and currants and knead until well distributed but without working the dough more than necessary;
8. line a large bread pan with brown paper that has been well buttered on both sides; place the dough in the pan and trace a cross on top;
9. cover with buttered paper and let rise again in a warm place for 15 minutes;
10. remove the paper from the top; brush the top with softened butter;


11.preheat the oven to 200°C (400° F);
12. place the bread pan on the middle rack of the oven and bake for 10 minutes;
reduce the oven temperature to 160° C (350° F) and continue baking for another 30 to 40 minutes, brushing again with melted butter; the bread is done when the surface is golden and crispy;
13. remove from the oven; remove the paper and let cool for 15 minutes before unmolding.


9.30.2011

KBB #25 : Pear Scones

Happy 4th birthday KBB. Gak berasa udah hampir 4 tahun join dengan klub baking ini. Banyak banget belajar dan dapet ilmu berguna dari tema-teman yang hebat-hebat. Bukan cuman belajar baking, kita juga sempet belajar foto bareng-bareng. Semoga pertemanan ini terus terjalin ya. Love you all.

Dan untuk edisi ulang tahun ini, saya memilih untuk membuat scones dengan based buah-buahan. Karena di rumah lagi banyak pear, ini karena salah beli pear, anak-anak gak terlalu suka dengan pear jenis ini, agak sepat rasanya...hihihi jadi daripada mubazir mending dibikin scones sekalian.


Pear Scones (the original recipe is Apple Scones, I changed the apples with pears)
source : joy of baking


Ingredients :
2 cups (280 grams) all purpose flour
1/3 cup (65 grams) granulated white sugar
1 1/2 teaspoons baking powder
1/4 teaspoon salt
1/2 cup (113 grams) (1 stick) unsalted butter, cold and cut into pieces
1 large egg
1/2 cup (120 ml) milk
1 teaspoon pure vanilla extract

Filling:
1 pound (454 grams) Granny Smith Apples, peeled, cored, and cut into 1 inch (2.5 cm) chunks
2 tablespoons (30 grams) granulated white sugar
1/4 teaspoon ground cinnamon

Directions :
Apple Scone Cake: Preheat oven to 350 degrees F (177 degrees C) and place rack in center of oven. Butter (or spray with a non stick vegetable spray) a 9 inch (23 cm) glass pie plate.

In a large bowl, whisk together the flour, sugar, baking powder, and salt. Cut the butter into small pieces and blend into the flour mixture with a pastry blender or two knives. The mixture should look like coarse crumbs. In a separate small bowl whisk together the egg, milk, and vanilla extract and add to the flour mixture, stirring just until the dough comes together. Do not over mix.


Transfer to a lightly floured surface and knead dough gently four or five times and then divide the dough in half. Roll or pat one half of the dough into a 9 inch (23 cm) circle and transfer to the pie plate and pat onto the bottom and up the sides of the pie plate.

In a separate bowl toss together the cut apples, sugar, cinnamon, and nuts. Spread the apples evenly over the bottom of the dough in the pie plate.

Roll the remaining dough into a 9 inch (23 cm) circle, on a lightly floured surface, and gently place the dough over the apples. With your fingers seal the edges of the top and bottom crusts. Brush the top of the dough with a little milk and sprinkle with white sugar. Cut a slit in the center of the dough to allow the steam to escape.


Bake in the preheated oven for about 35 - 45 minutes or until the pastry is nicely browned and a toothpick inserted into the center of the cake comes out clean.

Cool on a wire rack. Serve warm with a dollop of whipped cream or ice cream.

Serves 6 to 8.


7.16.2011

Our Book : Food Photography Made Easy


(photo by Irra Fachriyanthi)

Akhirnya, setelah proses panjang selama 14 bulan, terbitlah buku kami (Empat Rana : Saya, Arfi Binsted, Riana Ambarsari dan Irra Fachriyanthi), "Food Photography Made Easy". Buku yang kami kerjakan dan tulis di sela-sela kesibukan mengurus rumah, suami dan anak-anak. Kesibukan yang terkadang sering membuat kami terlalu lelah untuk berpikir karena tenaga yang sudah terkuras seharian. Berkejar-kejaran dengan waktu tidur yang tak tentu dan deadline tiap bulan untuk menyelesaikan bab demi bab. Lega sekaligus terharu rasanya akhirnya kami bisa melihat wujud buku ini di depan kami. Bagitu bahagianya, sampai saya menitikkan air mata saat melihat teman-teman sudah menerima dan membaca buku kami. Masih teringat, malam-malam saat semua sudah terlelap, saya menyelesaikan tulisan dan menyeleksi foto-foto. Kegiatan ini tak mungkin saya lakukan siang hari, karena Papin kerja dan saya harus mengurus dan mengawasi anak-anak. Butuh konsentrasi untuk menulis. Oleh sebab itu, saya selalu memilih waktu di malam hari, saat anak-anak sudah terlelap dan ada yang gantian jaga. Atau bangun sepagi mungkin, sebelum anak-anak terbangun dan siap beraktivitas.

Belum lagi tantangan waktu antar negara. Buku ini ditulis oleh saya dan Irra di Kuwait, Arfi Binsted di New Zealand dan Riana Ambarsari di Jakarta, Indonesia. Selama pengerjaan buku ini kami tak pernah bertemu. Semua komunikasi dan diskusi dilakukan lewat e-mail. Jika butuh sesuatu terburu-buru, kami harus bisa toleransi, karena yang satu masih tidur, yang lain sudah siap beraktivitas :D. Benar-benar tantangan yang harus bisa kami taklukkan.

Adalah Irra Fachriyanthi, yang mempersatukan kami untuk menulis buku ini. Perjuangannya untuk meyakinkan kami bahwa kami bisa menulis buku ini benar-benar membuat saya terharu. Beliaulah yang pusing menyatukan ketiga tulisan kami yang tentunya berbeda karakter dan dengan sabar mengumpulkan dan menyusun foto-foto yang tepat untuk keperluan tema penulisan. Dulu saya pikir ini proyek di awang-awang. Tapi lama kelamaan ternyata semua makin serius...hahaha....Apalagi melihat Arfi Binsted yang dg kesibukan seabrek, blm urusan home schooling anak-anaknya dan Riana Ambarsari yang terus semangat di sela-sela kesibukan mengajar baking, menulis buku dan mengajar fotografi, saya semakin terajak dan semangat untuk mewujudkan mimpi kami.

Mimpi untuk bisa berbagi ilmu yang kami tahu dan kami dapat dari pengalaman kami selama ini. Mimpi untuk membuat buku Food Photography di Indonesia yang konon belum ada yang menulis, apalagi yang menulis ibu-ibu semua :). Mimpi untuk membuktikan bahwa kami ibu-ibu rumah tangga juga bisa berkarya dan berguna buat orang banyak. Mimpi kami supaya teman-teman yang sangat antusias ingin belajar food photography, dapat dengan mudah belajar melalui buku.

Buku ini bukan buku resep masakan. Tapi berisi resep panduan praktis untuk yang baru belajar dan tertarik Food Photography. Panduan yang kami tulis sangat mudah diikuti karena kami tulis berdasarkan pengalaman kami yang mengerjakan semua kegiatan fotografi di rumah, dg alat sederhana dan studio odong-odong. Tanpa lampu-lampu mahal, tapi cahaya termahal di dunia, yaitu sang surya :)). Jangan harap menemukan istilah fotografi yang njelimet di buku ini. Semua kami paparkan dengan bahasa yang sederhana.

Saat-saat paling seru justru ketika lay out buku sudah jadi. Campur aduk rasanya. Merinding membaca file PDF buku kami. Revisi bolak-balik, foto-foto yang tertukar atau foto-foto yang salah, dan naskah yang terbalik-balik. Benar-benar bikin deg-deg-an, sementara pihak penerbit sudah mulai pasang ancang-ancang buku harus terbit 2 bulan lagi. Foto-foto yang kalau di Indonesia mungkin bisa dikirimkan via CD karena koneksi internet yang tak bersahabat, di sini kami share via website atau menunggu teman yg mau mudik untuk dititipkan CD berisi foto-foto kami.

Perjalanan panjang berbuah sudah, Buku Food Photography Made Easy sudah bisa ditemukan di toko buku Gramedia sejak 12 Juli 2011. Semoga ini jadi awal untuk bisa terus berkarya menelurkan buku-buku berikutnya. Semoga buku ini bisa menginspirasi orang banyak untuk melakukan kegiatan positif di waktu-waktu luangnya. Kritik, saran dan masukan sangat kami harapkan untuk kemajuan Empat Rana.

Terima kasih semua. Seluruh teman-teman Food Blogger yang banyak menginspirasi kami. Dan keluarga kecil kami yang selalu mendukung kegiatan kami.

Inilah persembahan Empat Rana. Semoga bermanfaat buat orang banyak.


7.04.2011

Coming Soon!

Yayyyy!!! Buku Home Food Photography "Food Photography Made Easy" akan segera beredar. Nantikan karya perdana kami, Empat Rana : Arfi Binsted, Riana Ambarsari, Irra Fachriyanthi dan saya Dita Wistarini, di toko buku terkemuka di kota Anda.

5.08.2011

KBB #23 : Cheesy Fun : Lemon Cheesecake


Maafkaaannnnnnnnnnn saya telat publish, karena foto sempet nyempil entah di mana, bikin pusing nyari-nyarinya. Waktu baru pertama kali baca resepnya...alamak jantung mo copot, secara bahan-bahannya ya bow, mehitawati semua. Mascarpone dan ricotta-nya itu loh. Tapi ya dibela-belain juga, karena feeling saya, ngeliat dari komposisi bahan-bahannya, cheesecake ini bakal enak banget.

(KBB) Lemon Cheesecake

Selama proses pembuatan gak ada masalah sama sekali. Waktu liat cheesecake mulai kuning keemasan di dalam oven, rasanya seneng banget dan udah kebayang ntar bakal didandanin kayak apa buat foto-foto. Di pertengahan proses pemanggangan, bagian atas loyag saya tutup dengan aluminium foil supaya matangnya merata dan bagian atas tidak cepat gosong.

Tapi hikssss terjadi kecelakaan...lah kok ya bisa lupa matiin oven pas ninggalin cheesecake ini. Baru inget pas udah mo pulang groceries shopping, kok perasaan belum matiin oven....hiyaaaaa....lemes banget rasanya. Kebayang itu mascarpone dan ricotta mahal kebuang percuma. Selama perjalanan pulang mo nangis rasanya.

Begitu sampe rumah langsung lari ke dapur. Dan bener aja kan, belum matiin oven *nangis kejer*. Buru-buru ngeluarin cheesecake dari oven dan buka lapisan aluminium foilnya....ternyata oh ternyata...phuuiiihhhhhh..... gak item-item amat dan gak gosong-gosong amat. Pertama ketolong sama tutup alu foil, kedua karena saya set di api kecil. Padahal ditinggal selama 1 jam bow!!! Alhamdulillah gak kebuang. Dan ternyata bener banget kan, cheesecake ini enak banget. Beda rasanya dari cheesecake yang pake cheese cream. Harga emang gak bohong :D

Owiyah terjadi kesalahan juga dalam pengerjaan lapisan kacang. Karena gak teliti baca resep, kacang tidak saya spread di sekeliling loyang tapi hanya di dasar loyang aja.

Lemon Cheesecake
Sumber: Successful Baking

kbb lemon cheesecake

Bahan-bahan :
Untuk 8-10 porsi
¼ cup port ----- (*sejenis wine - bisa diganti)
¼ cup orange juice
75g sultanas
150g mascarpone
400g ricotta
125g gula kastor
2 btr telur, pisahkan kuning dan putihnya
3 buah lemon, parut kulitnya
60g tepung terigu
80g manisan apricot, iris tipis

Crust:
30g mentega tawar
185g kacang2an, haluskan
8 sdt gula kastor
4 sdt dark brown sugar
½ sdt bubuk kayu manis
¼ sdt bubuk mixed spice

Panaskan oven 170C. Siapkan loyang ukuran 23cm, olesi dasar dan sisi2 loyang dengan mentega leleh. Alasi dasar loyang dengan baking paper, lalu olesi mentega leleh.

Panasi port, orange juice, dan sultanas di dalam panci selama 5 menit. Angkat dari api, tutup dan biarkan selama 15 menit.

Crust: panaskan mentega hingga leleh, masukkan kacang2an, semua gula dan rempah-rempah; aduk rata. Letakkan di dasar dan sisi loyang, tekan-tekan supaya padat dan melekat.

(KBB) Lemon cheesecake

Kocok mascarpone dan ricotta hingga lembut, lalu masukkan gula, kuning telur dan parutan kulit jeruk, lalu masukkan tepung, aduk hingga rata dan lembut. Masukkan campuran sultanas-port-orange juice dan apricots.

kbb lemon cheesecake

Kocok putih telur di dalam mangkuk yang bersih dan bebas lemak hingga soft peaks. Masukkan putih telur kocok ke dalam campuran keju. Tuang ke dalam loyang, ratakan permukaannya.

kbb lemon cheesecake

Letakkan loyang ke atas loyang oven/loyang biscuit (oven tray/baking tray), panggang selama 1 jam, atau hingga permukaan cheesecake set tengah2nya dan berwarna emas kecoklatan di sekelilingnya. Matikan oven. Biarkan cheesecake di dalam oven dengan pintu dibuka sedikit selama 50-60 menit.

Keluarkan cheesecake dari oven. Gunakan pisau tumpul secara perlahan ke sekeliling cheesecake, lalu biarkan hingga betul2 dingin. Keluarkan cheesecake dari loyang dan dinginkan dalam kulkas selama 2 jam sebelum disajikan.

Tips: olesi mentega leleh ke sekeliling loyang agak tebal sehingga crust kacang akan terbalut secara merata.


(KBB) Lemon Cheesecake

4.25.2011

(Indonesian Food) Pempek Pistel

Suatu ketika @nyonyo26 bertanya, udah pernah makan pempek pistel belum? Apa pula itu. Pempek saya taunya cuman pempek kapal selam, lenjer, kulit dan adaan (baca di sini soal macem-macem pempek)

(Indonesian Food) Pempek Pistel

Terus dia cerita kalo pempek pistel itu diisi pepaya muda dan dibentuk kayak pastel/panada. Hmmm sounds yummy!! Penasaran saya googling, dan pengen banget nyoba bikin. Udah lama banget gak bikin pempek dan pas kebetulan punya tenggiri juga. Tapi pepaya mudanya lagi gak punya. Akhirnya rencana bikin pempek pistel ketunda cukup lama sampai akhirnya saya dapet pepaya muda.

Haha...ternyata bikin pempek pistel ini makan waktu ya bok. Soalnya kan musti satu satu ngelipetin kulitnya. Akhirnya gue menyerah di pempek ke 15 dan sisanya dibikin lenjer, yang gampang :D.

Untuk resep adonan dasar pempek, saya gak mau coba-coba resep lain, udah jatuh cinta sama resep NCC. Empuk dan gak alot. Untuk isian setelah browsing ternyata ada beberapa macam resep. Pokoknya intinya pepaya muda ditumis dengan ebi bubuk. Akhirnya resep isian saya modif sendiri dengan nambahin bawang merah, sedikit cabai bubuk dan ketumbar.

Pempek
source : NCC
Bahan 1
1 kg bersih daging Ikan Tenggiri, haluskan dengan Blender
200 ml air
2 butir telur

Bahan 2
50 gram Tepung terigu
2 sendok makan garam
2 sendok teh gula pasir
4 siung bawang putih
200 ml air

Bahan 3
800 gram tepung Sagu tani + sedikit tepung Tang Mien

Cara membuat :
1. bahan 1 dicampur dan diaduk-aduk dengan jari tangan sampai
tercampur homogen. masukan kulkas, biarkan menjadi mengental
2. Bahan 2, dicampur dan didihkan dengan api kecil sambil diaduk terus
sampai mengental, dinginkan dan masukan kulkas
3. 30 menit kemudian, Campurkan adonan bahan 1 dan bahan 2, aduk
dengan jari tangan sampai tercampur rata.
4. Masukan tepung sagu kedalam campuran adonan Ikan sedikit demi
sedikit, sambil diuleni dengan ujung jari tangan.
5. Adonan masih agak terasa lengket, supaya gampang dibentuk, lumuri
tangan dengan sagu, ambil sesendok makan adonan dan bentuk bulat
panjang. atau bisa juga dijadikan pempek kapal selam.
6. Masukan pempek yang sudah dibentuk dalam air mendidih, sampai
matang (pempek akan mengapung).


Isian Pepaya Muda & Cuko

Bahan-bahan :
500 gr pepaya muda
2 sdm ebi bubuk
3 bawang merah, cincang
1 clove bawang putih, cincang
1/2 sdt merica
1/2 sdt ketumbar bubuk
garam
2 sdm minyak goreng untuk menumis

Cara membuat :
Tumis bawang putih, bawang merah dan ketumbar hingga wangi. Masukkan pepaya muda serut, ebi, merica dan garam. Masak hingga pepaya layu. Sisihkan.

(Indonesian Food) Pempek Pistel

Penyelesaian :
1. Ambil adonan pempek, gilas dan cetak seperti akan membuat panada/pastel.
2. Beri isian pepaya. Tutup dan lipat pinggir-pinggirnya (kalo saya biar cepet di sealed pake garpu aja...hahaha...pemalas)
3. Rebus pempek hingga mengapung, angkat.
4. Goreng sesaat sebelum disajikan. Hidangkan dengan cuko.

(Indonesian Food) Pempek Pistel

Cuko :
500 gr palm sugar (gula aren)
100 gr asam jawa
1 sdt ebi bubuk
2 bawang putih, cincang
1 1/2 liter air
3 sdm cuka
cabe rawit secukupnya
garam

Pas mau bikin cuko kehabisan gula jawa/gula merah. Untung dikasih temen, gula srilanka. Melihat warna dan bentuknya sepertinya menjanjikan mirip gula jawa. Warnanya lebih hitam daripada gula India (Indian Jaggery). Baunya pun lebih mirip gula jawa. Rasanya juga gak asam seperti Indian jaggery.

Srilankan Jaggery

Cara membuat cuko :
1. Campur air, asam dan gula aren dalam panci. Biarkan larut dan didihkan.
2. Masukkan bawang putih, ebi, cabe ulek dan garam. Didihkan. Angkat. Tambahkan cuka.
3. Saring dan tempatkan di wadah bersih.


(Indonesian Food) Cilok - Chewy Balls

Sejak liat Pepy posting Cilok, gue jadi pengen banget bikin. Tapi tepung tapioka lagi susah banget dicari, udah gitu lagi gak punya stok ebi juga. Sebenernya gak pake ebi juga bisa, tapi pengen nyobain aja kalo dipakein ebi.


Lumayan bisa ngobatin kangen jajanan jaman SD. Kebetulan masih punya bumbu sisa somay, jadi gak ribet bikin sausnya lagi.

Here's I copied the recipe from Pepy's blog

Cilok/Pentol
Indonesian Chewy Balls

Ingredients:
350 grams unbleach all purpose flour
250 grams arrowroot starch (can be substituted for tapioca flour or sago flour)
3 cloves garlic, roasted*
2 tablespoons ground dried shrimp (ebi)**
1 tablespoon chopped Chinese celery
kosher salt
1/2 teaspoon ground white pepper
1 tablespoon minced Chinese chives (can be substituted for green onion)
400 milliliter hot water

Methods:
In a bowl, use a spoon and mash roasted garlic until smooth. I like using roasted garlic since I don't need to grate them.

Stir in all purpose flour, ground dried shrimp, salt, ground white pepper, Chinese celery and chives. Mix well.

Add hot water. Mix well. Add in arrowroot flour and knead the mixture with your another hand.

In a big pot, heat some water (don't let the water boil, about 80 degrees C)

Scoop about 1 teaspoons, make round balls. Drop the balls in hot water. Cook until the balls are floating and continue cooking for another 10 minutes

Serve with pecel sambal or your favourite peanut sauce.

Cook's Note:
* Use fresh garlic or garlic powder to substitute
** Ground dried shrimp is optional.

(Indonesian Food) Cilok - Chewy Balls (Indonesian Food) Cilok - Chewy Balls

Sambal Kacang (Peanut Sambal)
source : also from Pepy's

400 g garlicky roasted peanuts
100 g garlicky roasted cashew nuts
150 g red cayenne pepper (reduce the amount to your liking), roasted
3 cloves roasted garlic, mash with a spoon
2 tbsp canesugar vinegar
2 tbsp salt
7 tbsp coconut sugar (gula jawa, gula merah)
500 g baked sweet potato (about 2 regular size sweet potatoes), peeled
1.5 L water

(Indonesian Food) Cilok - Chewy Balls

Methods :
1. Process peanuts and cashew nuts in a food processor until smooth (I like a bit crunchy, everyone who loves smoother texture can process a bit longer). Transfer into a bowl. Set aside.

2. Process red cayenne pepper and garlic until smooth. Add sweet potato and process again. Add ground nuts; process. Add salt, vinegar, sugar and combine again. Do a taste test, if it's perfect for your tastebuds then it's ready to serve.


4.11.2011

(Baking with Kids) Snickers Brownies

Oalah, tante Lala tetangga sebelah, ngasih segepok snickers dan kawan-kawan. Gaswat, musti diumpet-umpetin nih. Kalo krucils sampe tau, bisa gak brenti-brenti makan dan efeknya...DASYAT! Saya ulangi DASYAT! Efek sampingnya ke mereka adalah jadi gak bisa diem, pecicilan, jadi aktif banget dan ketawa-ketawa gak jelas. Persis kayak orang mabok...tapi ini mabok sweets...LOL.

Baking with kids : Snickers Brownies

Nah, daripada daripada, mending ini snickers diberdayakan aja. Yang kepikiran langsung bikin brownies. Pas masih punya LINDT nganggur juga. Tadinya pengen pake resep brownies biasanya, tapi pengen coba eksperimen resep lain. Akhirnya pilih resepnya TASTE. Sengaja pilih yang gampang gak pake mikser karena mau dikerjain bareng Arwen dan Leia.

Snickers Brownies
source : TASTE

Ingredients :
150g butter, chopped
200g dark chocolate, chopped
3/4 cup caster sugar
2 eggs, lightly beaten
1 cup plain flour, sifted
1/4 cup self-raising flour, sifted
2 x 60g Snickers chocolate bars, cut into 1cm cubes

Method :
Grease a 3cm-deep, 18cm x 28cm (base) slice pan. Line with baking paper, allowing a 2cm overhang at long ends.

Place butter, dark chocolate and sugar in a saucepan over medium heat. Cook, stirring occasionally, for 3 to 5 minutes or until chocolate has melted. Set aside for 15 minutes to cool. Preheat oven to 180°C/160°C fan-forced.

The Making of Snickers Brownies

Whisk eggs and then flours into chocolate mixture. Fold in Snickers. Pour mixture into prepared pan. Smooth top. Bake for 25 minutes or until a skewer inserted in the centre comes out with crumbs clinging. Cool in pan. Serve.

Picnik collage


The Making of Snickers Brownies

The Making of Snickers Brownies

The Making of Snickers Brownies

Notes
Variation: You could use 2 x 80g Cherry Ripe chocolate bars instead of Snickers.


The Making of Snickers Brownies

Saya masih lebih suka tekstur brownies yang biasa saya buat. Ini lebih kayak cake dan sedikit chewy karena efek snickers-nya. Next kalo bikin lagi, mau pake resep biasanya aja.

Baking with kids : Snickers Brownies