7.30.2008

(KBB) # 6 : Cheese Biscuits

I'm warning you : you won't stop until your cookie jar is empty! :D

Cheese Cookies

This is Cheese Biscuits. Challenge number 6 of
KBB (Klub Berani Baking/Indonesian Baking Club, pretty similar with Daring Bakers). I made them 3 times. First ones with sesame seeds and oregano and skipped cayenne pepper, the second times I added icing sugar on top of them and for the third times I made them flatten and put walnut on top. And I like them all. They are so cheesy and tasty!

Cheese Biscuits

I ate some bites with a smooth soup. And it goes really really great!

Cheese Biscuits
Source: Vogue Australia: Wine and Food Cookbook

Ingredients :
225g grated mature cheese
125g butter
125g flour
cayenne pepper to taste
sesame seeds

Directions :
With finger tips, mix together cheese, butter, flour and cayenne pepper until mixture forms a mass. Butter a biscuit tray. Make small balls of the dough. Roll some in sesame seeds and press on tray, placing them fairly far apart as they will spread while cooking. (We have pressed walnuts on some of the biscuits and, for a colour contrast, some chopped pistachio nuts). Bake biscuits in pre-heated oven 180C for 15 minutes. Store in an airtight container.

Cheese Biscuits

PS : so sorry, due to a broken harddisk, we can not publish the how-to video. I will post it later, as soon as possible after the harddisk's worked.


7.29.2008

Our Artful Life

If you can not find me here. Maybe I am busy with my family in the next corner! See you there!

My creation

Cream Cheese Donut

I'm so happy, finally I've found donut pan!!

Donut with Caramel

There's a donut recipe included in the packaging. And know what???!!! You must try this one! No egg is needed! So simple method. And the results are great, they are soft and sweet and smell so so good! For the topping I just simply drizzled caramel syrup on them.

(Nes, ini penampakan loyangnya)


Donut Pan

Donut
for 12 donuts

Ingredients :
200 gr flour
4 tbsp baking powder
100 gr soft curd cheese (dita-I used cream cheese)
60 gr sugar
1 pkg vanilla sugar (dita-I used 1/2 tsp only vanilla)
4 tbsp oil
8-10 tbsp milk
Icing sugar and chocolate glaze for decorating

Directions :
1. Mix soft curd cheese, sugar, vanilla sugar, salt, oil and milk.
2. Sift flour and baking powder over the mixture and blend well.
3. Fill dough into greased pan and baked approximately 20 minutes in the centre of an oven preheated to 180˙C.
4. Dust the donuts with icing sugar or coat with chocolate glaze. Serve while fresh.

7.24.2008

Yakitori - Grilled Chicken Meatballs

Yakitori is grill chicken speared on skewer. I used to buy it from my favorite Japanese fast food restaurant, Goiza. In Japan you can get it everywhere from street vendors.

Yakitori Chicken Meatballs

The important key is, apart of using fresh chicken and grilling it well, the quality of the sauce. I'm satisfied with this recipe especially the sauce. It tasted great, eventhough I skipped sake and used non alcoholic mirin. The balls were delicious when eat warmed. But unfortunately, they turned out to be too hard to chew when cold, so better eat right after grilling (on the next day, I used the left-over grilled balls for my chicken meatballs soup).

Ok Sig since you are the host, here's my contribution for Monthly Mingle-Grill It to celebrate summer. Come on join the fun of grilling here! And Bee, thanks for sharing the recipe. I found it coincidently in your 2007's archive ;).


Yakitori Chicken Meatballs

Grilled Chicken Meat Balls (Yakitori)
Source : Rasa Malaysia

Ingredients:
11 oz skinless chicken (minced)
2 eggs
1/2 teaspoon salt
2 teaspoons plain (all-purpose) flour
2 teaspoons corn starch
6 tablespoons dried bread crumbs
(dita- I added 1 tbsp soy sauce)
2 inches fresh ginger root (grated)
Bamboo skewers

For the "tare" yakitori sauce
4 tablespoons sake
5 tablespoons shoyu (soy sauce)
1 tablespoon mirin
1 tablespoon sugar
1/2 teaspoon corn starch blended with 1 teaspoon water

Method:
1. Put all the ingredients for the chicken balls (except the ginger) in a food processor and blend well.
2. Wet your hands and scoop about a tablespoonful of the mixture into your palm. Shape it into a small ball about half the size of a golf ball.
3. Squeeze the juice from the grated ginger into a small mixing bowl. Discard the pulp.
4. Add the ginger juice to a small pan of boiling water. Add the chicken balls and boil for about 7 minutes, or until the color of the meat changes and the balls float to the surface. Scoop out and drain on a plate covered with paper towels.
5. In a small pan, mix all the ingredients for the yakitori sauce, except for the corn starch solution. Bring the mixture to boil, and then reduce the heat and simmer for about 5 minutes or until the sauce slightly reduced. Add the corn starch solution and stir until the sauce is thickened. Transfer to a small bowl.
6. Thread 3-4 balls on to each bamboo skewer. Grill the skewers with an indoor grill or broiler or on a barbeque (preferred). Brush them with the yakitori sauce and turn the skewers frequently until the balls turn brown.
7. Serve hot and sprinkle with shichimi togarashi (Japanese chile powder with sesame seeds) and some yakitori sauce if you like.

Yakitori Chicken Meatballs

7.22.2008

HFP # 3 : Studio - The Round Up!!

Many many thanks untuk my dearest friends yang sudah meluangkan waktunya untuk berpartisipasi dalam event ini. Excited rasanya menerima entry dari teman-teman yang tinggal tersebar di berbagai penjuru dunia tapi mempunyai minat dan passion yang sama dalam dunia food photography.

Tema event ini memang dibuat fun, lucu dan terkadang nyeleneh (baca : aneh). Melalui cara ini, diharapkan ada hal-hal yang bisa dipetik dan dipelajari sebagai sesama Home Food Photographer, secara santai dan fun. Kali ini temanya adalah Studio....Iya studio odong-dong, jangan dianggap studio fancy dengan segala peralatan mahal ya. Mau tau kan rahasia di balik foto-foto cantik temen-temen Foodie Blogger berikut ini? Gimana settingnya, dll?

OK, are you ready for The Round Up????

Here they are!!
1. Ayin dari AG's Food (Norwegia)


Makasih Yin, gak sampe 5 hari dirilis pengumumannya, kamu udah setor!! Top banget deh semangatnya. Ayin ini rela gotong sana-sini di halaman buat dapetin angle dan cahaya yang bagus. Untung punya halaman ya, Yin, jadi kamu bebas motret, jumpalitan, jungkir balik....hehehe.....mo motret apa sirkus sih? Cerita lengkapnya di sini .

2. Rita dari Mochachocolata-Rita (Hong Kong)


Hihihihi.....Rita ini banyak akalnya. Biarpun apartemennya kecil, dia tetep lihai menggunakan spot-spot yang ada walopun resikonya cedera punggung :D. Cek aja aksi hebohnya di sini!

3. Dhita Beechey dari Cooking Etcetera (China)


Waahhhhh Dhi lumayan serius nih! Niat bikin soft box. Berhubung cuaca memang sering gak bersahabat, ya mau gak mau memang harus pake soft box. Kali-kali ada yang mau belajar bikin soft box, mampir aja ke sini ya. Nyimpennya ati-ati Dhi, nanti digaruk-garuk kucing lagi! :D

4. Zita Abharee dari Simplicious (Yordania)


Yup hampir sebagian besar para Home Food Photographers mengandalkan window lighting. Liat aja yang dilakukan Zita, rela numpuk-numpuk meja di samping jendela supaya mendapatkan cahaya yang diinginkan. Ati-ati jangan angkat-angkat yang berat-berat, nanti sakit pinggang :P.

5. Regina Budiardjo dari Estudia 14 (Australia)


Bersyukurnya jadi Re yang punya dapur gede, bersih dan lega. Tengok aja tuh dapurnya yang kinclong! No wonder bisa dijadiin studio odong-odong.

6. Arfi Binsted dari Through My Lens (New Zealand)


Sebuah pojok yang sederhana ternyata ada di balik foto-foto cantiknya. Masi gak percaya sama foto di atas? Mampir ke sini! Arfi gak punya studio fancy.

7. Vin Wong dari Enjoyable Baking (Indonesia)


Waduh waduh, senengnya punya sebuah lantai yang didedikasikan untuk baking ;). Jadi lega ya, Vin, bisa sekalian buat pojok foto-foto. Pantes aja bakingnya jadi enjoy :D. Intip yuk studio odong-odong di lantai 2 rumahnya.

8. Ambar dari Mlaku-Mlaku (Amerika)


Asik banget punya dapur gres ya, Mbar, puas berbaking ria dan makin rajin bikin food photos. Foto-foto makanan hasil karyanya berkesan sederhana dan cantik. Mau diskusi sama Ambar soal photography, mampir ke sini aja, sekalian nengokin studio odong-odongnya :).

9. Dwiana Porter dari The Adventure of My Cooking Diary (Amerika)


Seru banget ya Dwi, punya alternatif motret di halaman kalo motret di dalam rumah lagi gak memungkinkan, gitu juga sebaliknya. "Studio" alam di halaman rumahnya bisa diliat di sini.

10. Retno Prihadana dari Kedai Hamburg (Jerman)


Penasaran kan kenapa foto-fotonya mbak Retno selalu bertaburan bunga-bunga cantik. Ketauan deh sekarang!!! :D. Liat studionya yuk!!! Huhuhuhu...sirik sama halamannya!! ;)

Ada satu kutipan yang gue suka dari mbak Retno : Jadi, Home food photography ini paling tidak merupakan hasil karya, yang melewati proses masak memasak, tidak cukup hanya sekali jepretan, hasil kreativitas yang memerlukan waktu dan tenaga (wira-wiri turun tangga, keluar masuk ruangan sembari gotong-gotong perabot, makanan, menata ulang dlsb, dst)....soooo...please don´t steal our pictures, ask first!

11. Mae dari Mae's Little Kitchen (Indonesia)


Mae punya tempat favorit untuk motret makanan di teras belakang rumahnya. Soalnya tempatnya strategis deket dapur. Beratapkan langit, berlimpah sinar dan gak musti repot gotong-gotong properti foto. Cerita lengkapnya di sini.

12. Elsye dari Dari Dapur Saya (Jepang)


Nih, perlengkapan lenongnya Elsye : kursi lipet kayu, buku buat ganjel, selembar styrofoam sama maenan puzzle anaknya yang dilapisin alumunium foil buat reflektor. Percaya gak dengan alat sesederhana itu bisa bikin foto-foto bagus. Yuukkk buktikan di mari!

13. Fitri dari Rumah Manis (Amerika)


Fitri buka kartu soal kegiatan fotonya. Mau liat gak studio lainnya selain foto di atas? Fufufufufuuuuuuuuu....jealous gue dengan backyard lo!!!!! Ati-ati keujanan ya, mak!

14. Rurie dari Just A Thought (Belanda)


Heboh juga suasana studio odong-odongnya. Apalagi kalo si meong udah ikut-ikutan :P. Cerita lengkapnya di sini ya.

15. Mindy dari Mindy di Caracas (Venezuela)


Wooohooooooo sedep banget kan actionnya!!! Belum lagi ngeliat studio odong-odongnya yang berlimpah sinar gitu. Gak di dapur, gak di ruang makan, jendelanya gede-gede gitu *ngiler*. Intip deh karya cantiknya di studio odong-odong di sini.

16. Sefa dari Food is Love (Jerman)


Istilah studio asal goblek pertama kali gue denger dari Sefa dan kata-kata ini "asal goblek" pas banget menggambarkan bagaimana studio foto para home food photographers ini :D. Sama kayak gue, Sefa sering mengandalkan kardus-kardus bekas di studio odong-odongnya. Kalo kurang tinggi mejanya, ya tambahin ada kardus bekas :P. Setelah baca entry-nya Sefa dan Rita, gue juga makin sadar, sebagai Home Food Photographer kita dituntut untuk punya badan yang lentur untuk mendapatkan angle-angle asik....bwahahahaha.....

17. Yuli dari Bundacorner (Indonesia)


Ternyata banyak juga temen-temen kita yang gak beruntung bisa mengejar window light. Alhasil lampu meja yang diandalkan. Seperti halnya Yuli, yang sering gak punya waktu di pagi hari karena beliau bekerja, akhirnya kesempatan motret baru bisa dilakukan malam hari atau weekend. Gak ada natural lighting, toh kegiatan foto bisa terus berjalan. Yuk intip studio dan set-nya :).

18. Lidia Sianturi dari Bianca's Mom (Canada)


Asiknyaaaaa yang punya balkon!!! Ibu hamil ini masih giat aja ber-Home Food Photohraphy walopun perut semakin membuncit. Cerita lengkapnya ya.

19. Lia Gurun dari Lia's Home (UAE)


Tadinya gak pede ikutan, tapi setelah dapet gambaran betapa odong-odongnya "studio" gue, Lia langsung mau join. Bayangannya semua studionya canggih-canggih ya, Li? Tempat strategisnya ada di pinggir jendela *toss dulu ah*. Ngrasain ya Li tinggal di apartemen kecil, agak-agak tricky nyari spot :). Cerita lengkapnya di sini ya.

note : berubung ada yang lupa kirim foto karna mikirnya udah summer vacation aja....huekekekekkkk....sorry gue copy dari blog lo fotonya.

20. Dita dari My Culina Sanctuarium (Kuwait)


Gak jauh beda sama temen-temen yang lain, gue punya spot andalan di pinggir jendela apartemen. Ya berhubung tinggal di apartemen jadi cuman bisa ngiler liat temen-temen yang punya backyard ;). Ada 2 spot favorit di apartemen gue. Satu ada di kamar tidur, yang fotonya ada di atas itu, satu lagi di living room, fotonya ada di sini.

21. Rachmah dari Ordinary Woman with Great Obsession (Indonesia)


Rachmah dengan semangatnya gak mau ketinggalan. Liat deh gimana beliau beraksi di "studio" odong-odongnya bersama asisten cilik.

22. Yohana dari Foot Print (Indonesia)


Mau liat studionya MamaJo yang penuh ganjelan? Loh kok ganjelan? Liat aja ke sini. Ganjelan-ganjelan ini berjasa loh menghasilkan foto-foto cantiknya ;).

23. Findrie dari Mamapindie's Kitchen (Indonesia)


Punya kursi putih gak ke pake? Jangan dikasih ke tukang abu gosok!!! Liat deh karya cantiknya Findrie yang hanya bermodal bangku putih yang udah mulai dakian...hwakakakakakkk!!

Sekali lagi buat temen-temen, thank you so much buat partisipasinya dan rela "rahasia" dapurnya diintipin. Mohon maaf kalo ada kekurangan atau salah-salah ketik nama atau yang merasa udah ngirim entry tapi gak ke round up. Silahkan kirim ulang e-mailnya supaya bisa gue ikutin dalam round up. Atau kalo ada yang masih mau ikutan, silahkan kirim foto studio odong-odongnya biar bisa dipamerin di sini ;).

See ya di the next event ya!!!

Related Links :
1. HFP # 1 : A Tiring Job! - The Round Up
2. HFP # 2 : Gila Properti! - The Round Up


7.21.2008

Egg Yolks Recipe # 3 : Banana Pistachio Biscotti

Another almost forgotten pics and recipe ;). Made these a month ago.

Use over-ripe banana, that's the key to a strong banana flavour.

Banana Pistachio Biscotti

Here's the recipe from Recipazaar
Happy dunking!!

Banana Pecan Biscotti

Ingredients

* 1 3/4 cups all-purpose flour
* 1/2 cup white sugar
* 1 teaspoon baking powder
* 1/4 teaspoon salt
* 1/3-1/2 cup mashed banana, about 1 banana
* 1 tablespoon vegetable oil
* 1 teaspoon vanilla
* 1 large egg (dita-I used 2 eggyolks)
* 1/3 cup pecan, chopped (dita-I used pistachio)

Directions
1. Preheat oven to 350°F.
2. Lightly grease your cookie sheet.
3. Sift flour and baking powder into a bowl. Add sugar and salt and stir together.
4. In another bowl combine all the wet ingredients: banana, oil, vanilla and egg.
5. Pour dry ingredients into wet ones along with pecans; stir together.
6. Flour a board and turn dough out onto it. Form two 8-inch logs. Put onto cookie sheet and pat down to 1/2 inch thickness.
7. Bake at 350°F for 23 minutes.Turn oven down to 250°F.
8. Remove logs from cookie sheet and cool for 10 minutes.
9. Then cut into about 1/2 inch slices and bake 15 minutes at 250°F.
10. Turn biscotti over and bake another 15 minutes.
11. Biscotti will still be soft but will harden as they cool.

Another Egg Yolks Recipes :
1. Creme Brulee
2. Clafoutis

7.16.2008

Chicken in Milk

Bloggers always seem to have a story to tell. There's always something to tell, to share and to write about. But today is an exception for me. I'm not feeling well and I'm not in the mood to tell a story *sorry*. My kids have been sick for 5 days and I didn't have much time for internet. To all my friends, thanks for dropping by.

When I saw this recipe, I raised my eyebrows ;). Chicken in Milk?? Never had it before, usually I cooked chicken with coconut milk or cream. I was so curious and wanted to give it a try.

Chicken in Milk

And heyyyy.....who would have thought this combination would work? So easy to do. The chicken was tender and the sauce was flavourful. It's a very aromatic dish.

But I wasn't pretty satisfied because I put too much sage on it :(. The rest was good!

Chicken in Milk
source : Jamie Oliver

Chicken in Milk

Ingredients :
•1 x 1.5k/ 3½lb organic chicken (dita-I used chicken legs)
• sea salt and freshly ground black pepper
• 115g/4oz or ½ a pack of butter
• olive oil
• 1/2 cinnamon stick
• 1 good handful of fresh sage, leaves picked (dita-I used dried sage)
• zest of 2 lemons
• 10 cloves of garlic, skin left on
• 565ml/1 pint milk

Got Milk?

Directions :
Preheat the oven to 190°C/375°F/gas 5, and find a snug-fitting pot for the chicken. Season it generously all over, and fry it in the butter and a little olive oil, turning the chicken to get an even colour all over, until golden. Remove from the heat, put the chicken on a plate, and throw away the oil and butter left in the pot. This will leave you with tasty sticky goodness at the bottom of the pan which will give you a lovely caramelly flavour later on.

Put your chicken back in the pot with the rest of the ingredients, and cook in the preheated oven for 1½ hours. Baste with the cooking juice when you remember. The lemon zest will sort of split the milk, making a sauce which is absolutely fantastic.

To serve, pull the meat off the bones and divide it on to your plates. Spoon over plenty of juice and the little curds. Serve with wilted spinach or greens and some mashed potato.

7.12.2008

Got Milk?


August is coming, means we (breastfeeding mother) are going to celebrate World Breastfeeding Week on the first week of August. And this time, I'd like to dedicate my post to support WBW 2008, all the mothers who still breastfeeding and the mothers to be.

WBW is an annual event to promote breastfeeding on a global scale. In conjunction with the Olympic event next August, WBW 2008 calls for greater support for mothers in achieving the gold standart of infant feeding : breastfeeding exclusively for 6 months and providing appropriate complimentary foods with continued breastfeeding for up to 2 years or beyond. Supporting mother=supporting her to provide the golden start for every child.

When I found this foodie event "Got Milk!" hosted by Linda, I said "what an amazing idea she had!" I was so excited to participate in this event. You might be ask some questions, why would food blogger like me want to blog about breastfeeding? What's the connection between breastfeeding and food?

I'll tell you, there are many reasons why. I'm a breastfeeding mother, still breastfeeding my youngest daughter (now 22 months). And do you know that breastmilk is FOOD, the very best FOOD that your baby can get? And I'd like to join this foodie event to help Linda promote breastfeeding and to support my breastfeeding friends especially new moms and moms to-be. I know breastfeeding is not as easy as we can see. For some mommies, it's quite hard in the beginning. I only breastfed my first child for the first 2 months because I didn't know how and did not know much about it besides that it's a good thing. I didn't know how's the right position for breastfeeding, and then my nipples got sore, I had no idea what was lactation management, etc. I became desperate and thought formula would be more convinient. Then I felt so guilty about it.

breastfeeding + browsing

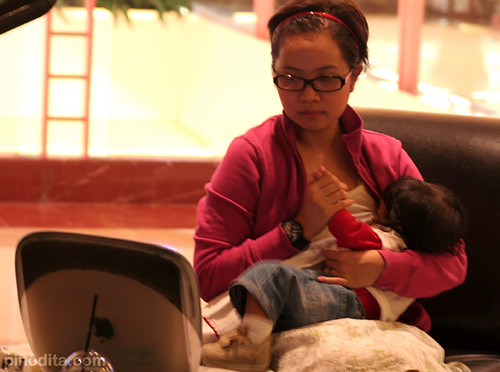
Furthermore, before and during my second pregnancy, I prepared and promised to myself that no matter what, my second baby must be breastfed. Lucky me, my hubby was a real supporter and I found supporting group with supporting members -and now they become my good friends- at mailing list asi for baby or mother breastmilk for baby. Nia, the owner of the group, asked me to join in *thank you so much, dear. You guys really did a great job to motivate so many Indonesian mothers out there to keep breastfeeding their babies*. My virtual conseulor, Kellymom supported me as well ;), "she"'s been there when I was confuse didn't know what to do with the whole breastfeeding things. Eventually, I succeed to breastfeed my baby eventhough it wasn't easy at the very beginning. I remember how I cried everytime my baby Leia began to suck my sored nipple. But I didn't give up. I learnt from the past and tried to do my best. And now, proudly said I'm still breastfeeding my almost 2 years old daughter, Leia, although many people here in Kuwait would raise their eyebrows when they knew my almost 2 years old daughter is still breastfed *hey c'mon!* I'm concerned why people in Kuwait, especially mothers and health care/medical practitioners don't take breastfeeding as an issue. Seems they don't encourage mothers to breastfeed their babies. So far, I've never heard and saw any breastfeeding campaign in this country. It's not easy to find breastfeeding/nursing room in every shopping centre here, meanwhile nursing in public is considered to be awkward or inappropriate *I don't think that would be any WBW celebration here!*

Anyway, to endorse, inspire and motivate Indonesian mothers to breastfeed their babies, 2 years ago my husband and I have made an introduction video to early latch on based on my experience. We hope that could be useful :).

Ok, enough about me ;). I got a great news to share from my supportive friends in AIMI, to all breastfeeding mother in Indonesia, Asi for Baby in collaboration with Asosiasi Ibu Menyusui Indonesia (Indonesian Breastfeeding Mother Association) organized a mass breastfeeding (menyusui serentak) event to celebrate World Breastfeeding Week 2008, on August 2, at Auditorium Gelanggang Remaja Bulungan Jakarta. Be there! *I wish I could be there*. More info here.

Linda, thanks for the event, I hope what you did could make a difference. And every babies in the world could have their right to get a golden start. Here's my entry for "Got Milk!".

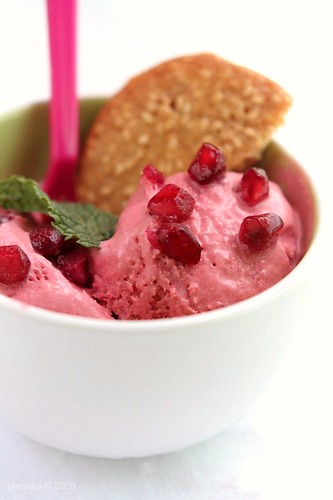
I didn't know what to do with the leftover mascarpone from my birthday cake last month, better made something before it gone bad, thanks God, Helen's post saved me! ;). And the gratin was so so scrumptious!!

Macarpone Raspberry Gratins

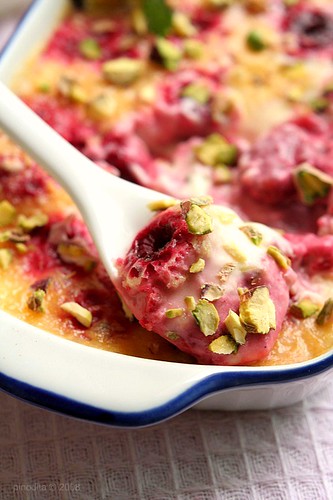
Mascarpone Raspberry Gratin
source : Helen of Tartelette with a little re-worked from me :)
Serves 4-6 depending on the size of your ramequins.

1/2 cup (4 oz) mascarpone, at room temperature
1/4 cup sugar
1 tsp vanilla bean paste or 1 tsp vanilla extract or 1/2 vanilla bean, seeded
1 egg + 1 egg yolk
3/4 cup heavy cream (dita-I used 1/2 cup whipping cream+1/4 cup plain milk)
1 cup fresh raspberries

Macarpone Raspberry Gratins

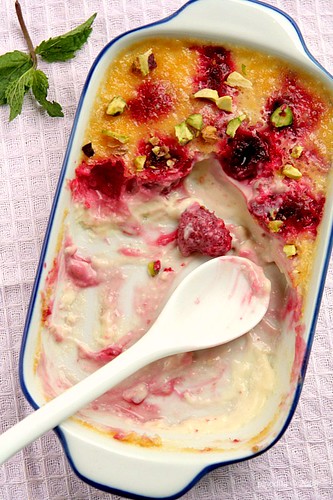
In a large mixing bowl, whisk the mascarpone with the sugar until smooth. Add the vanilla, the egg and the egg yolk. Whisk until fully incorporated and add the heavy cream. Make sure everything is well combined and divide between your ramequins, not filling them all the way to the top, about 3/4 full. Divide the raspberries among the gratins and set the dishes in a deep roasting pan. Fill the pan with water, half way up the sides of the dishes and bake at 340 for about 20-25 minutes or until they seem to be barely set: still giggling a little when you move the pan but not completely wobbly. They will continue to bake and set as they cool. Let cool and serve either chilled or at room temperature.

Macarpone Raspberry Gratins

Related Recipe :
1. Eggless Tiramisu

7.09.2008

Stir Fried Broccoli with Oyster Sauce (Brokoli Saus Tiram)


My all time favorite!! My kids call it "little tree." And they really like nibbling on steamed broccoli *thanks God they don't hate veggies! :)*.

Stir Fried Broccoli with Oyster Sauce

Broccoli is packed with vitamins A, C, K and beta-carotene, as well as possible cancer-fighting compounds like sulforaphane.

I usually add broccoli in my soup or just stir fried it. Who doesn't like stir fries, eh? They are generally fast, tasty and highly nutritional meals. And ideal for the busy cook. You will find that once your confidence grows in this style of cooking, you will enjoy experimenting with ingredients to suit your own personal tastes.

And I'd like to bring this dish to the MFM # 17 : Sayuran Hijau/green vegetables hosted by Dyah of Dyah's.

Stir Fried Broccoli with Oyster Sauce

Stir Fried Broccoli with Oyster Sauce (Brokoli Saus Tiram)

Ingredients :
2 tbsp olive oil - any vegetable oil will do
4 garlic cloves, chopped finely
1 tsp grated fresh root ginger
2 medium heads of broccoli, cut in to florets
3 tbsp oyster sauce
4 tbsp water
1 tsp cornflour + 4 tbsp water

Stir Fried Broccoli with Oyster Sauce

Directions :
Stir fry garlic and grated ginger until fragrant. Stir in broccoli. Add oyster sauce and water. Cook over a gentle heat. And then add the cornflour mixture. Stirring constantly, for 2-3 minutes until the sauce thickens slightly.

Serve immediately with steamed rice.

Pomegranate Ice Cream


I scream, you scream, we all scream for ice cream!
In my house there's always room for ice cream. Although I don't have an ice cream maker, I always enjoy to make this creamy treat without it. Especially for the girls :).

No Ice Cream Maker Ice Cream : Pomegranate Ice Cream

I like to experiment with my own mix-ins, especially fruits, because my kids really love them. You can use fresh fruits or frozen ones if you desire. I think any fruits will work well. However, feel free to modify the fruits as to your liking.

There are tons recipes that can be made with a few simple ingredients. And I always choose the one without raw eggs but still never lose its appeal.

I saw this pomegranate ice cream at Rachelle's flickr and she shared the recipe on her blog. Pomegranate? Why not?! And no ice cream maker needed, that's what I like the most :p. *I made this 3 weeks a go, just had a chance to posted here ;)*

And here's my contribution to celebrate National Ice Cream Month hosted by Nikki at Nik Snacks.

No-churn pomegranate ice cream (with fresh pomegranates)
source : Rachelle of Mommy? I'm Hungry!
(Rachelle's version with pomegranate juice, here)


Ingredients :
• 2 pomegranates
• 1 lime
• 1 1/2 cups powdered sugar
• 2 cups heavy cream
(dita-I added 2 tbsp balsamic vinegar)

pomegranate 2/4

Directions :
Juice the pomegranates and the lime, straining the juices into a bowl. You will have approximately ¾ cup of pomegranate juice. Reserve the pomegranate seeds for garnish.
Add the powdered sugar and whisk to dissolve.
Whisk in the cream and keep whisking until soft peaks form in the pale pink cream.
Spoon and smooth the ice cream into a rigid plastic container with a tight-fitting lid and freeze for at least 4 hours or overnight. Scatter with pomegranate seeds when you eat it.

Homemade ice cream is a real kids pleaser. My kids usually eat it with cookies. Just try this sesame cookies, they goes perfectly with your ice cream. Thanks for sharing the recipe, Rosa. They are so delightful!!

Sesame Cookies

Sesame Cookies
Taken from "The Soul Of A New Cuisine" written by Marcus Samuelsson and slightly adapted by Rosa of Rosa's Yummy Yums.

Makes 3 dozen cookies.

Ingredients :
1/2 Cup (64g) + 2 Tbs Plain white flour
1/2 Tsp Baking powder
1/2 Tsp Salt
4 Tbs (1/2 stick/60g) Unsalted butter
1 Cup (240g) Light brown sugar, packed
1 Large egg
1/2 Tsp Vanilla extract or paste
1 Tsp Fresh lemon juice
1 Cup (150g) Sesame seeds, toasted

Directions :
1. Combine the (sieved) flour, baking powder and salt in a small bowl. Set aside.
2. Using an electric stand mixer, hand mixer or spatula (by hand), cream the butter and brown sugar in a large bowl until light and fluffy.
3. Add the egg, vanilla and lemon juice and beat until thouroughly blended, about 30 seconds.
4. On low speed, slowly add the flour mixture and mix just until incorporated.
5. Beat in/incorporate the sesame seeds.
6. Allow the dough to rest, covered, in the refrigerator for 1 hour.
7. Preheat the oven to 180° C (350° F).
8. Line two baking pans/sheets with parchment paper.
9. Drop the dough by heaping teaspoons onto the baking sheets/pans, leaving about 7cm (2.8 inches) between the cookies.
10. Bake the cookies until golden, about 7-9 minutes, turning the baking sheets around midway through baking.
11. Remove delicately from the baking sheets/pans and cool on a wire rack.

Note :
Those cookies tend to spread a lot, so give them space.

Another No Ice Cream Maker Ice Creams :
1. Nutella Ice Cream
2. Cocoa Ice Cream
3. Strawberry Ice Cream